I built a box for my dad
An adventure in woodworking.
Fri Jul 18 2025
My dad died the day after my birthday last year. This is him:

When he died I had just started a new job. It was a lot to handle at the time. But when my defacto-stepmom suggested that I make a box for his ashes, that seemed just way too appropriate to not do. My dad and I were a lot alike in that we both had a drive to build things. So I set to work to build him a box.
First thing to do is figure out what I want to make.
Let’s make a plan
The intent was for the box to be a tribute to him, so I wanted to pick materials that meant something specific to who he was.
I think choosing the woods is the first thing to get right in any project. He grew up in the foothills north of Sacramento, so that’s easy… oak. Then when my sister and I were little he had a house in Concord, and there was a giant walnut tree in the back yard. I wanted to line it with cedar, because, well, it’s cedar. My dad also had a thing for driftwood, so my sister went looking around the beaches in Washington and sent me a box of what she found.
My dad was crazy for brass. He’d stop the car on random busy streets, run off into traffic, and return with some plumbing fixture that fell out of the back of someone’s truck.
“Look at that! That’s a piece of brass! Yeah, that’s not copper! No sir! That’s braaasss.”
He had boxes of the stuff squirreled away in his garage.
So, oak, walnut, cedar, driftwood, and brass.
Next thought is joinery. I thought about doing something fancy, with dovetails, miters with splines, or a patterned finger joint. It just didn’t feel right. It was all too fussy for him. Too fancy. My dad was a simple guy.
I settled on a box joint, and I think if my dad was a joint, that nailed him.
Now I need a plan…
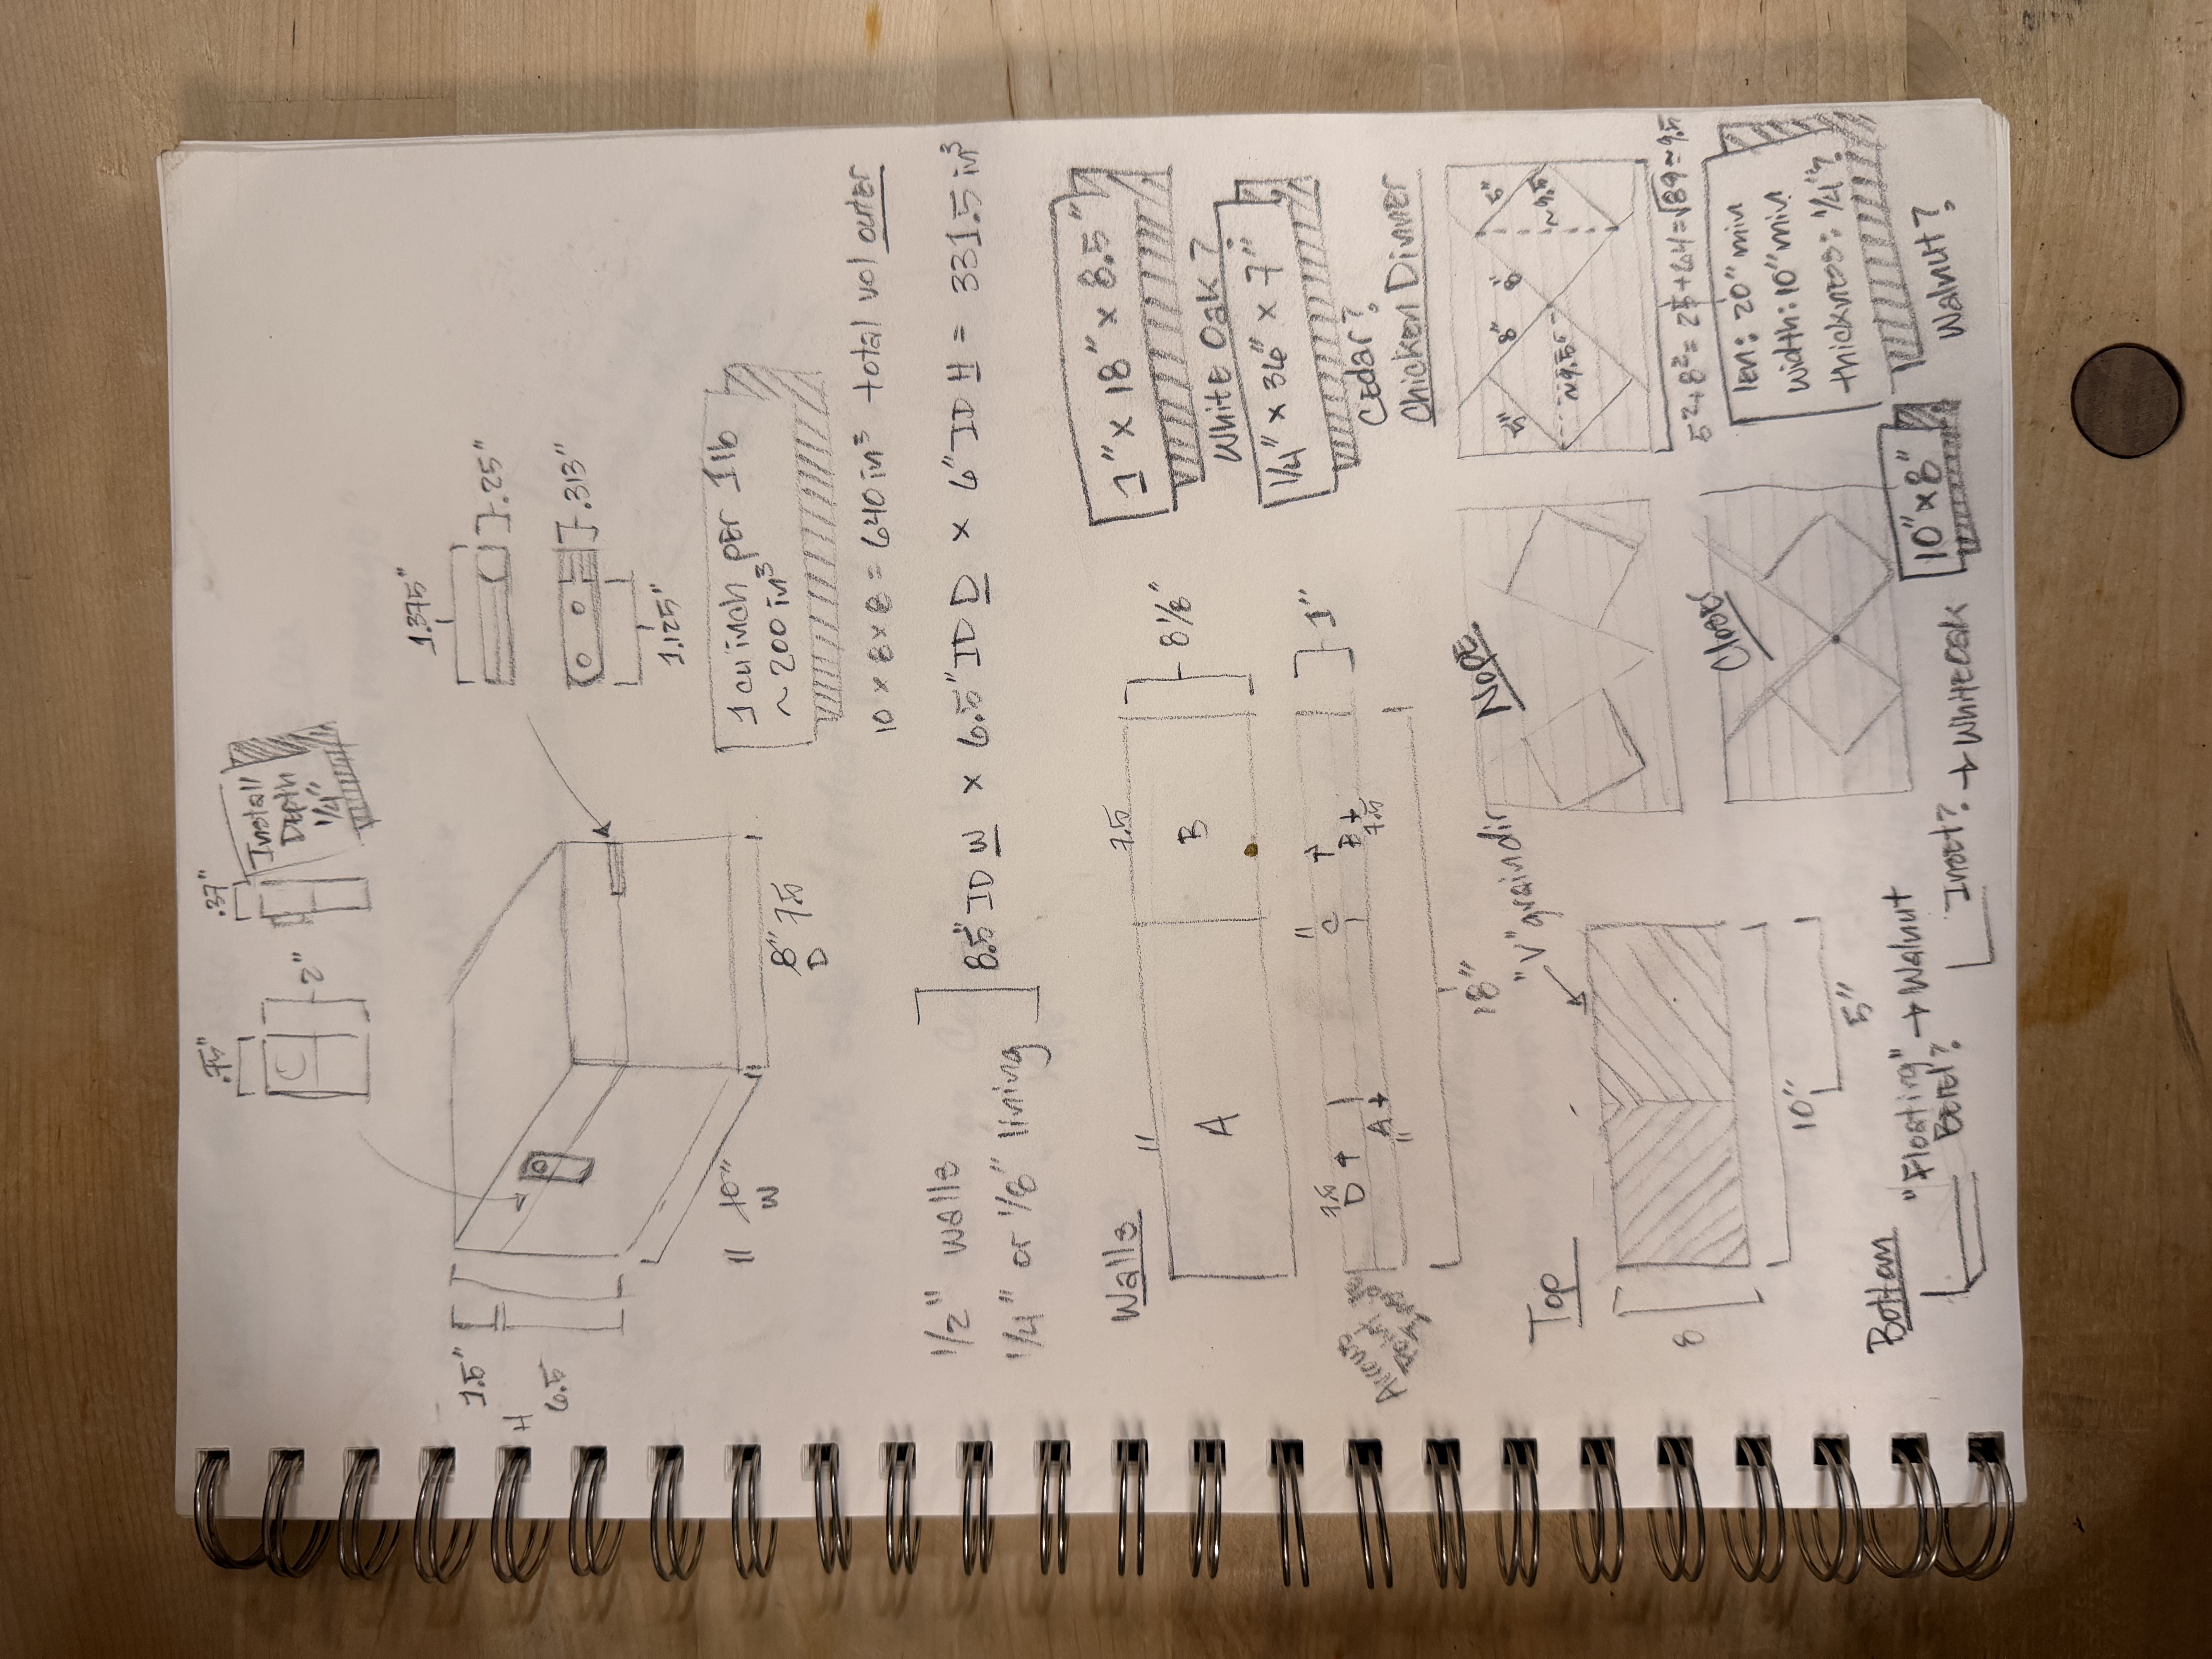
I spent some time in a coffee shop and got it pretty well figured out. Though anyone out there who’s a woodworker knows that things never go to plan, but it’s still good to have one.
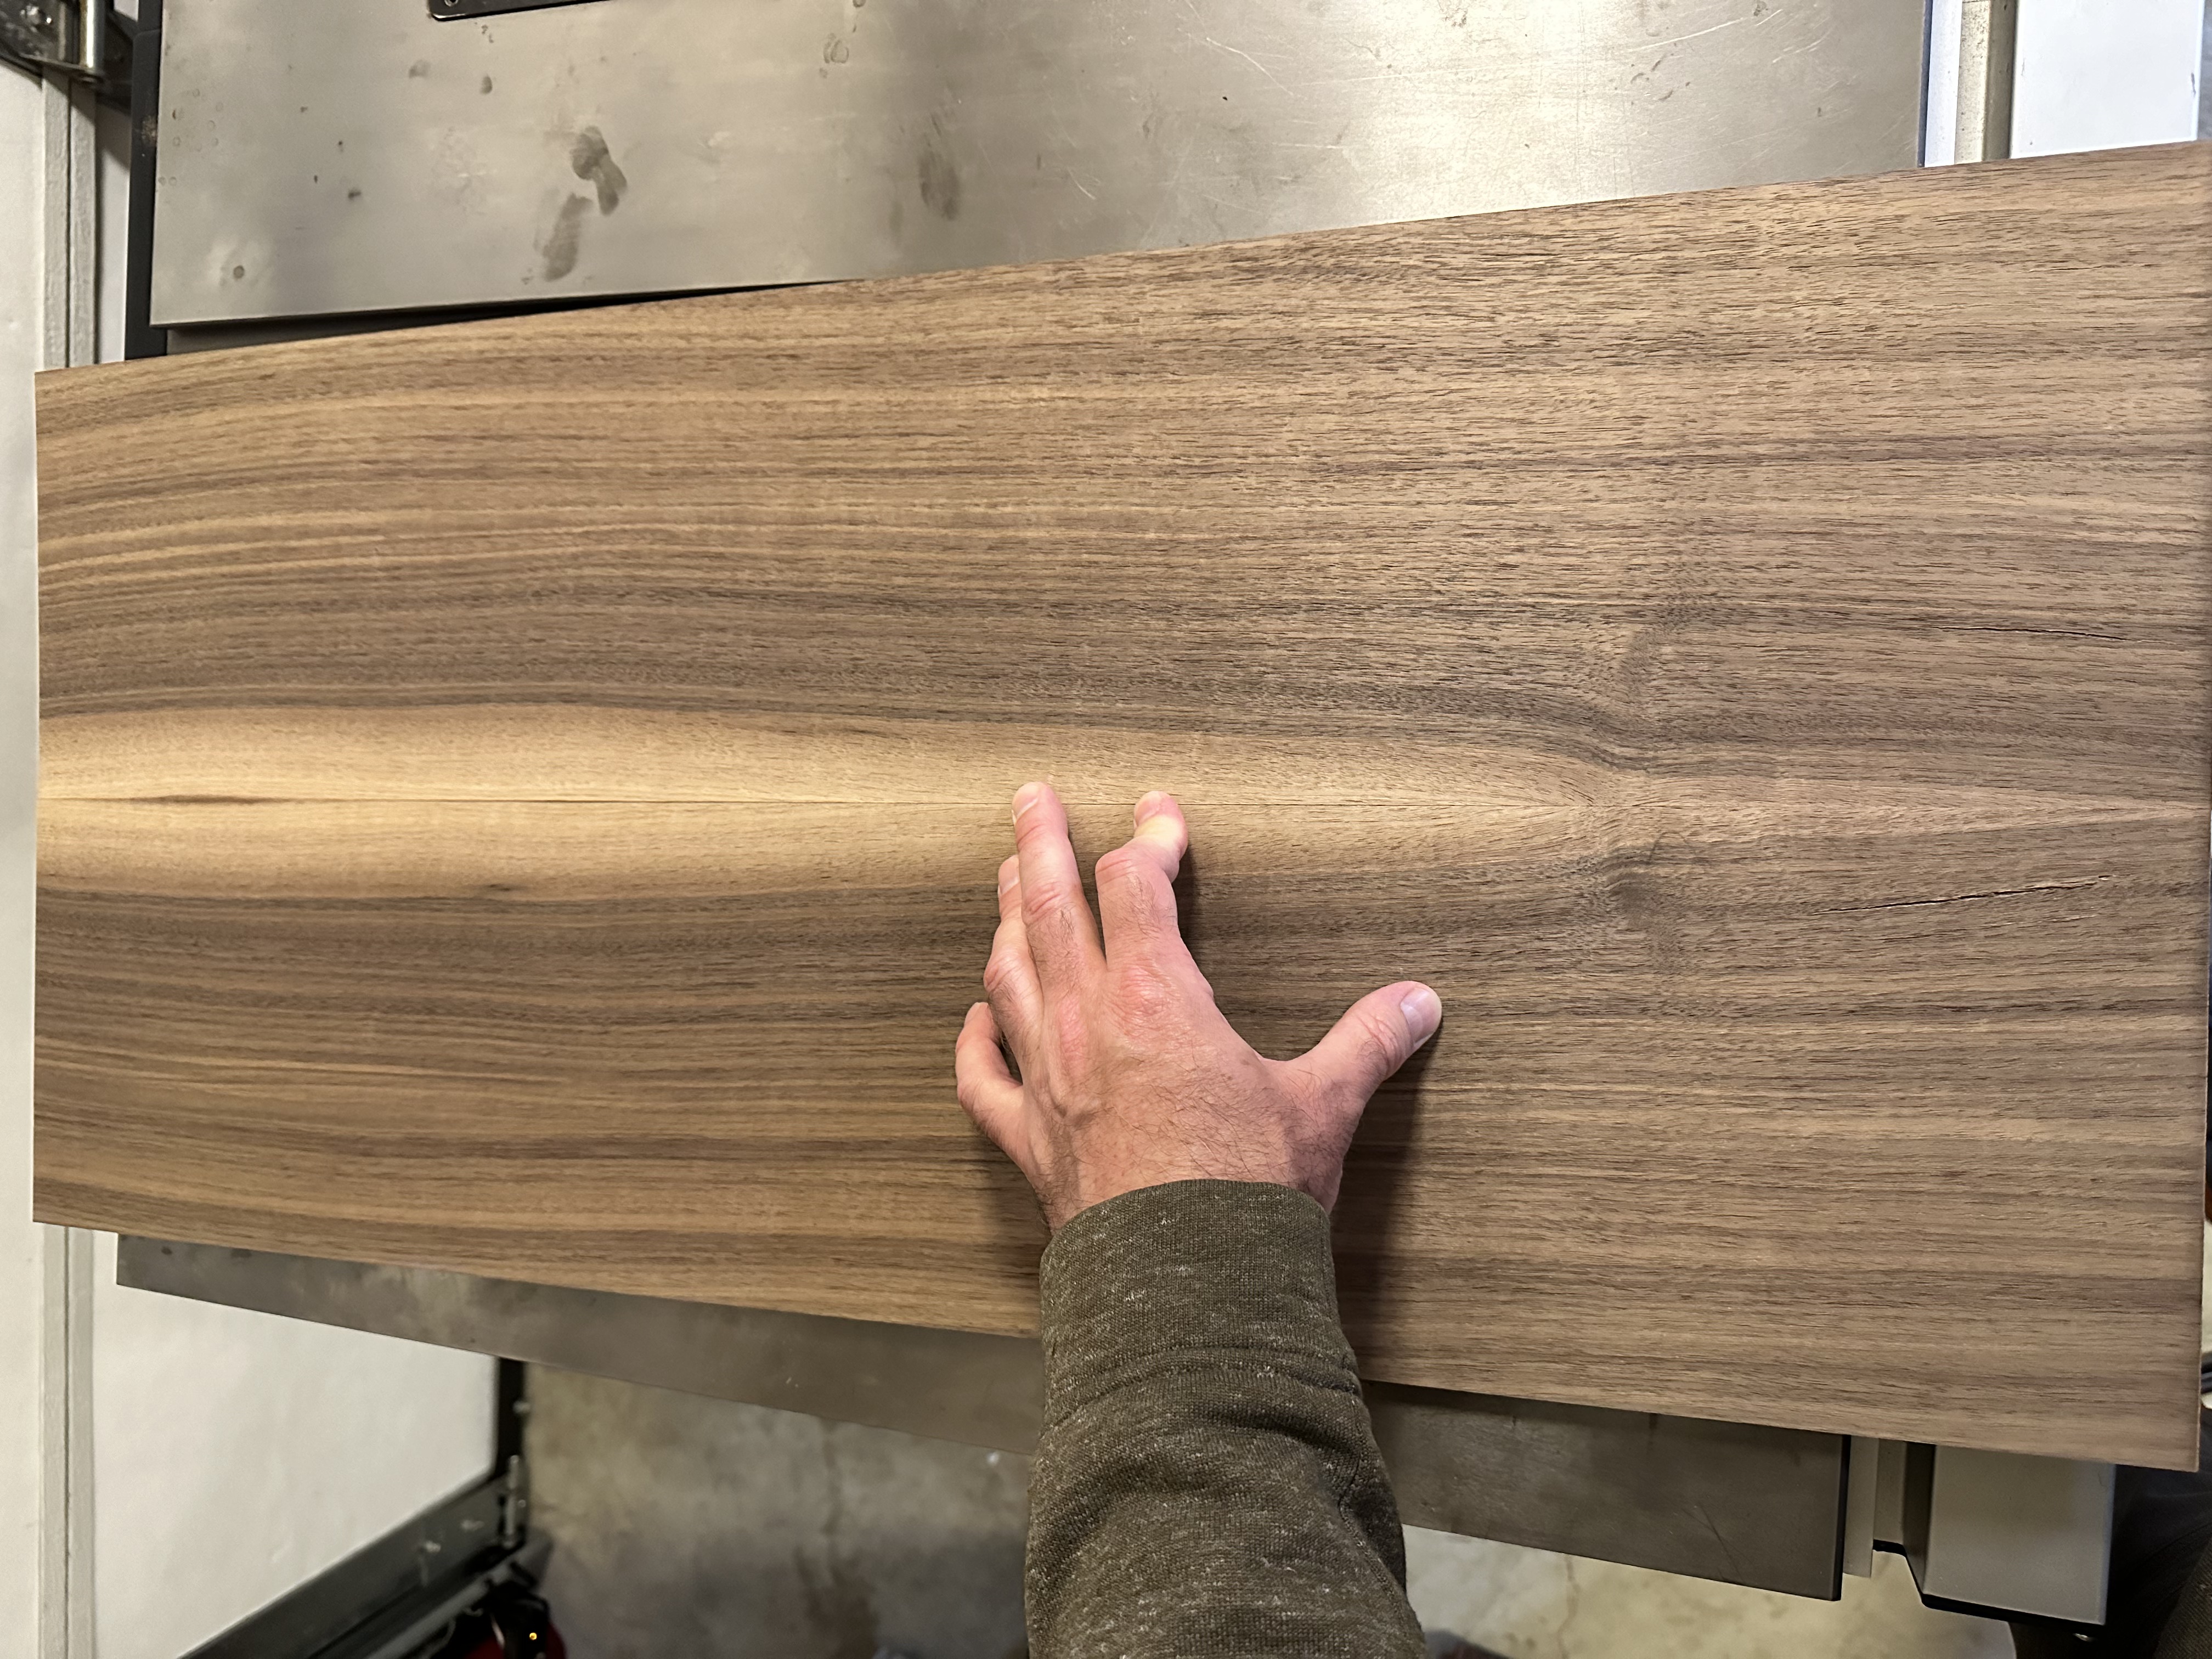
I thought I’d use a straight grained walnut for the top and bottom, and orient the grain in a V pattern. You really gotta plan that kind of thing ahead of time, because the orientation of the grain dictates how wide your boards need to be.
The reason why I went for straight-grained walnut is because I wanted the grain in the left and right parts to meet up. There are other ways to pull this off, like resawing — starting with a thicker board and sawing it vertically to make two thinner boards — but I had my reasons for not going down that route.
The sides would be figured oak. Figuring is where the grain of the wood swirls around, undulates, and catches the light in interesting ways. Who doesn’t like pretty wood?
Well, it’s a lot harder to work with, but I’ll get to that in a bit.
But first I needed to practice. So I milled up some scrap redwood and got to know my box joint jig.
Practice box joint
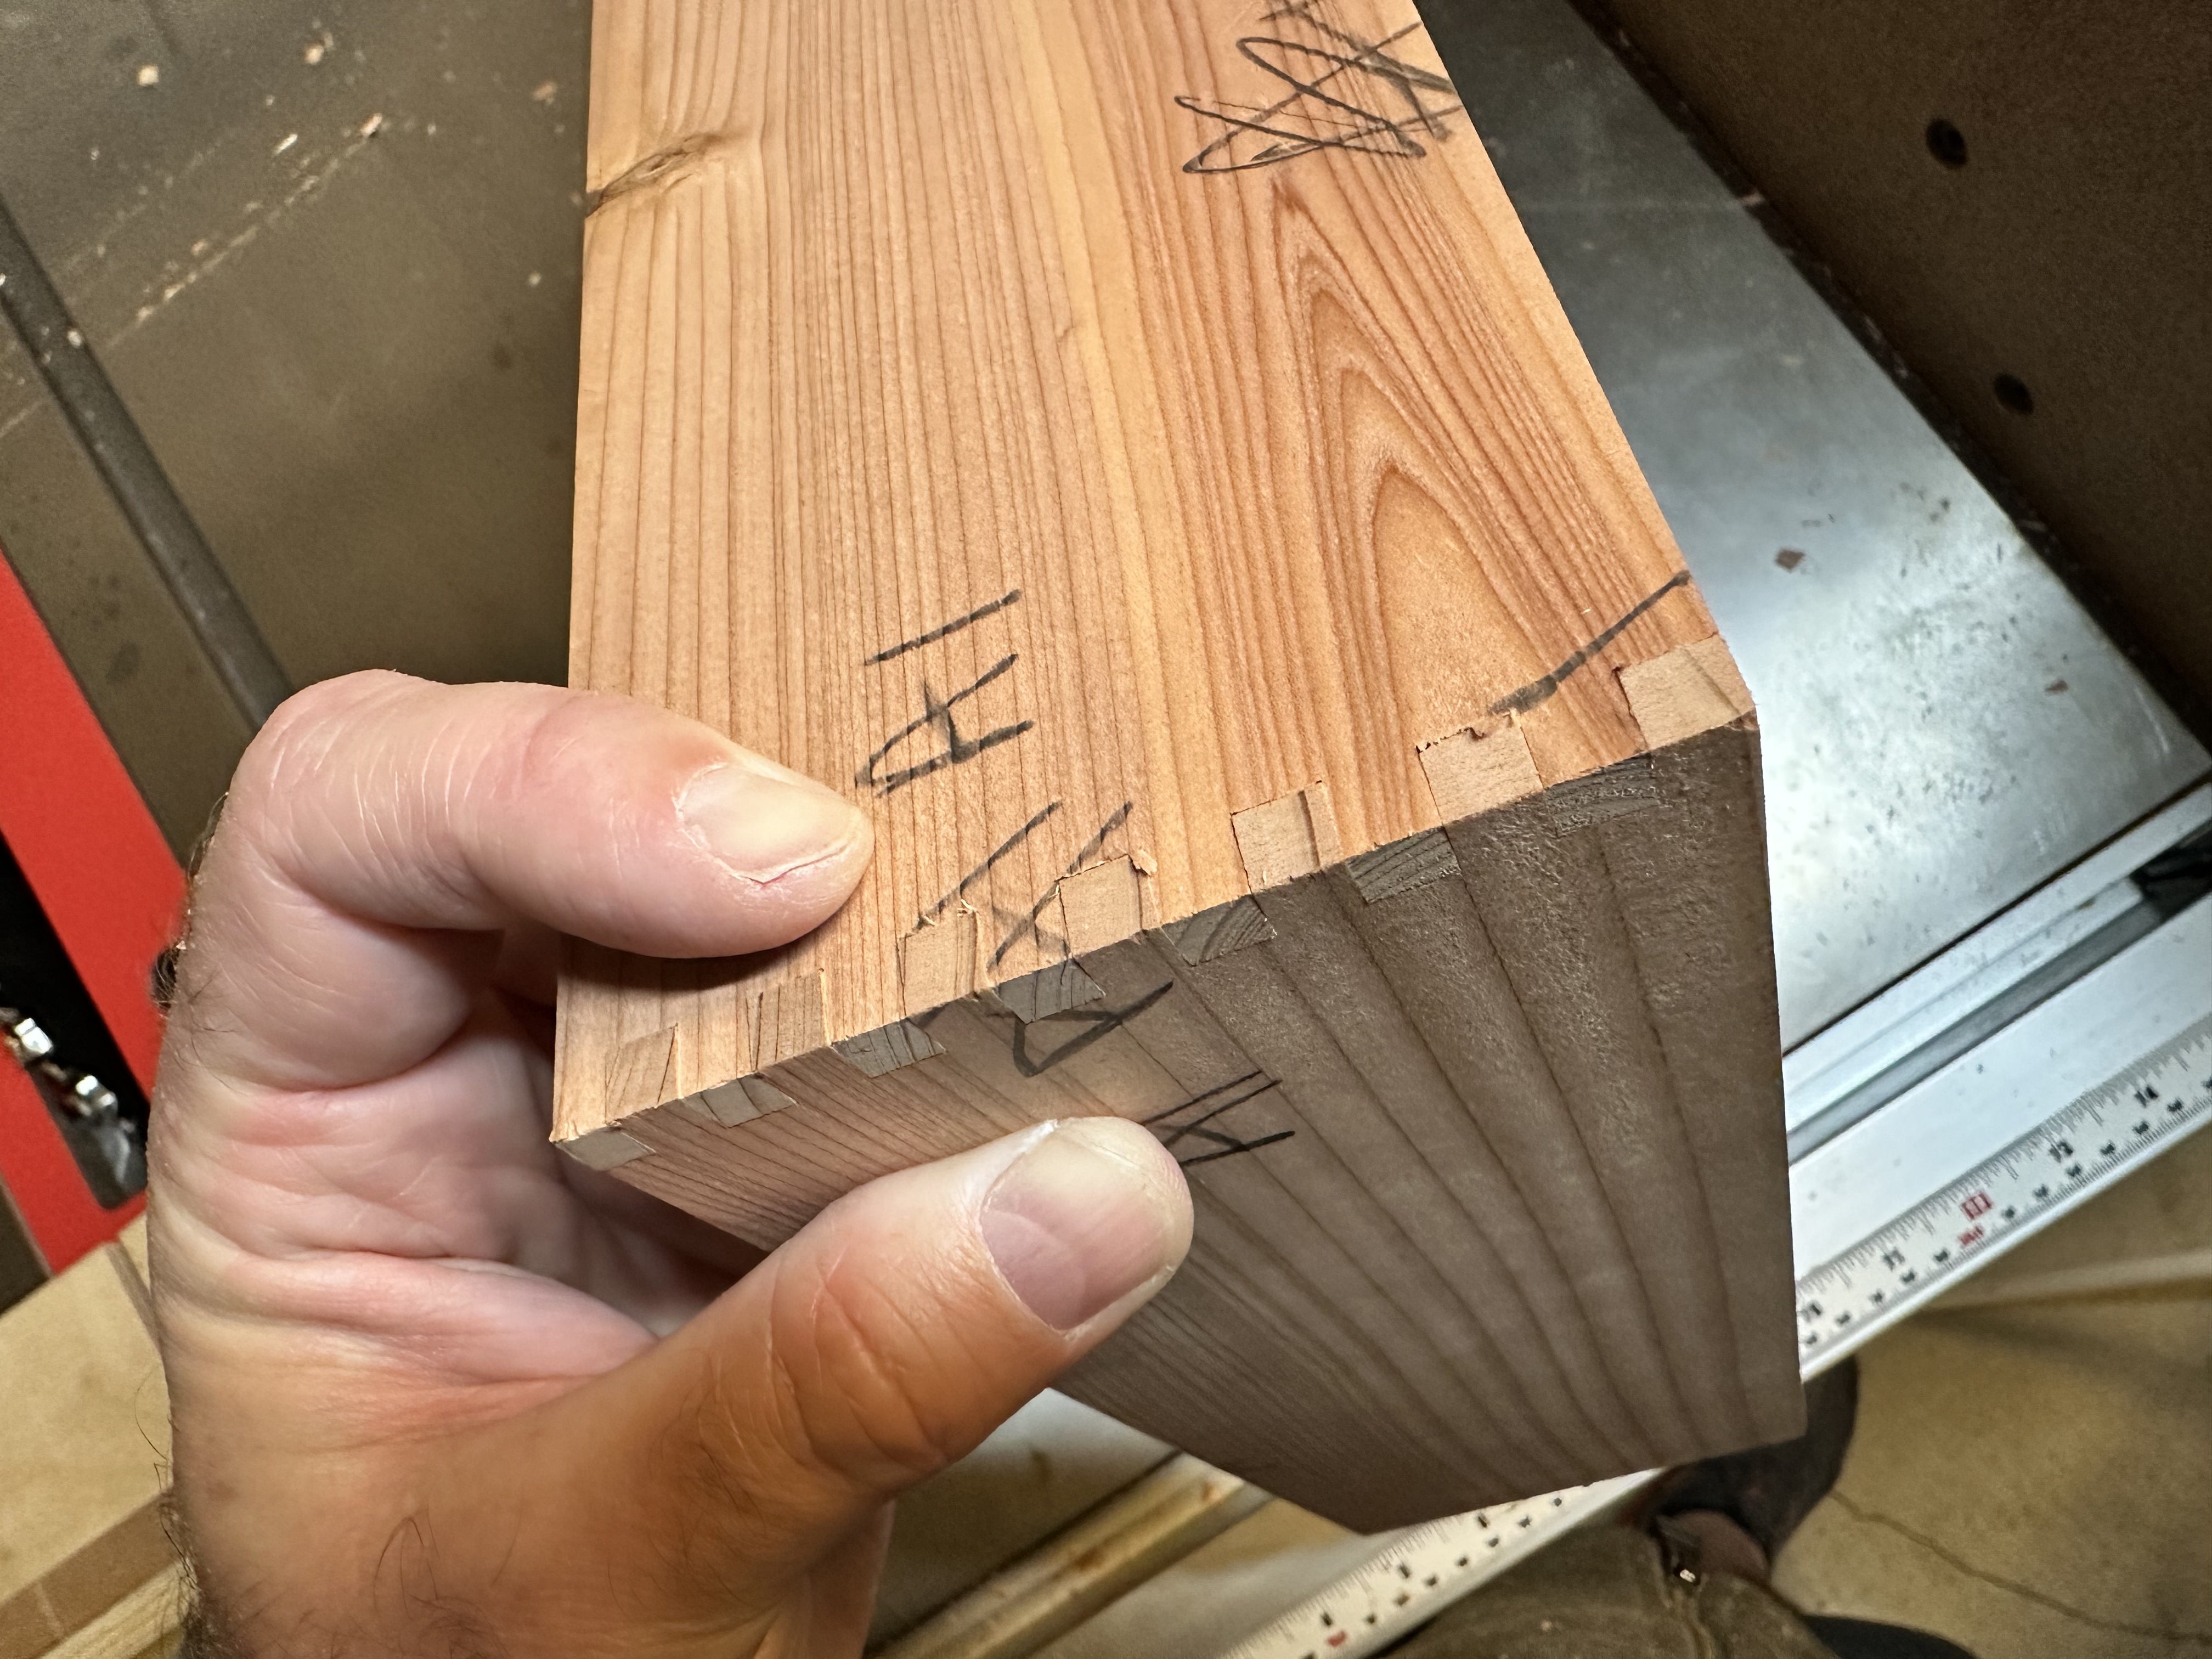
Looks pretty good right? Well, thankfully I’m not silly enough to believe that I could nail a tight joint with this many compounding cuts on a softwood.
If you look close, you’ll see tiny gaps between the joint fingers:

Milling is tricky
I needed to switch to oak to do the final tuning, and here’s where things start going off the rails.
Wood grain is a lot like a bundle of straws glued together. In straight-grained wood, the straws all run in the same direction. In figured wood, they twist and knot and push against each other.
That means there’s internal stress in the board. When you cut the wood, you release that stress and the board moves.
When you’re making a box like this, you want the grain to flow continuously around the box. The way you do this is by starting with a board that’s a bit more than twice as thick as the walls of your box will be. Resaw that board into two thinner boards that otherwise have the same dimensions and grain.
Then cut your pieces to length, and use the surfaces that were the inside of the board as the outside of the box. You’re essentially flipping the board inside out. You can see me working this out with my little “A B C D” diagram.
So when you go to the Wood Getting Place, you’re going to come home with thicker boards than you need. Whenever you’re de-thickening boards, you want to do that as slowly as possible, ideally spread out over days or weeks to give the wood time to settle.
But when you resaw boards for grain matching, there’s no doing that gradually. You’re releasing a bunch of internal stress all at once. The equilibrium of that stress might have been what was keeping the board straight. Now you’ve got potato-chip shaped thinner boards.
I don’t have a jointer, which is a machine that mills wood flat. All I have is a lunchbox planer, which mills wood parallel. It’s a de-thickener — it shaves wood from one side of your board, using the underside as the reference surface.
There are tricks for flattening with a planer, though. You can build a planer sled that supports the underside in all its curviness. Send that through the planer and the top gets flat. Then flip it over and run it again, and you’ve got a flat board.
But every time you plane a board, particularly with complicated grain, there’s a good chance it’s going to change shape again. So you do this slowly, stacking weights on it every night to try to coerce it flat.
Meanwhile, as you’re chasing flatness, your boards are getting thinner and thinner.
And then you screw up the grain direction when you send it through the planer. Or that’s what I did. I really went to school on grain direction this time. Trees grow from roots to sky — that’s the grain direction. Run your finger with the grain and it’s smooth. Against the grain and you get splinters.
Trouble is, sometimes it’s really hard to tell which way the grain runs.
When you send hardwood like oak through a planer the wrong direction, you get tearout — deep gouges caused by the blades raking against the grain, like splintering. It’s not always a disaster, but if your boards are already thinning from chasing flatness, you’re teetering on the edge of it.
Hide your mistakes
One of the things I like about woodworking is that perfection is impossible. Even if you perform flawlessly, the wood isn’t flawless.
Things go wrong. Mistakes are made.
Woodworking is mostly about fixing your mistakes.
So the sides of my box are as thin as they can be — dictated by the hinges — and I’ve got tearout on the show faces that looks like deep pock-acne scarring in the wood.
Starting over sets me back a month, and I don’t have a month.
So I flipped the boards. The outside show faces became the inside. Because I planned to line the box with cedar, that would hide my mess.
I convinced myself it was actually a good thing — it gives the glue somewhere to go.
Back to joinery
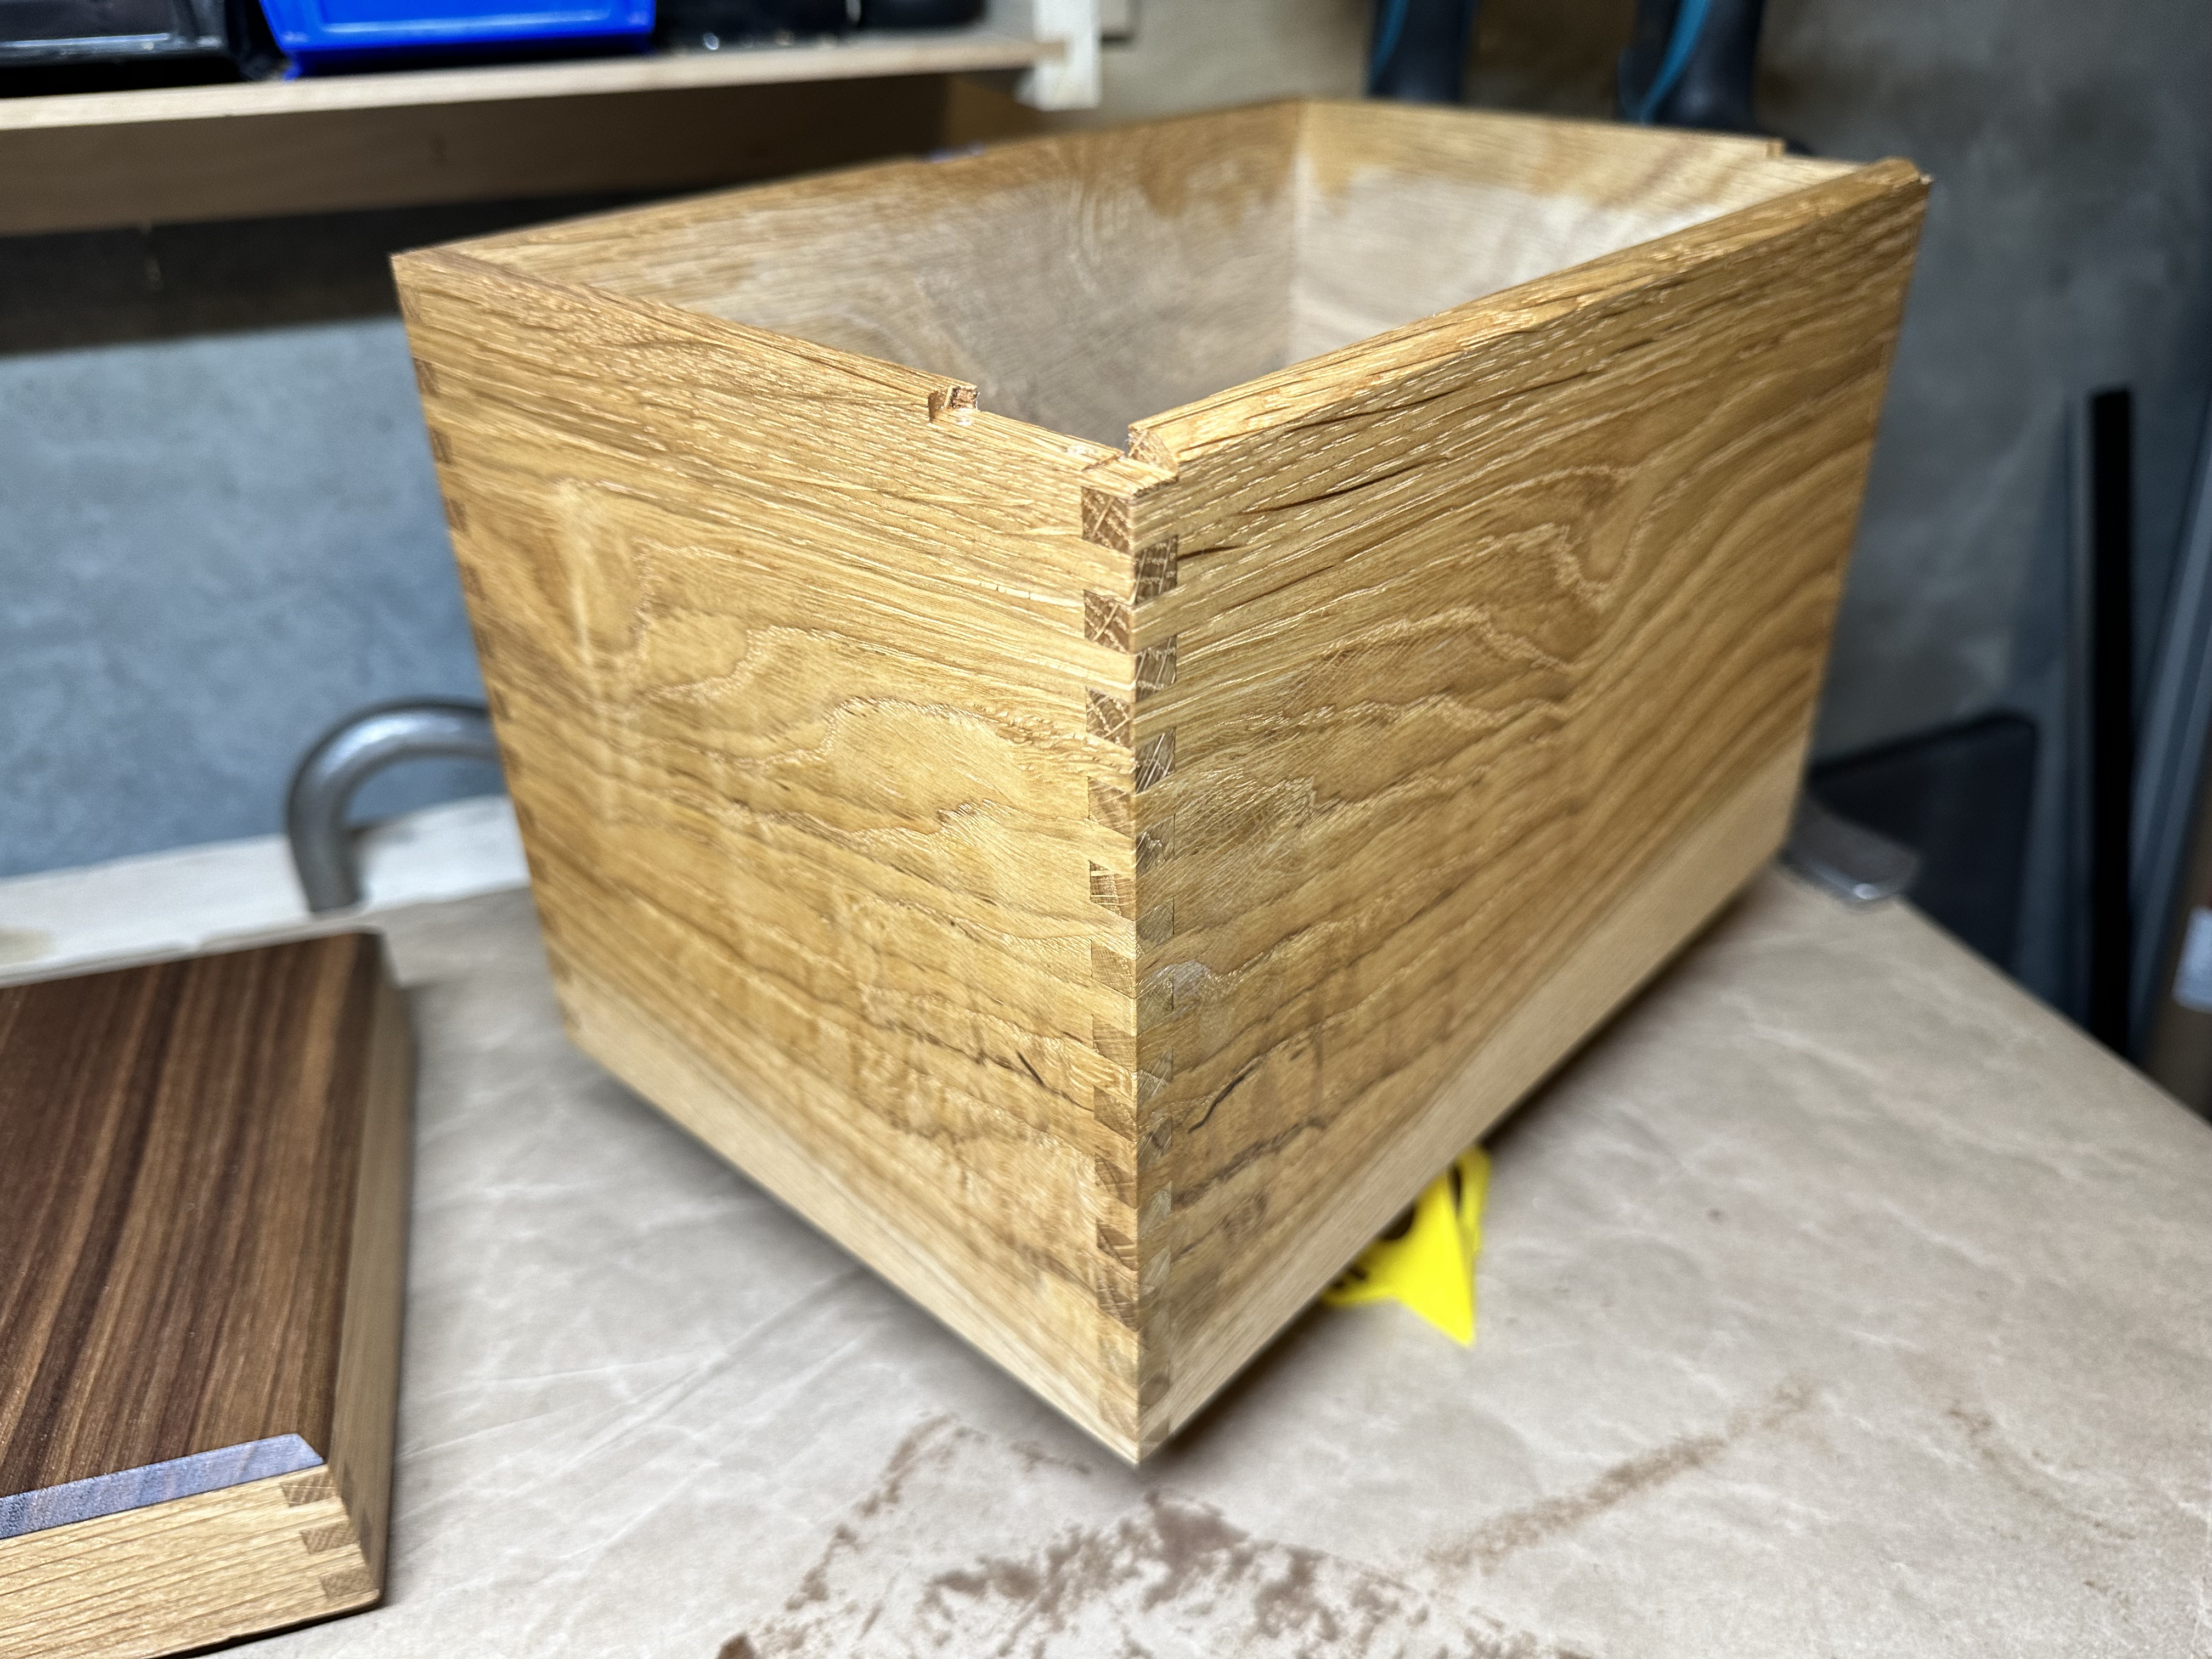
I’ve got the walls of my box milled, finally. Now I need to tune my box joint jig for oak, and that goes pretty well:
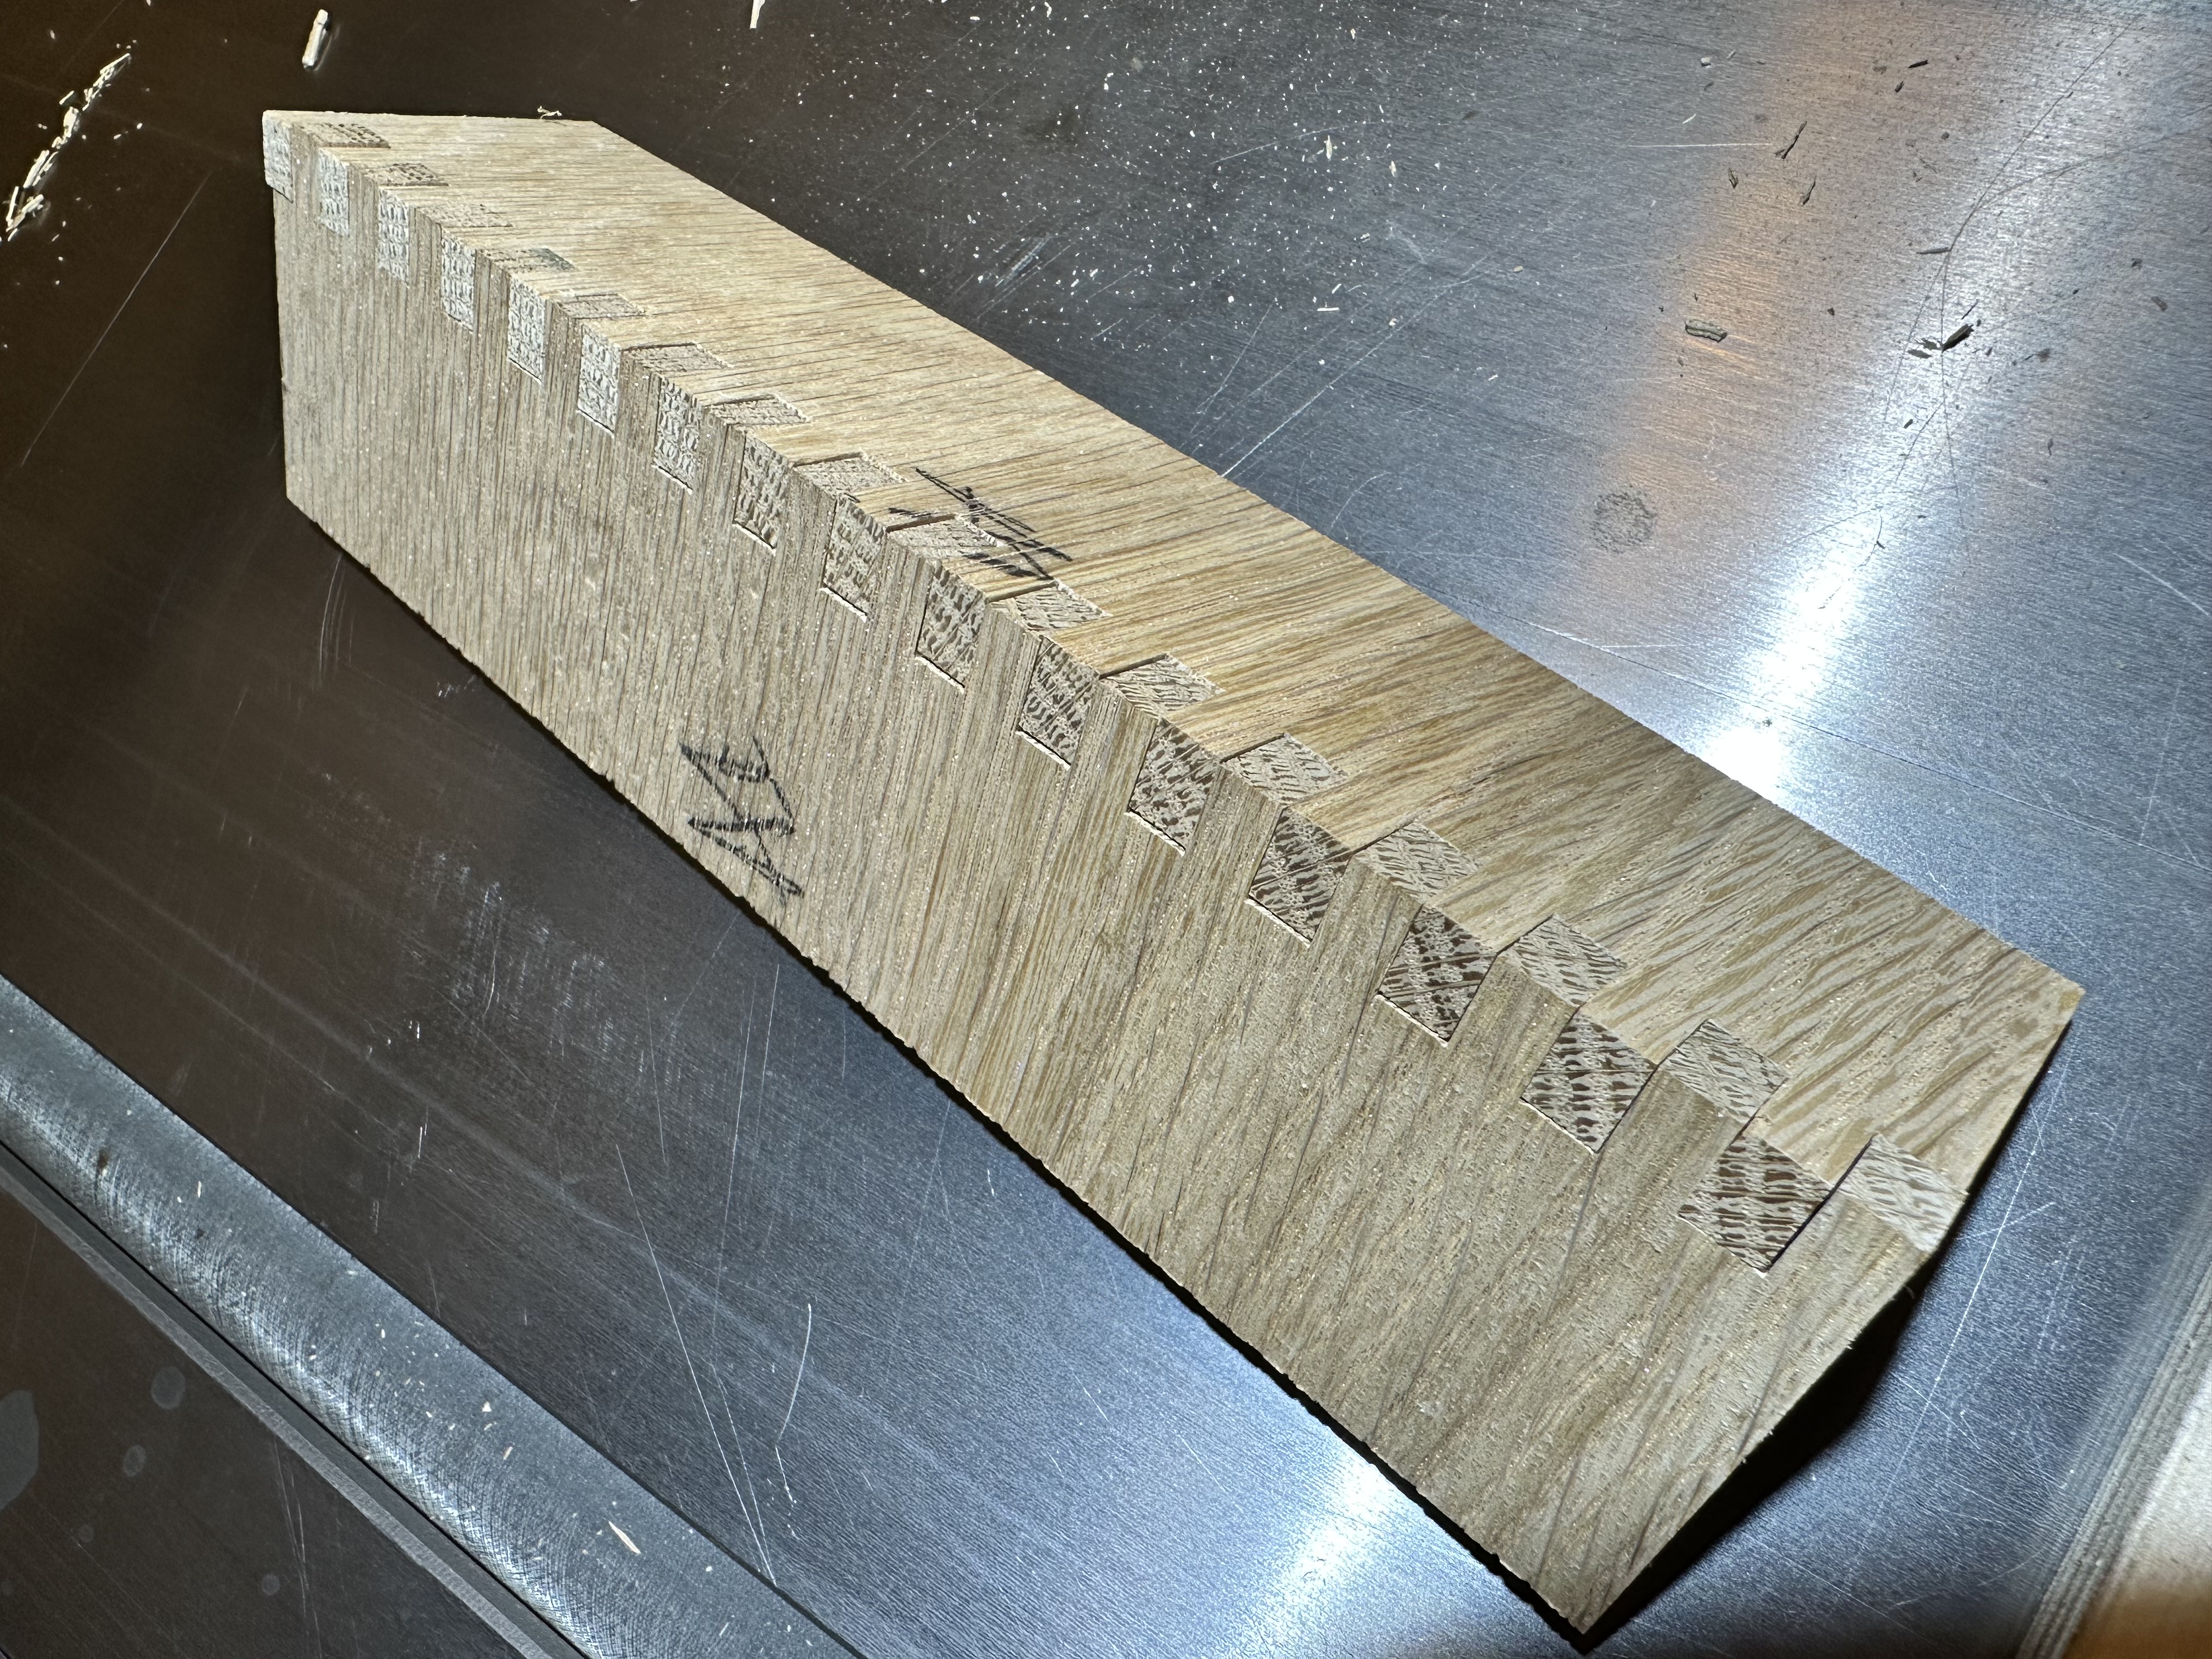
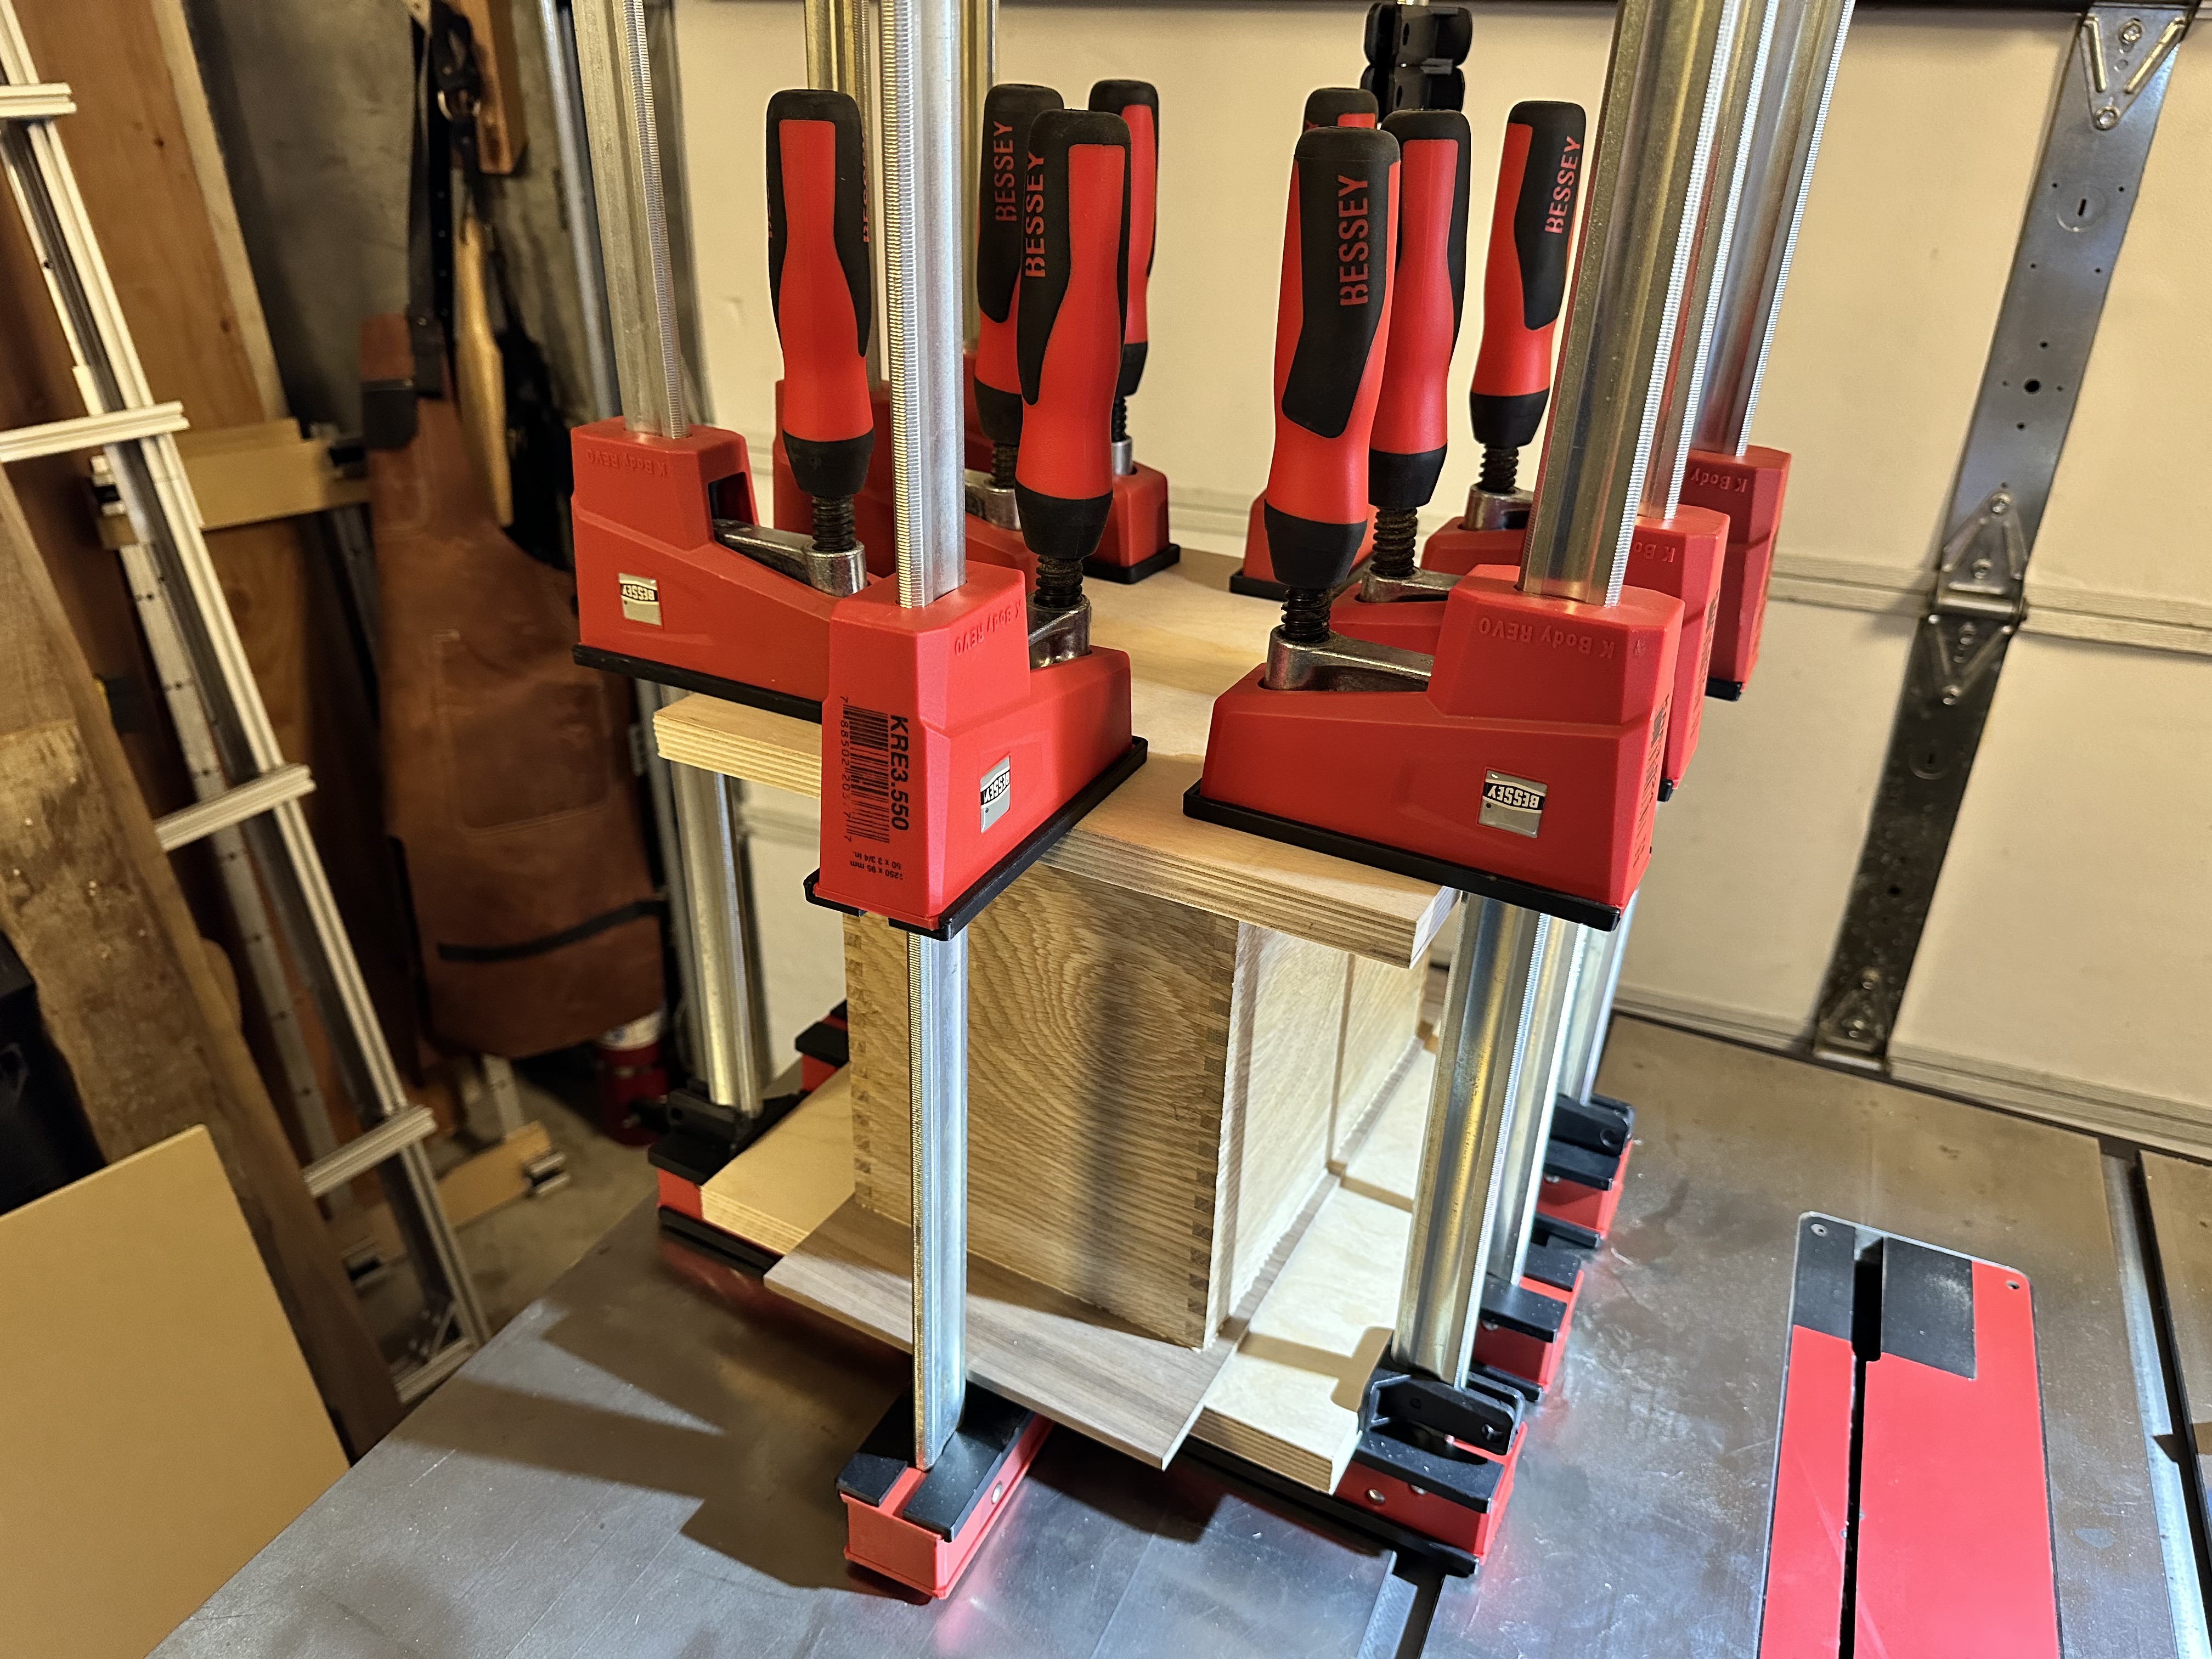
And I can do the sides. Here’s a dry fit:

And here’s the glueup after clamps were taken off. You may notice that the box joint fingers are just slightly proud. That’s intentional. They get taken down flush with a block plane later.
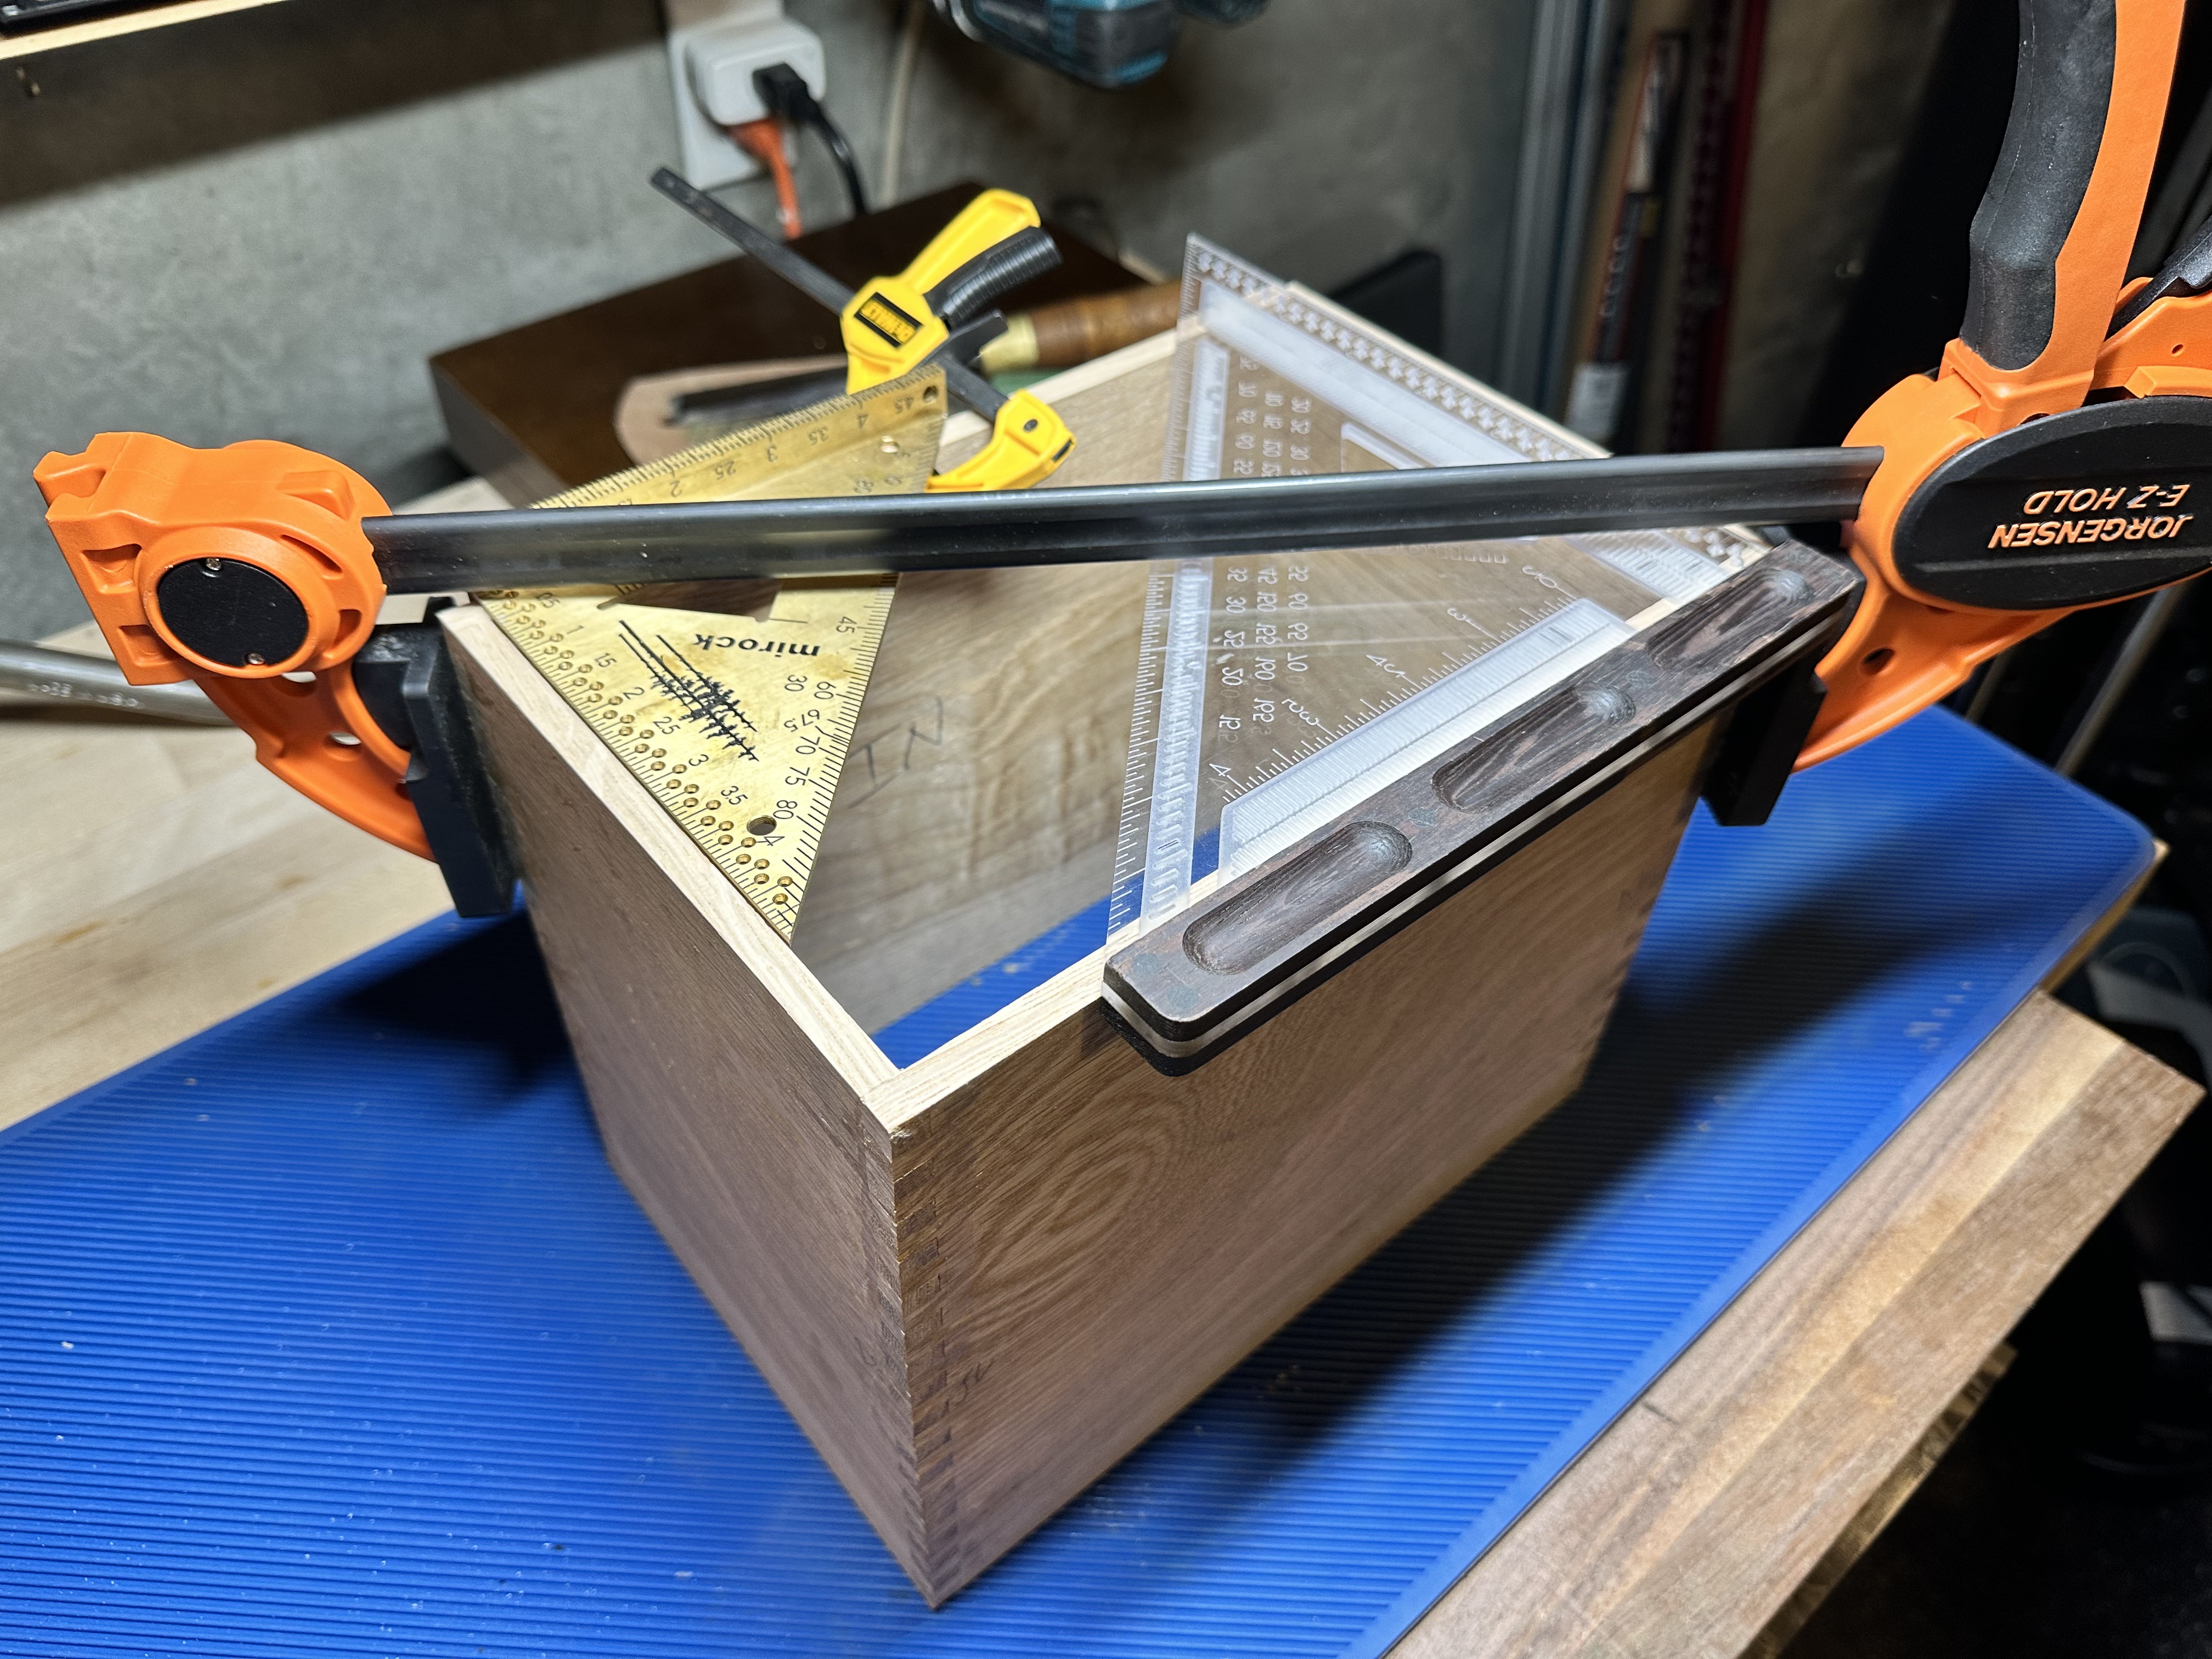
That’s what you call it when you glue things together in woodworking: a glueup.
They’re really stressful. Glue is stronger than wood, and it stains, so as you’re spreading glue — trying not to get it everywhere — it’s drying, and you’re fighting the joints together while trying to keep everything square.
Rehearsals are standard practice. It’s performance art.
And if you’re a dad, that’s the exact moment some child emergency arises and you have to drop everything.
Or you roll like I do and wait until 2am.
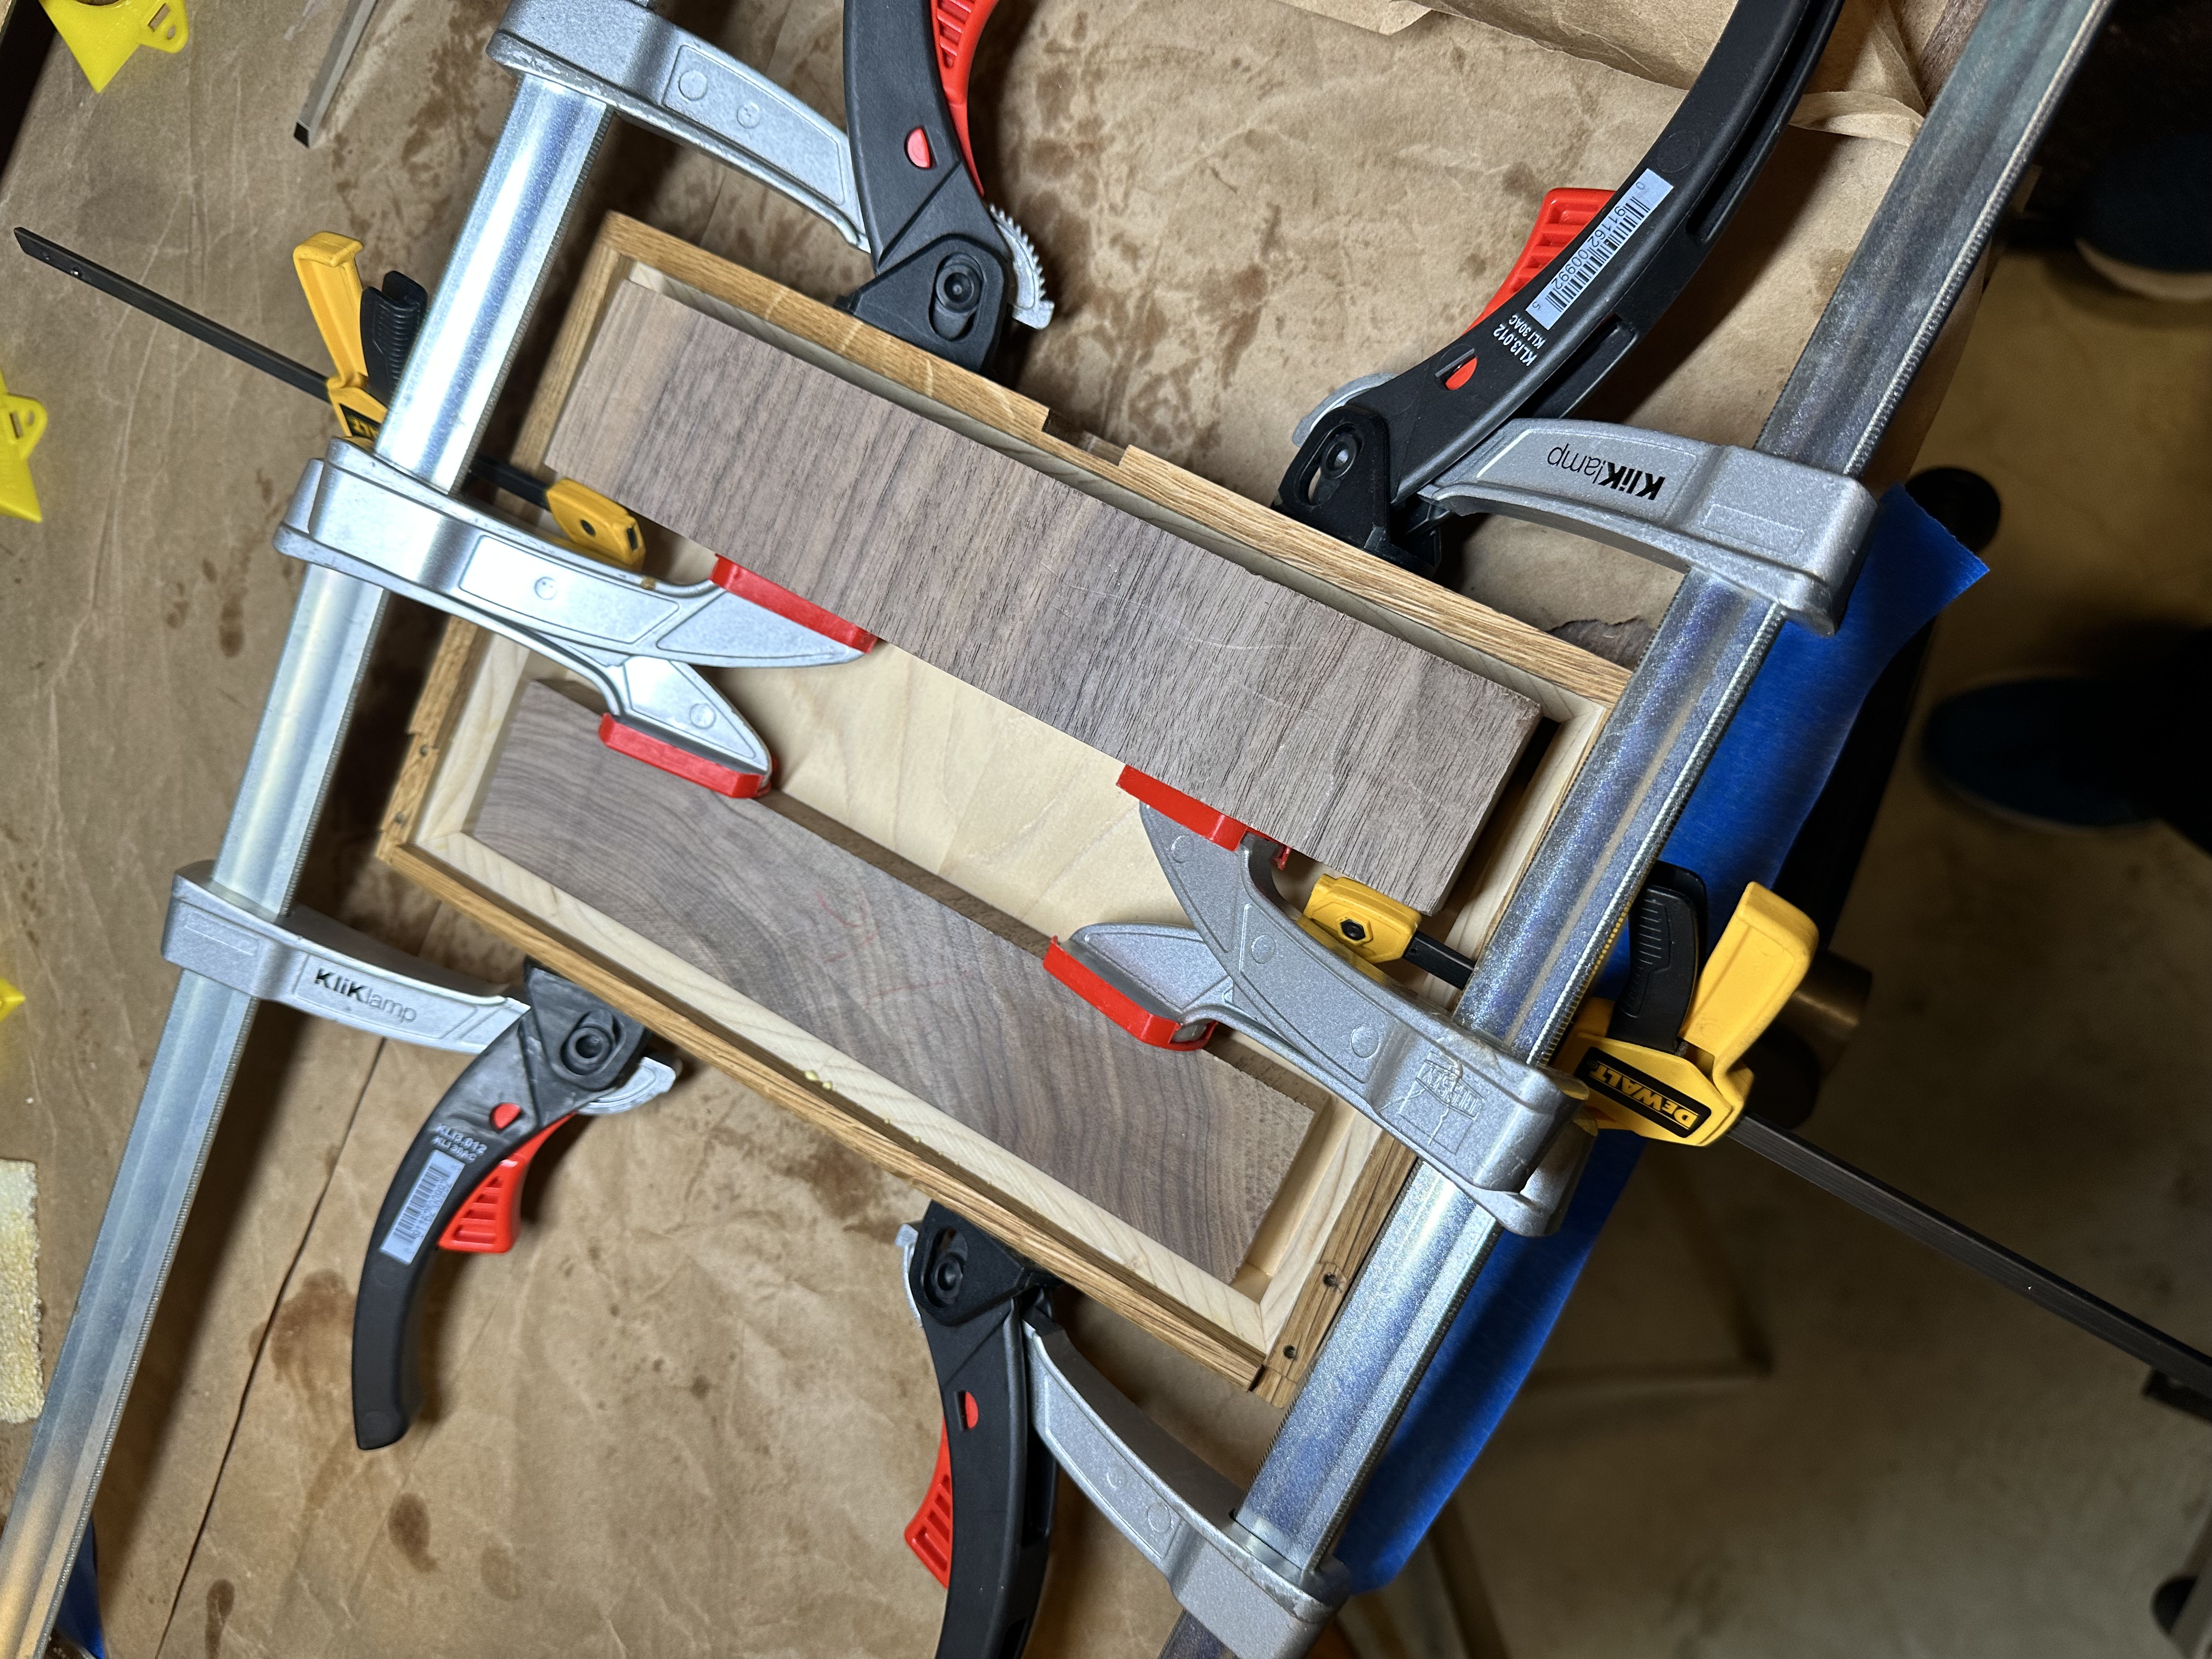
Tops and bottoms
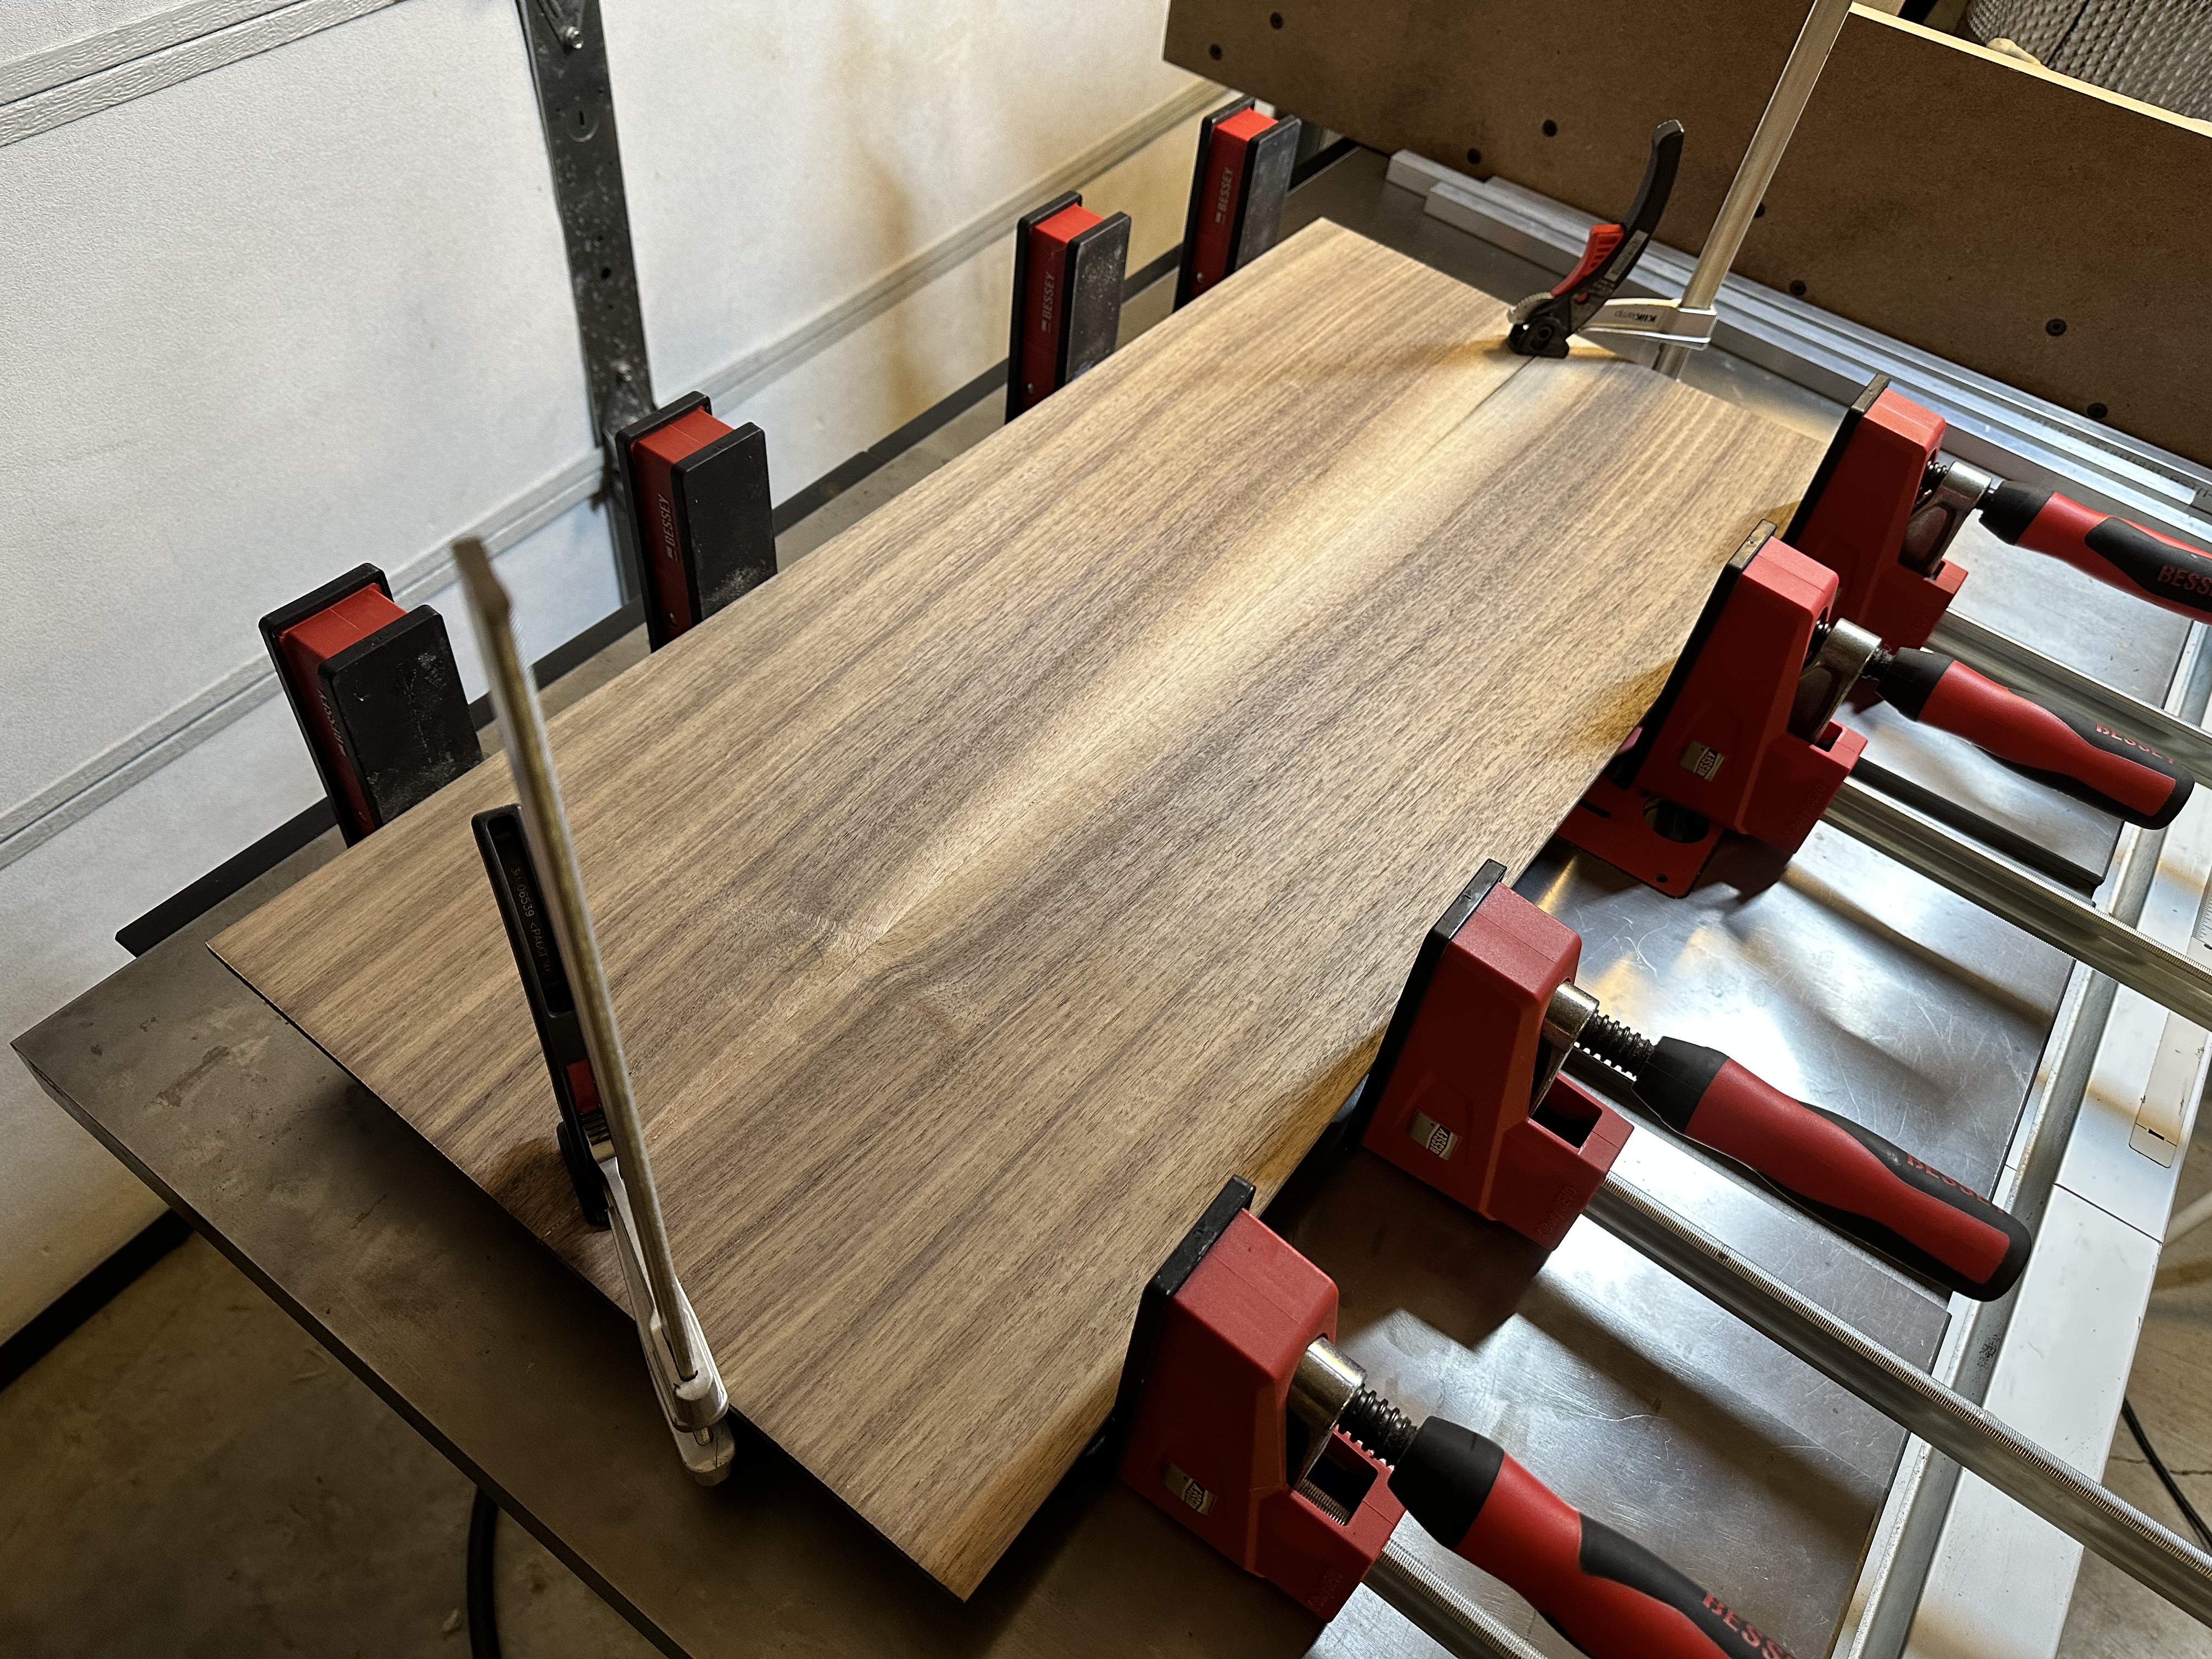
Resawing the walnut into bookmatched pairs for the top and bottom was a thousand times easier than the sides.
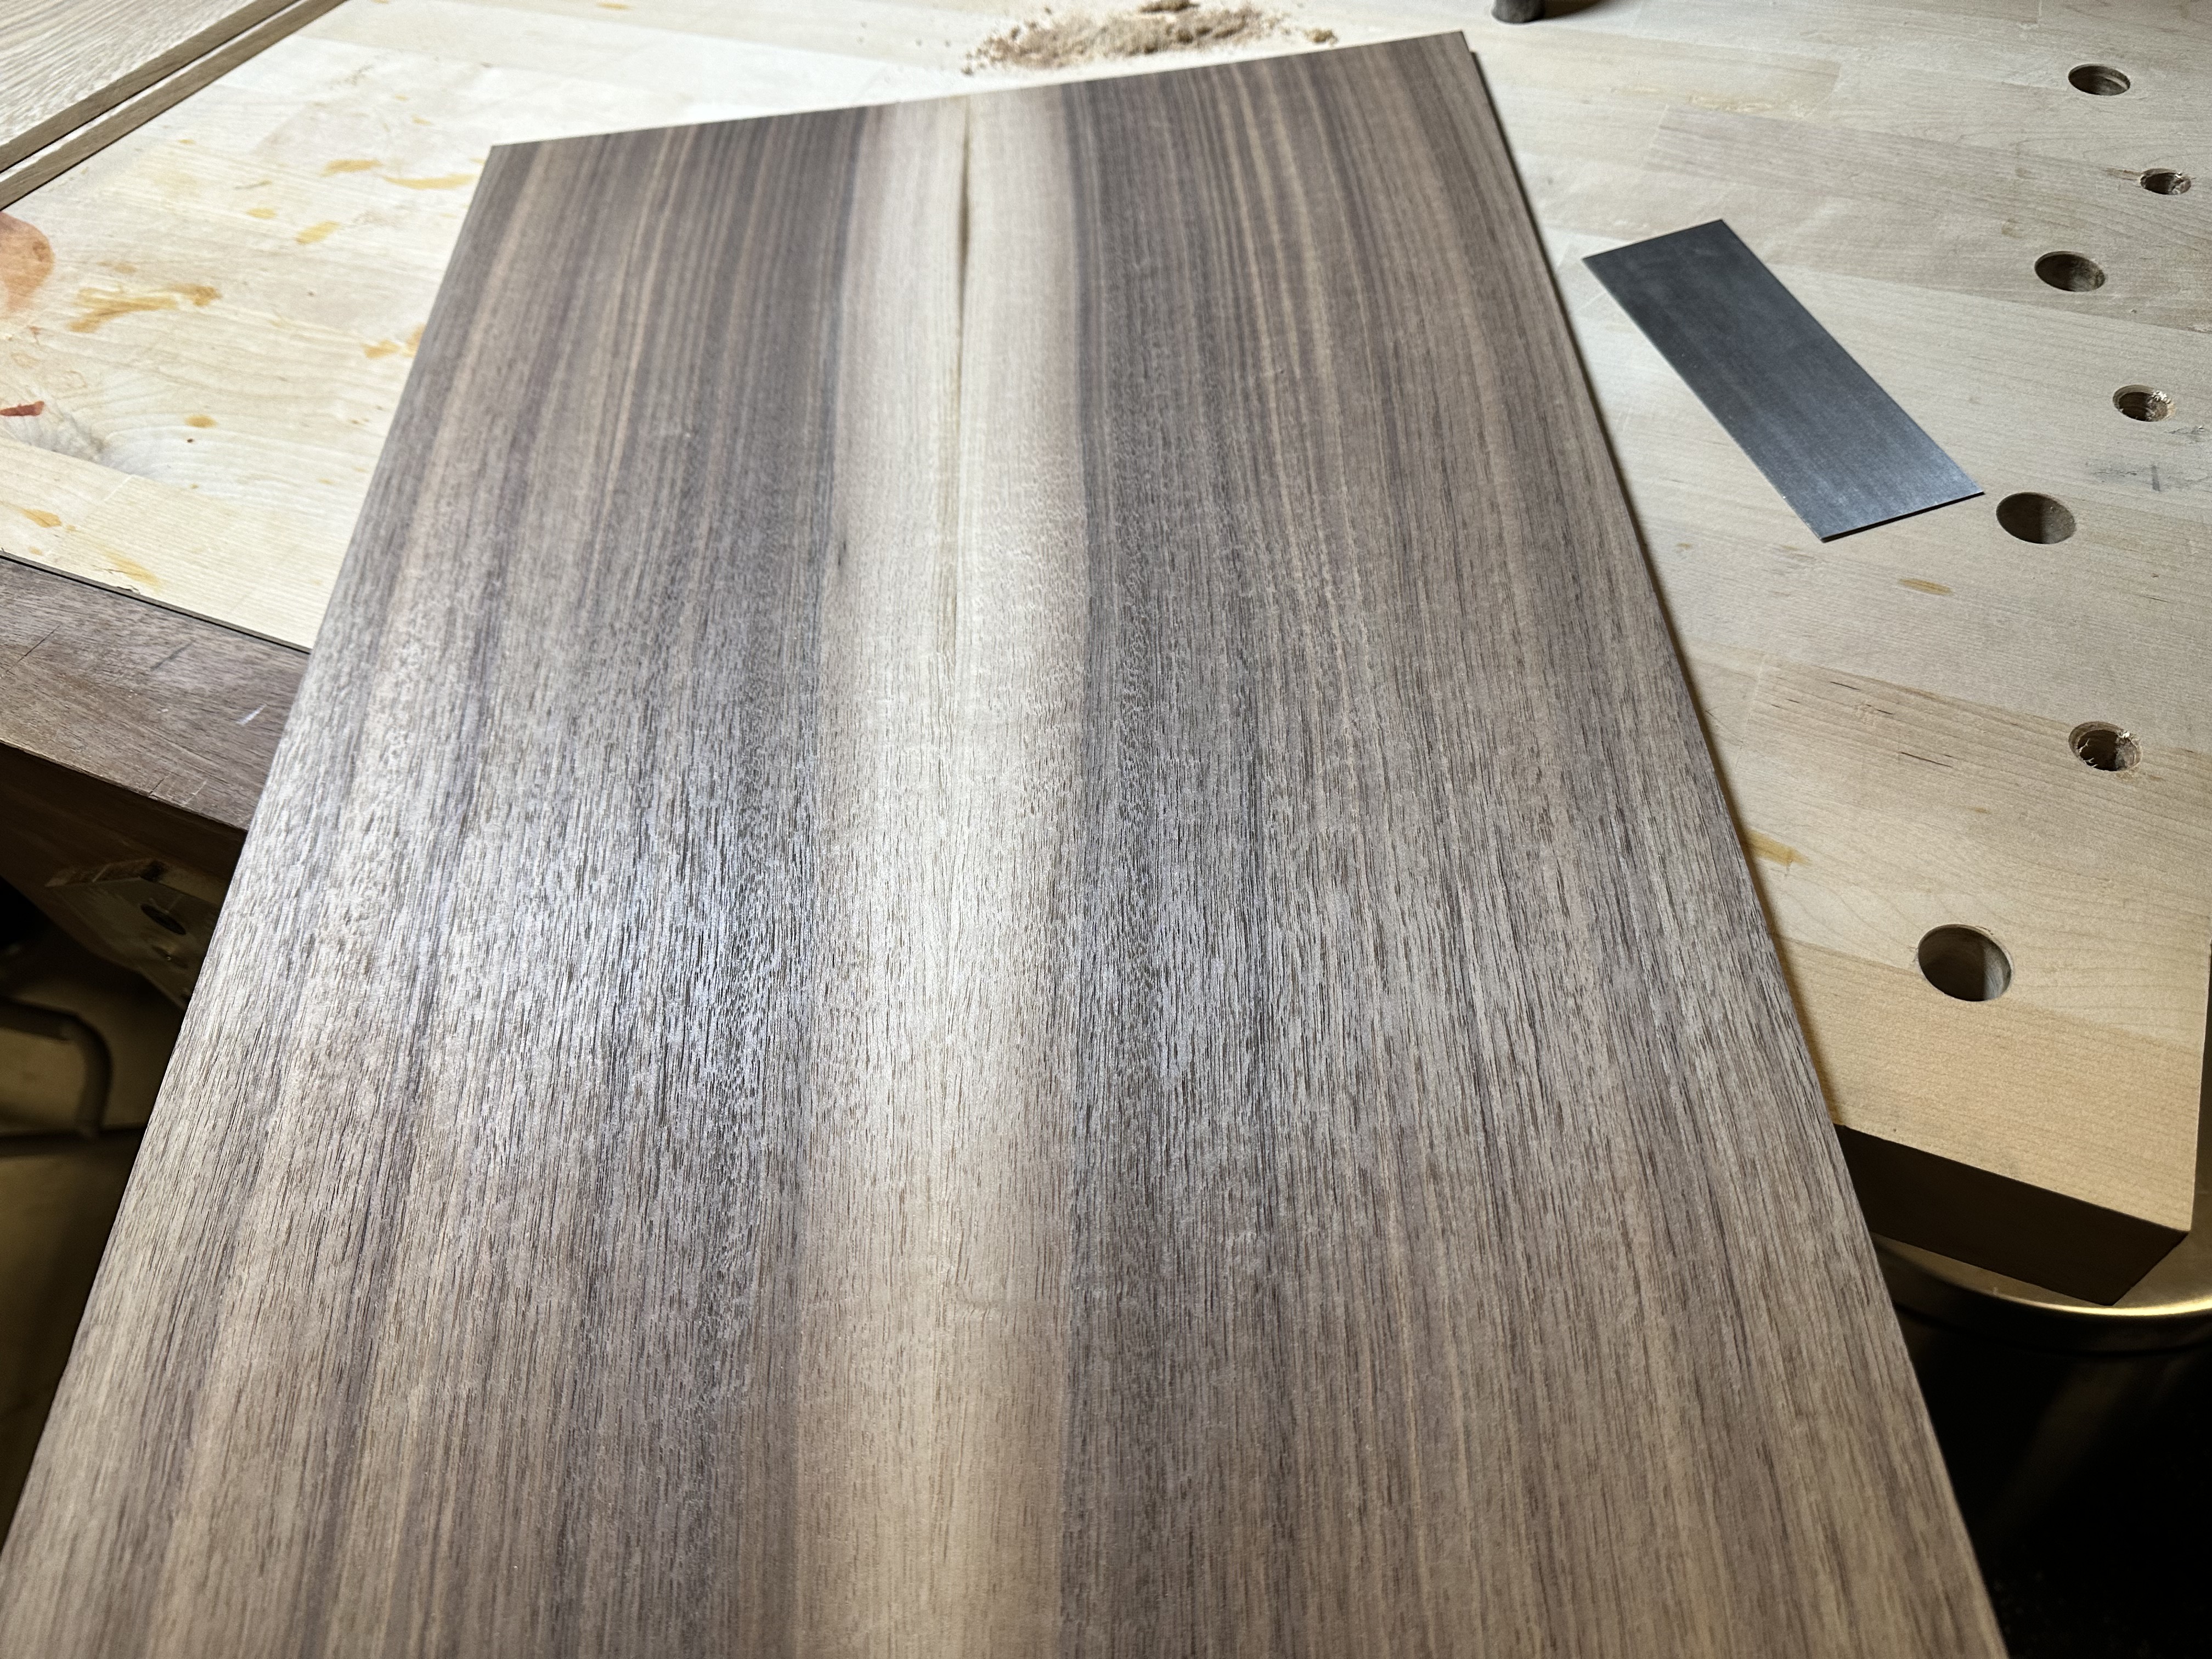
Once I saw it on the bench, I decided I liked the sapwood better than a V pattern, so I went with that instead.
Dry fit:
Glueup:
Using a card scraper to smooth out the joint. This is another nail-biter in the process, because if this isn’t flat, there’s going to be gaps on the top and bottom of the box.
Then it’s time to glue the top and bottom of the box on.
Panic clamping, as this really needs to work:
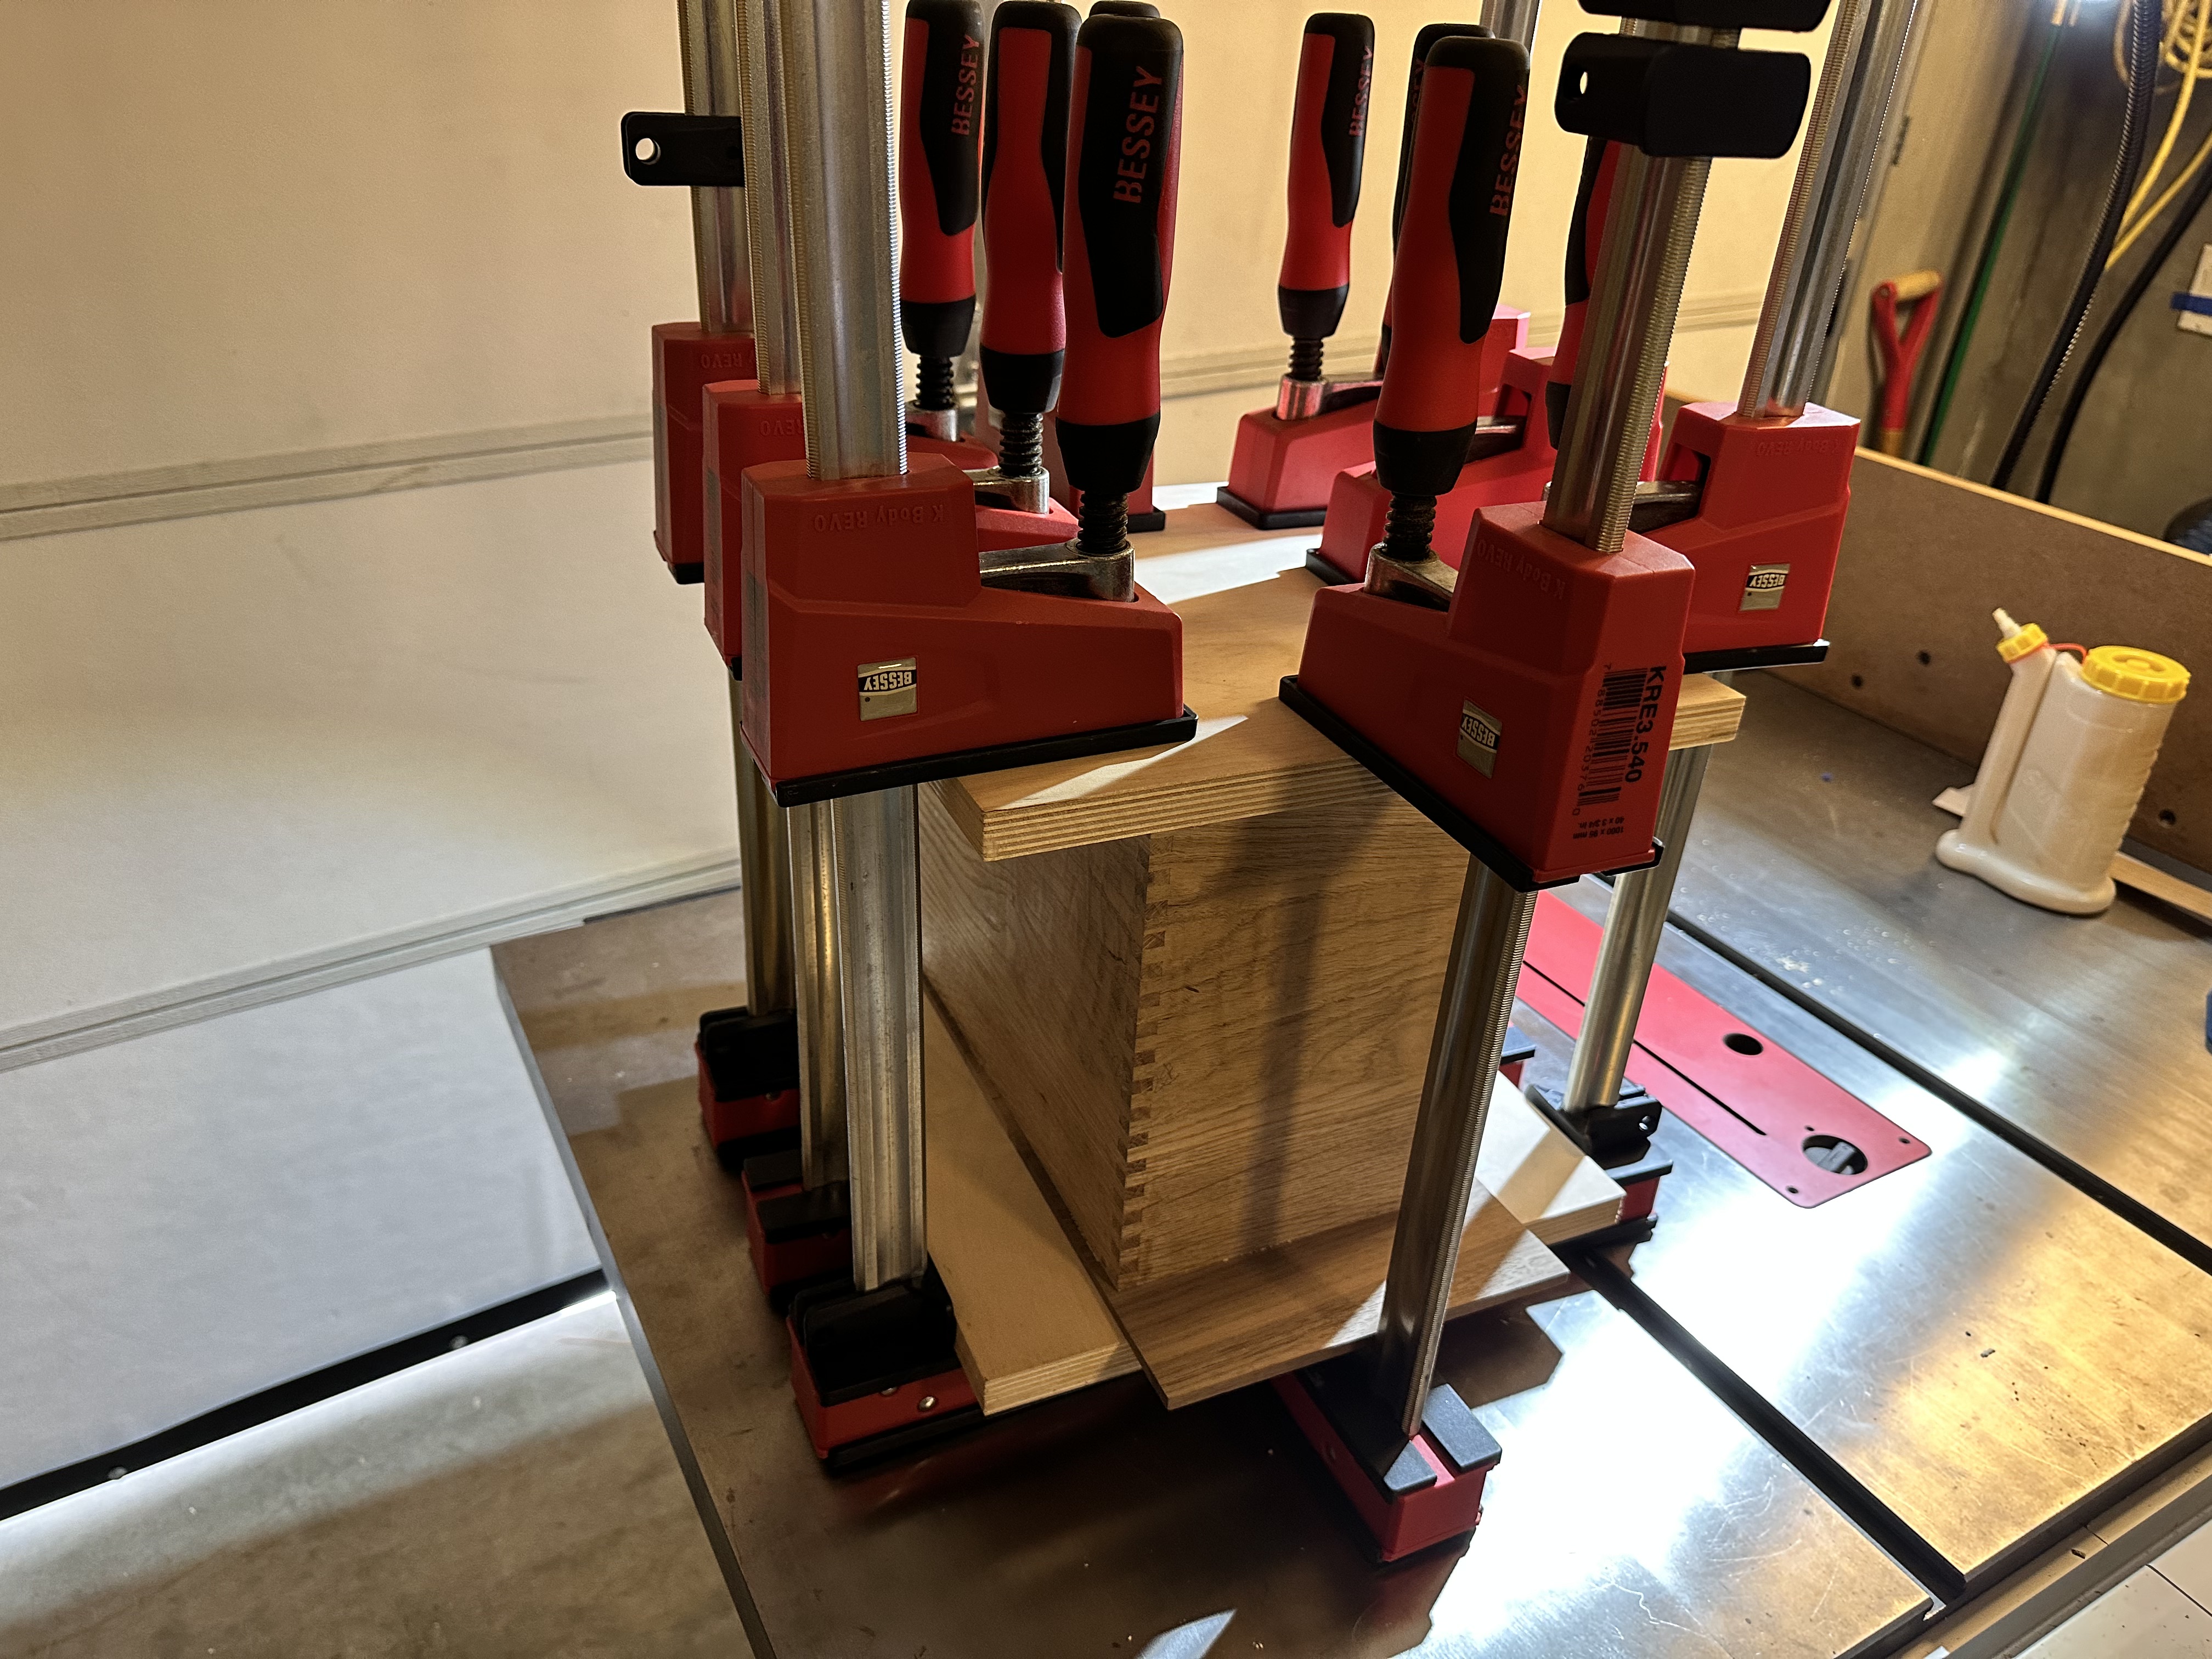
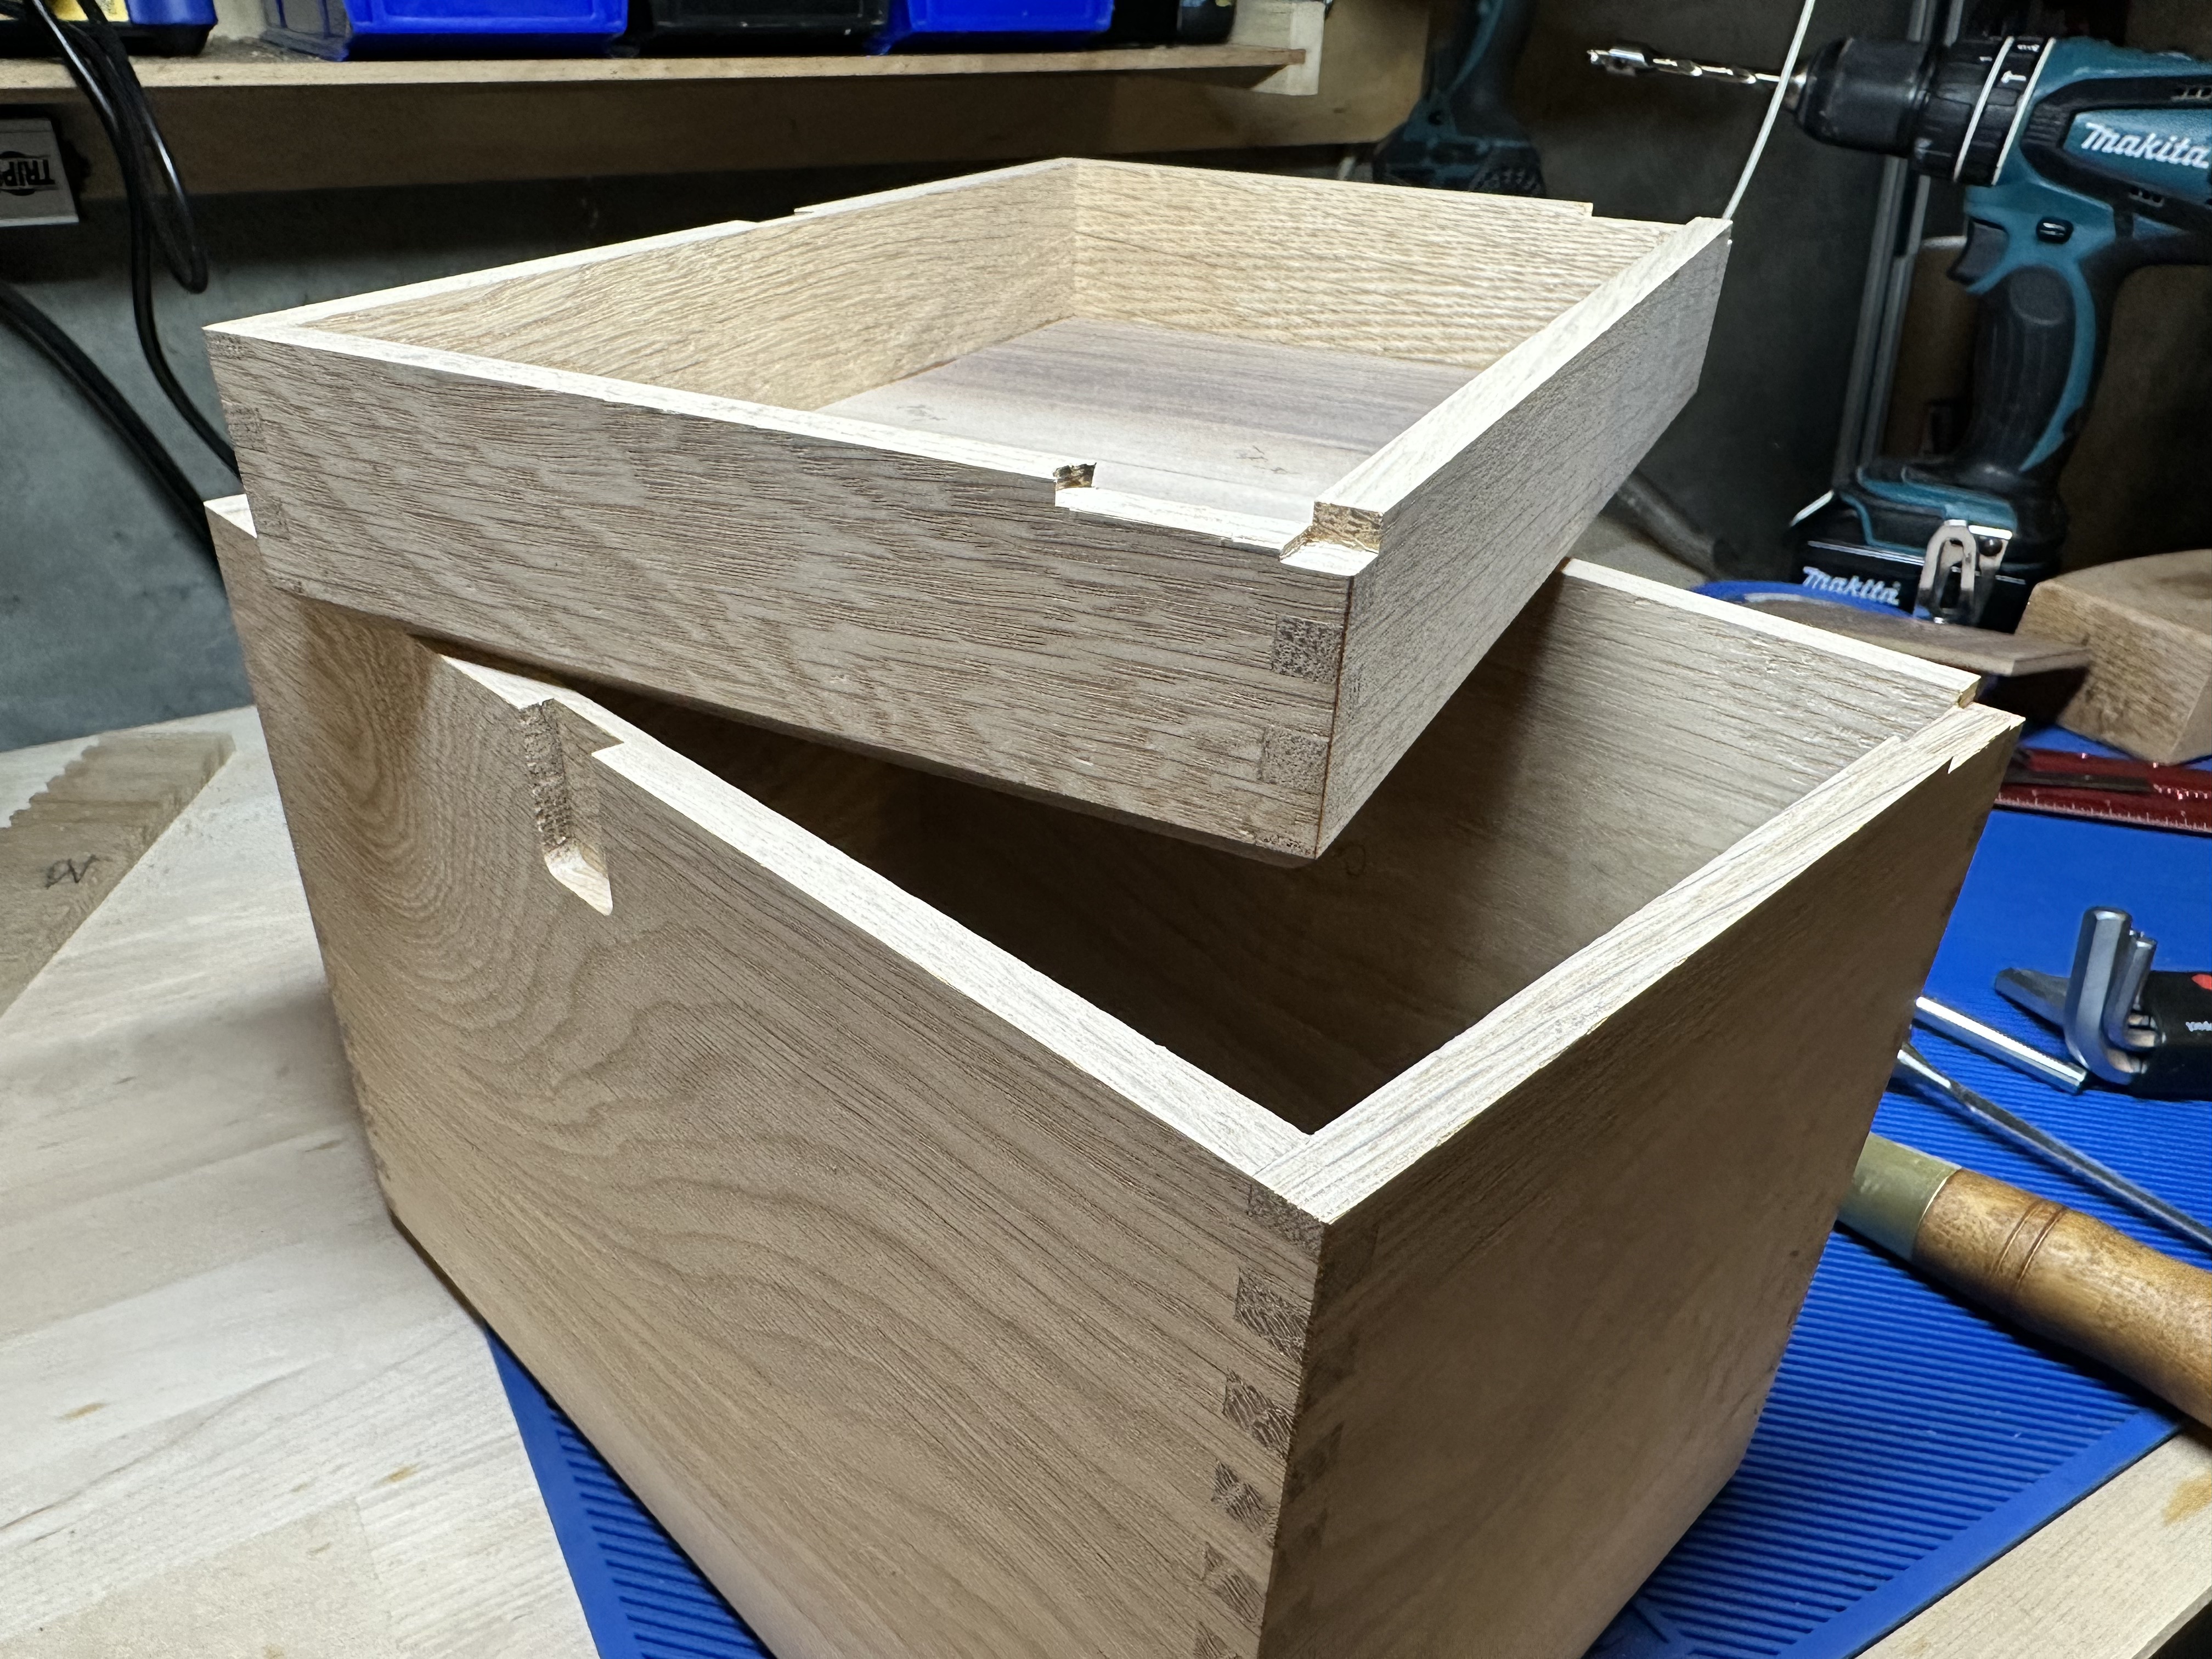
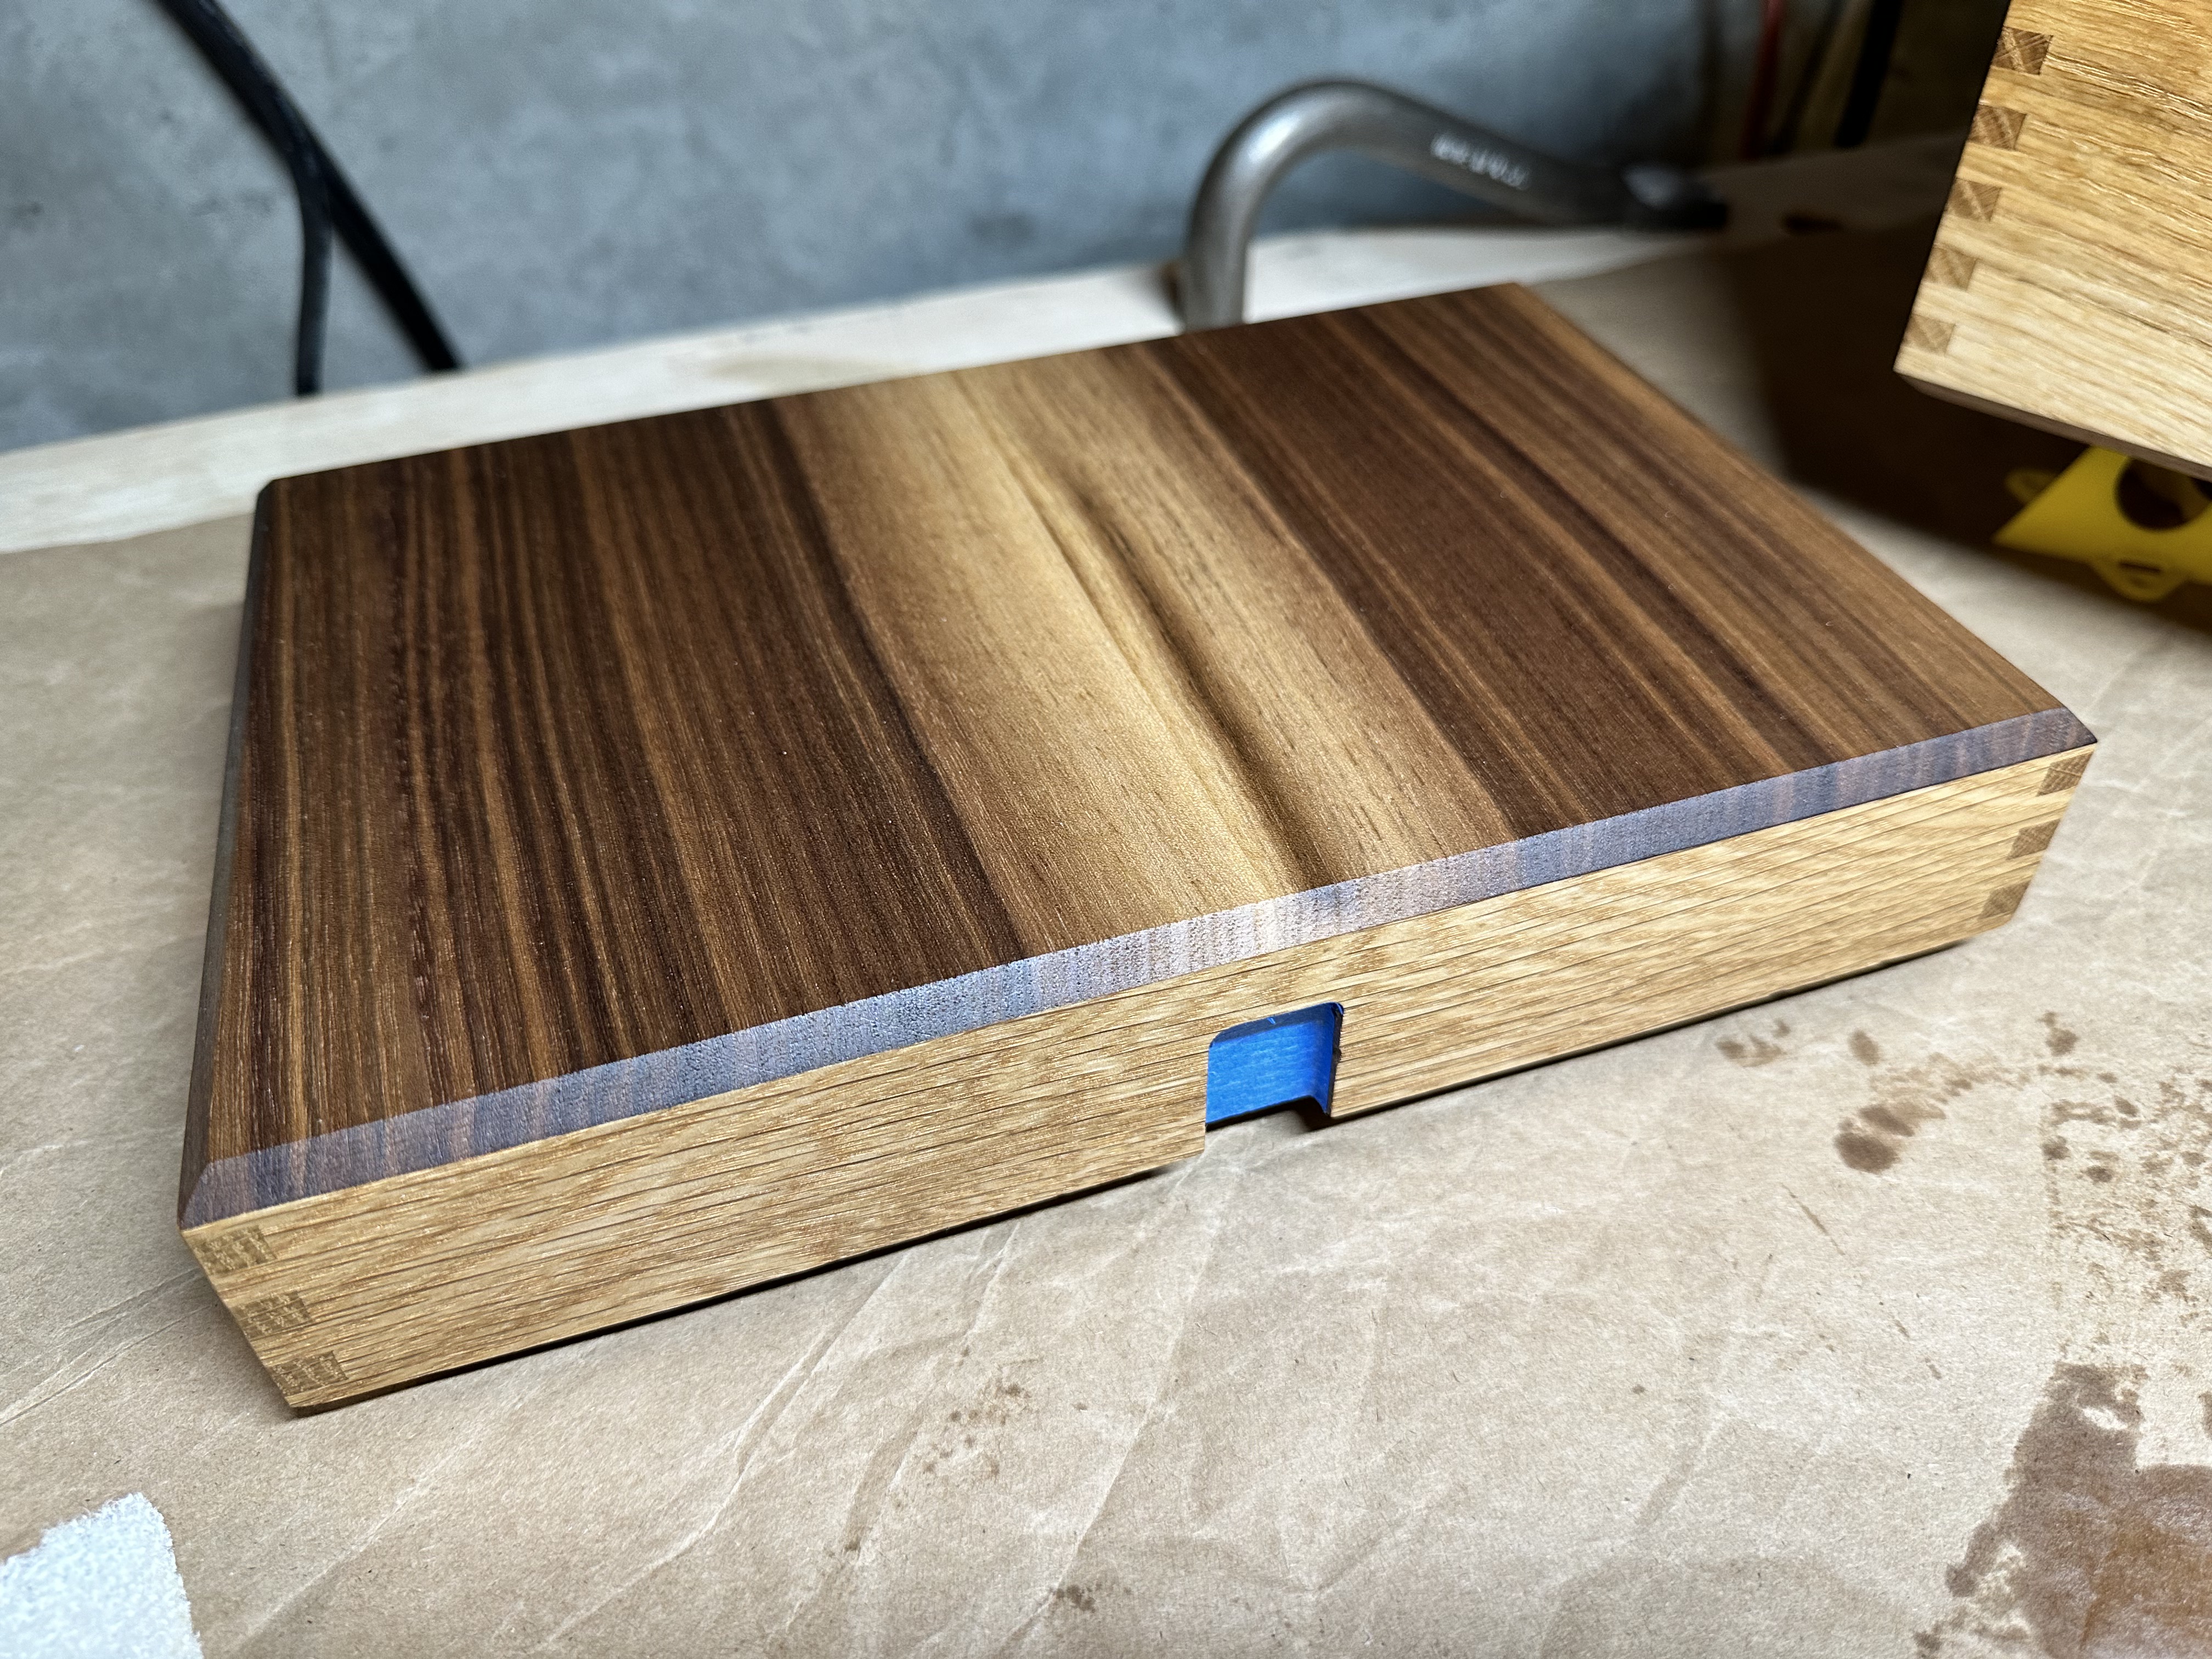
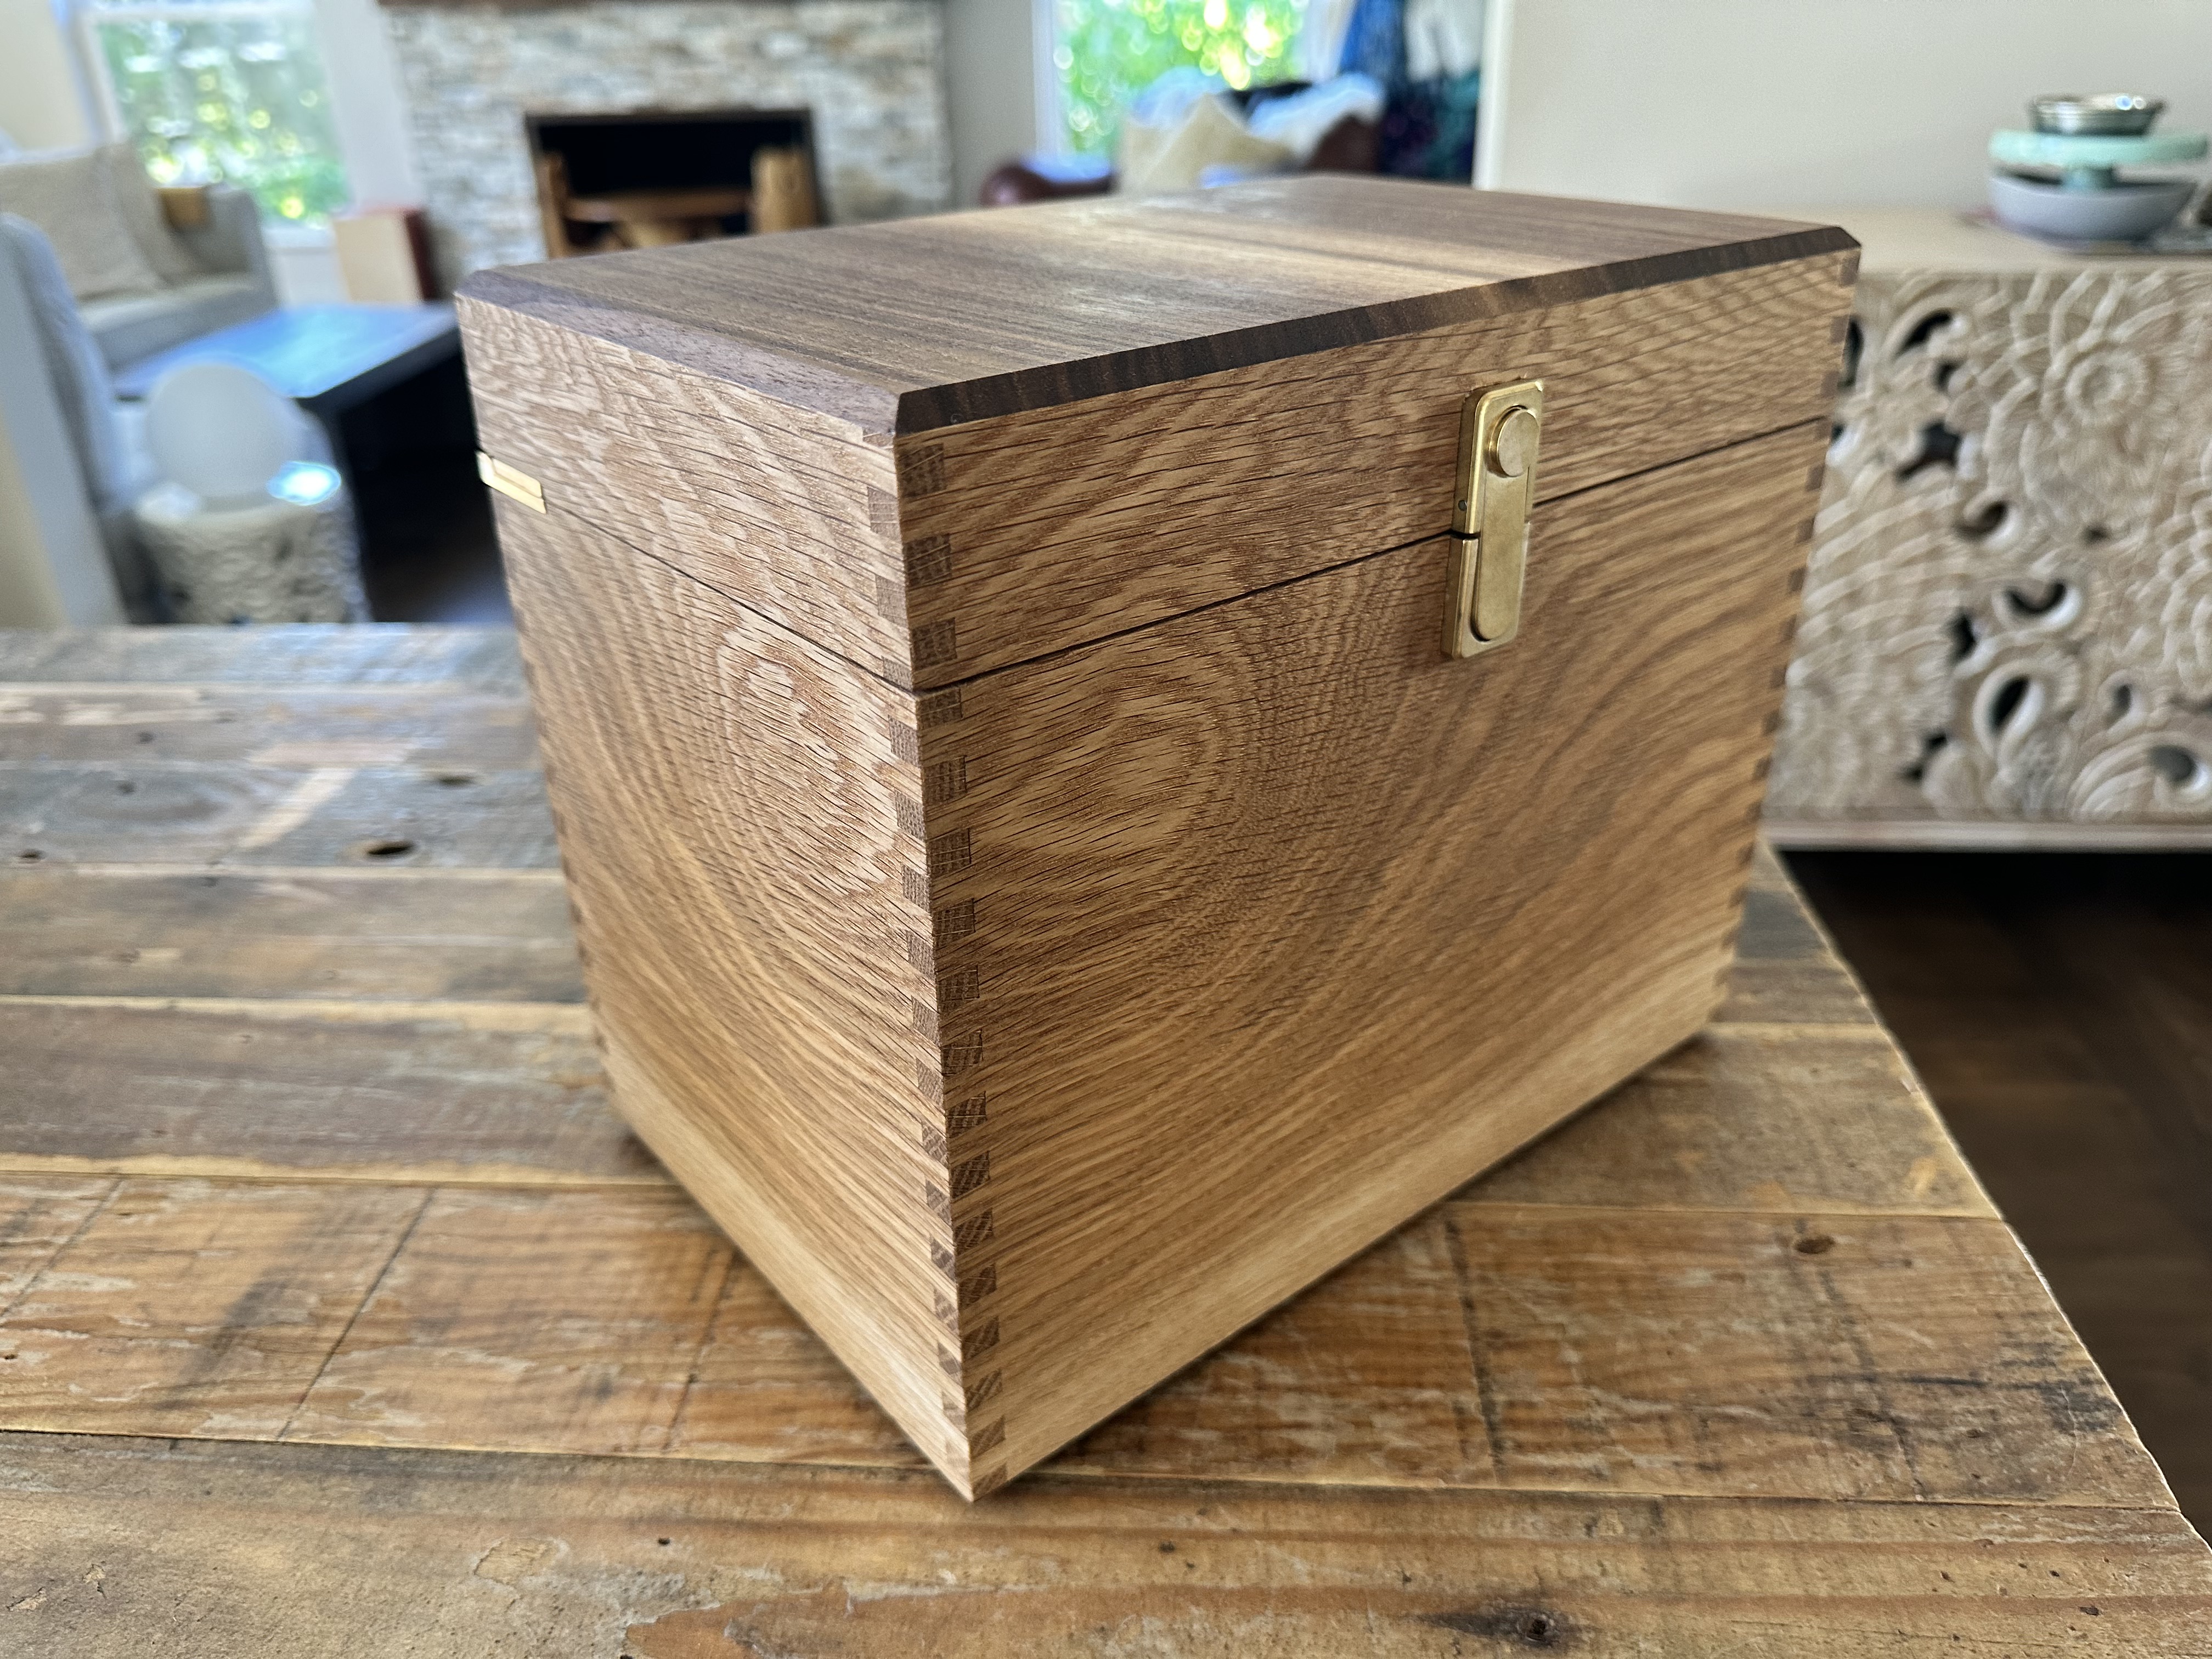
Success! We have a box:
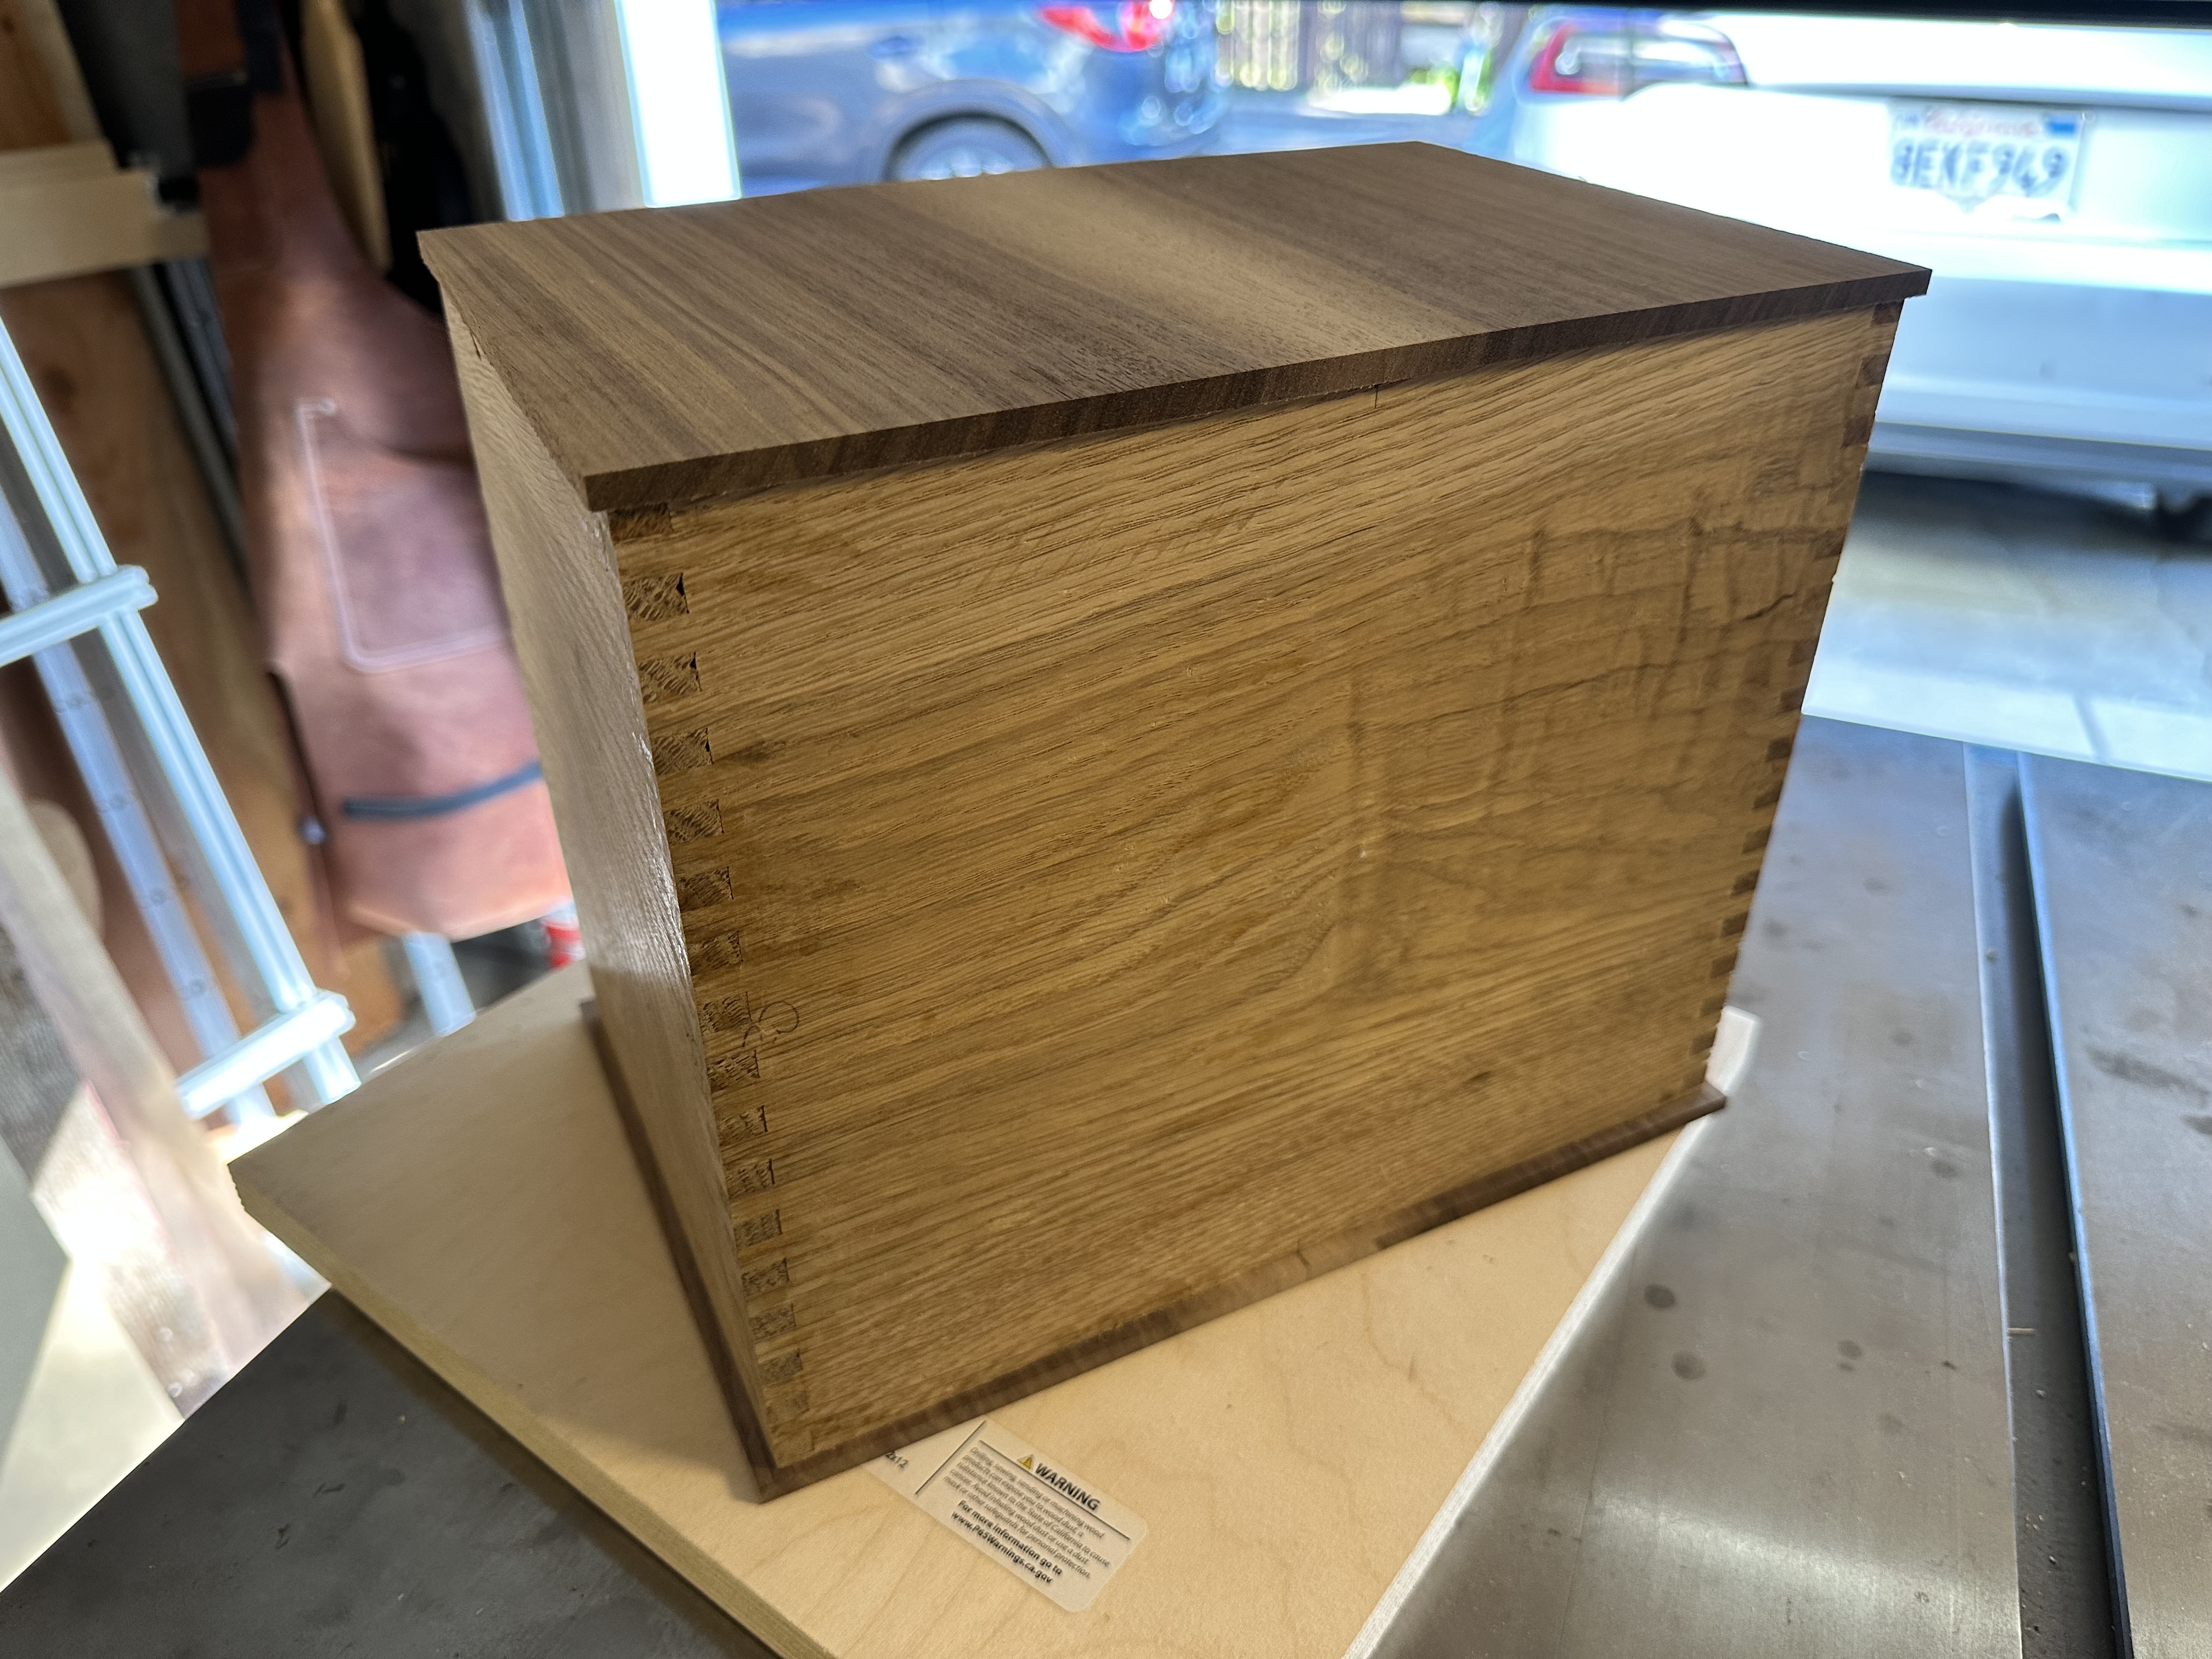
This step always surprises people, because we’ve just made a cube, not a box.
Fear not, gentle reader.
We’ll flush up the overhangs and then saw the top of the box off at the tablesaw.
The tablesaw blade removes about 1/8” of material, which means there’s going to be a visual hitch in the box joint pattern.
A while back I made a thin ripping jig:
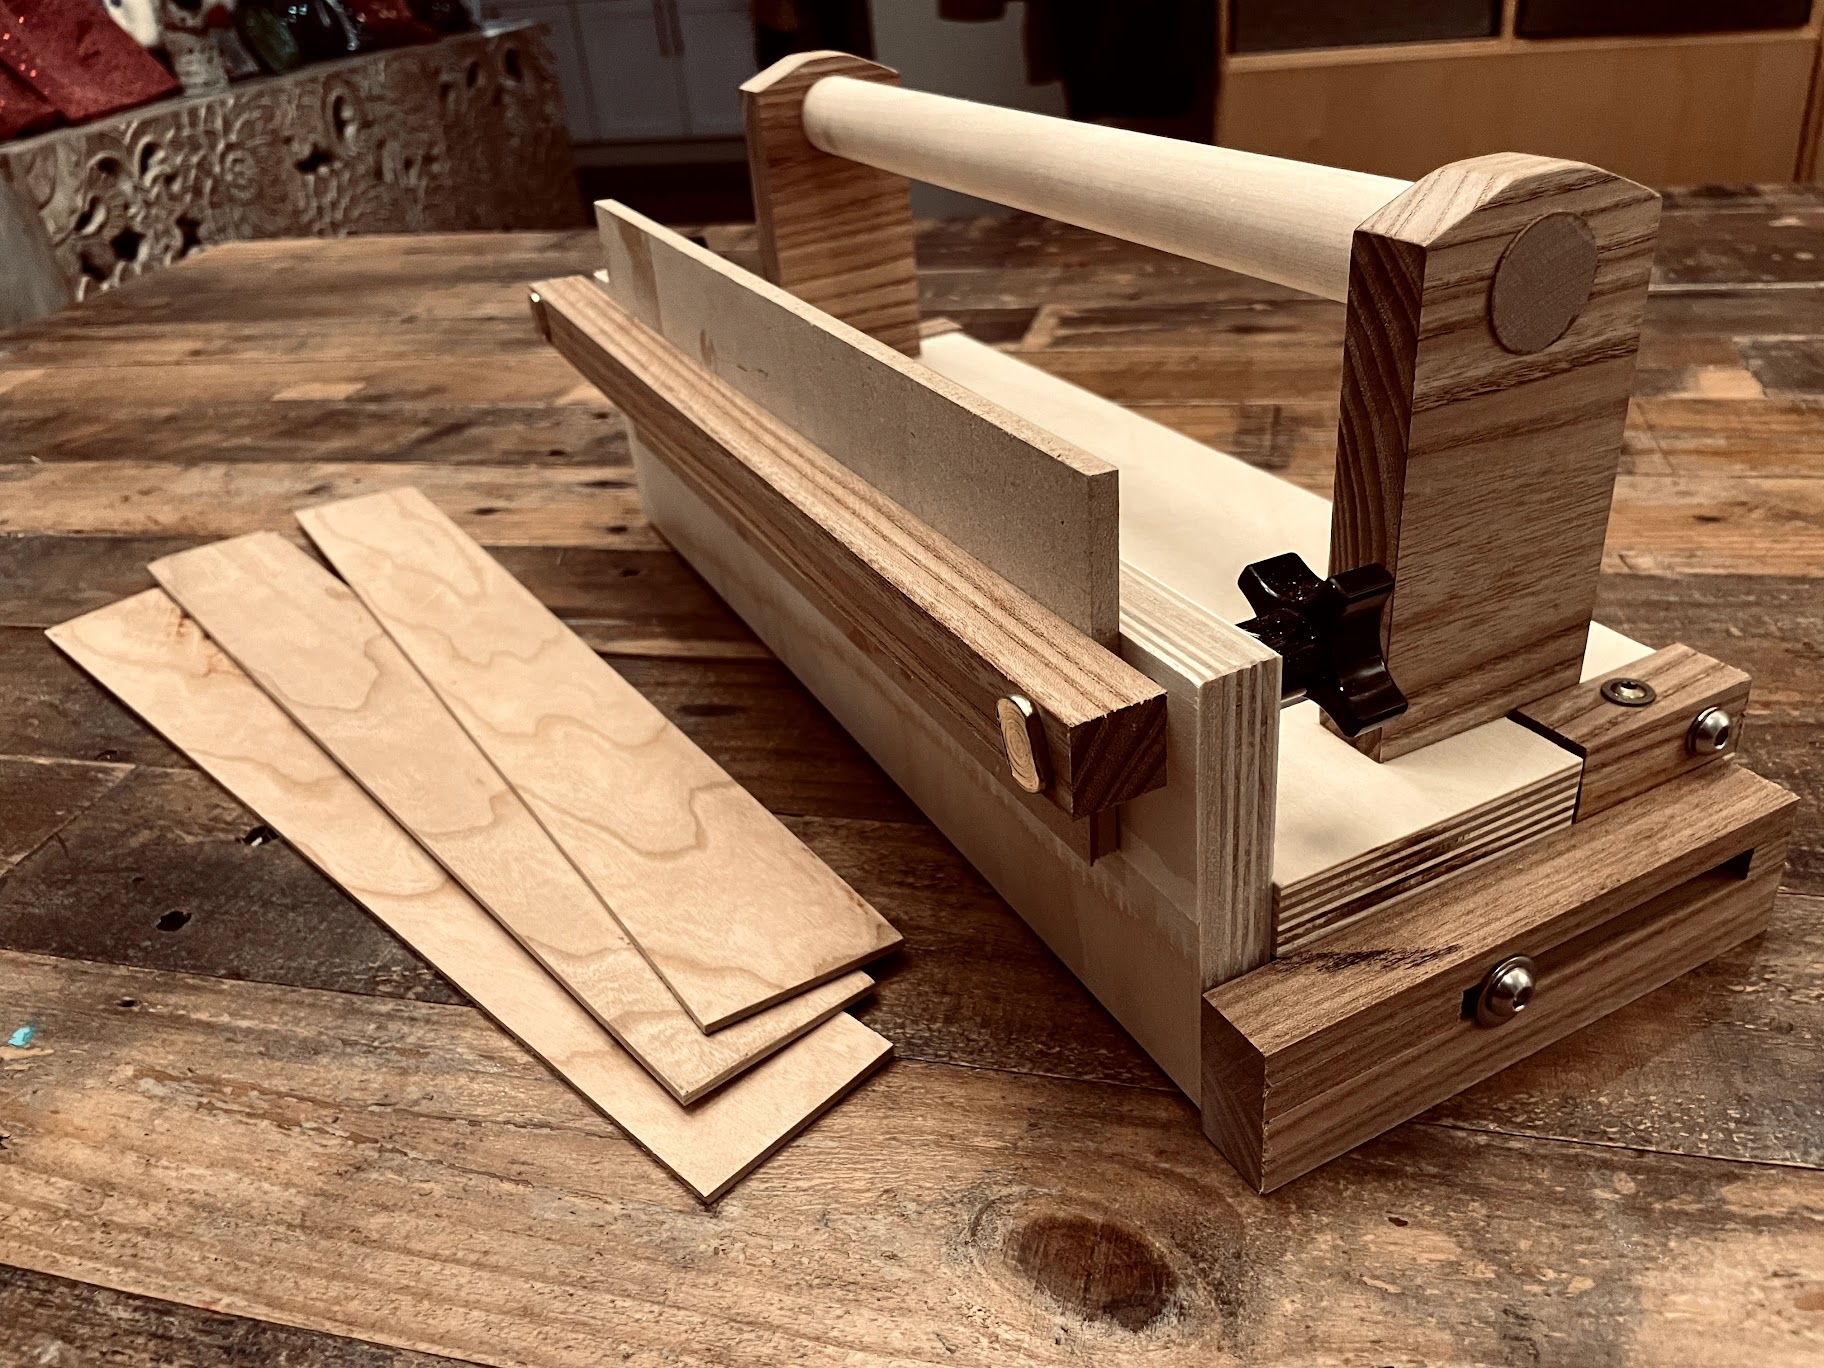
It allows controlled rip cuts of small parts where the offcut is on the left side of the blade and the keeper piece stays supported.
Small parts on a tablesaw can be dangerous — anything wedged between the fence and blade can launch.
Here’s what it looks like in action:
My plan was to fill the gap made by the blade with some maple I had lying around.
I used the jig to cut some 1/16” strips:
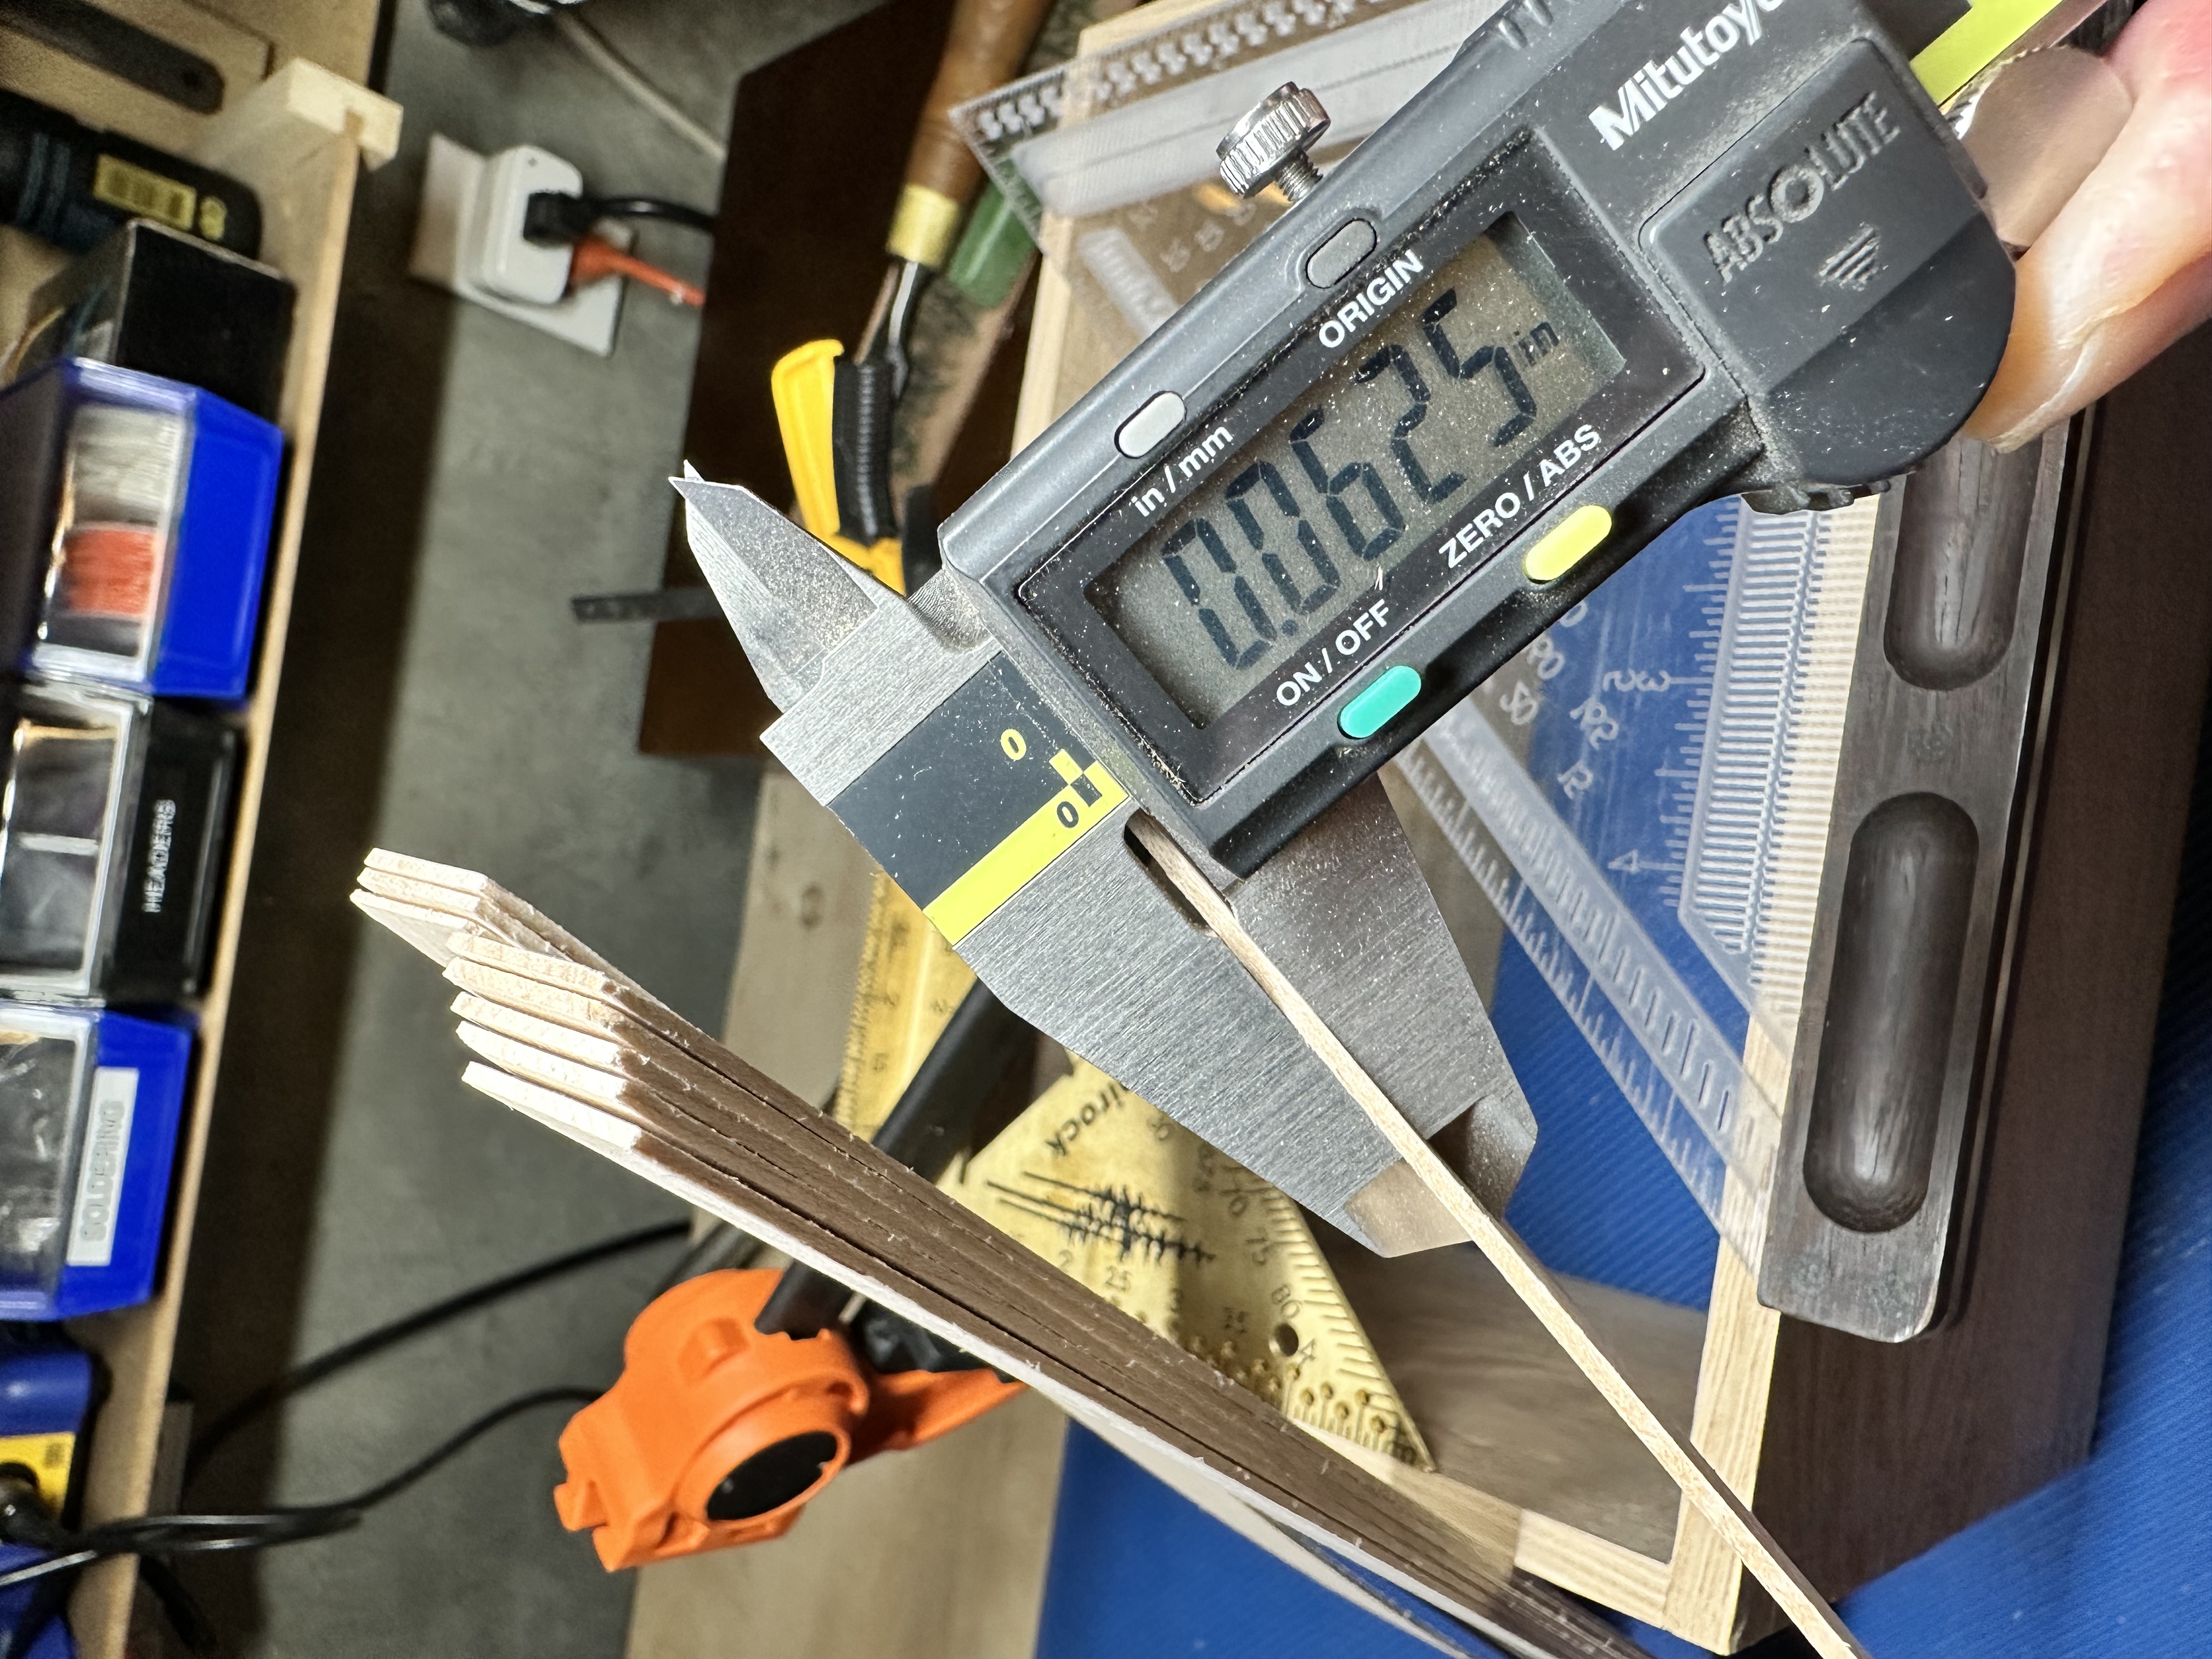
But I abandoned the idea because the strips had saw marks, and sanding them made their thickness inconsistent.
That would mean the lid would never sit flush. Deal breaker.
Hardware
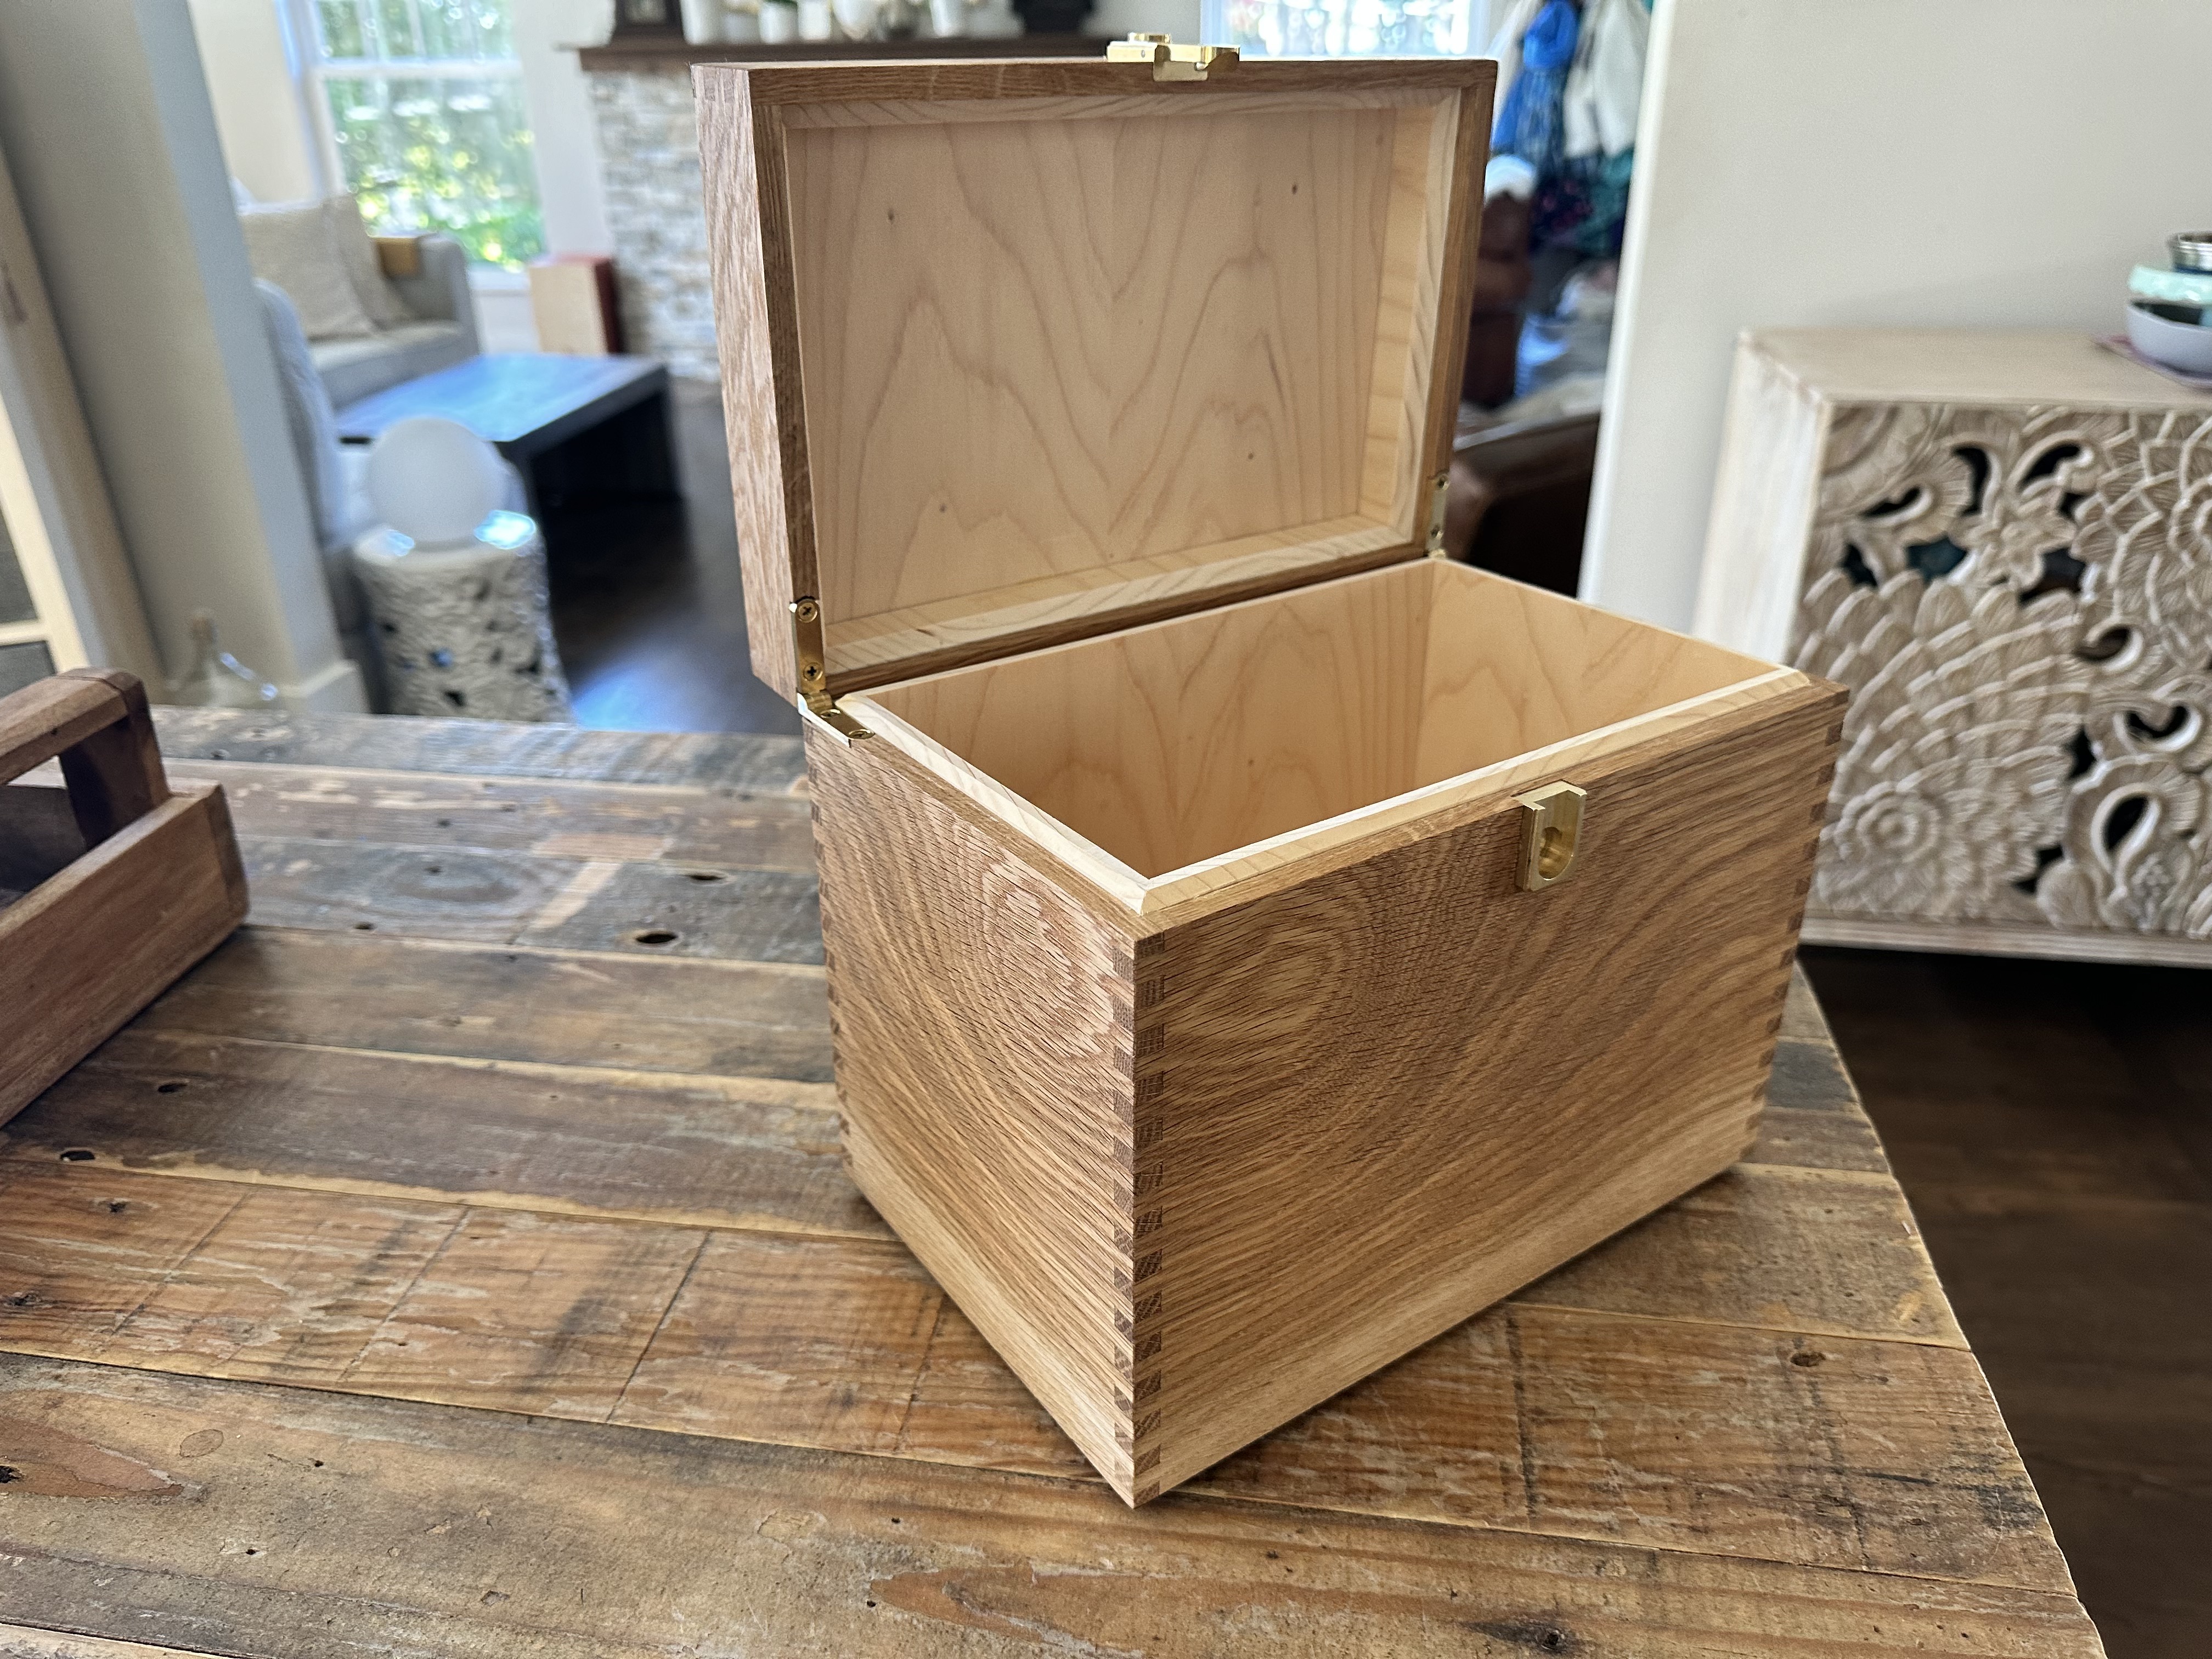
I used a jig that came with the clasp to router a recess for it. I carefully chiseled recesses and clearance for the hinges.
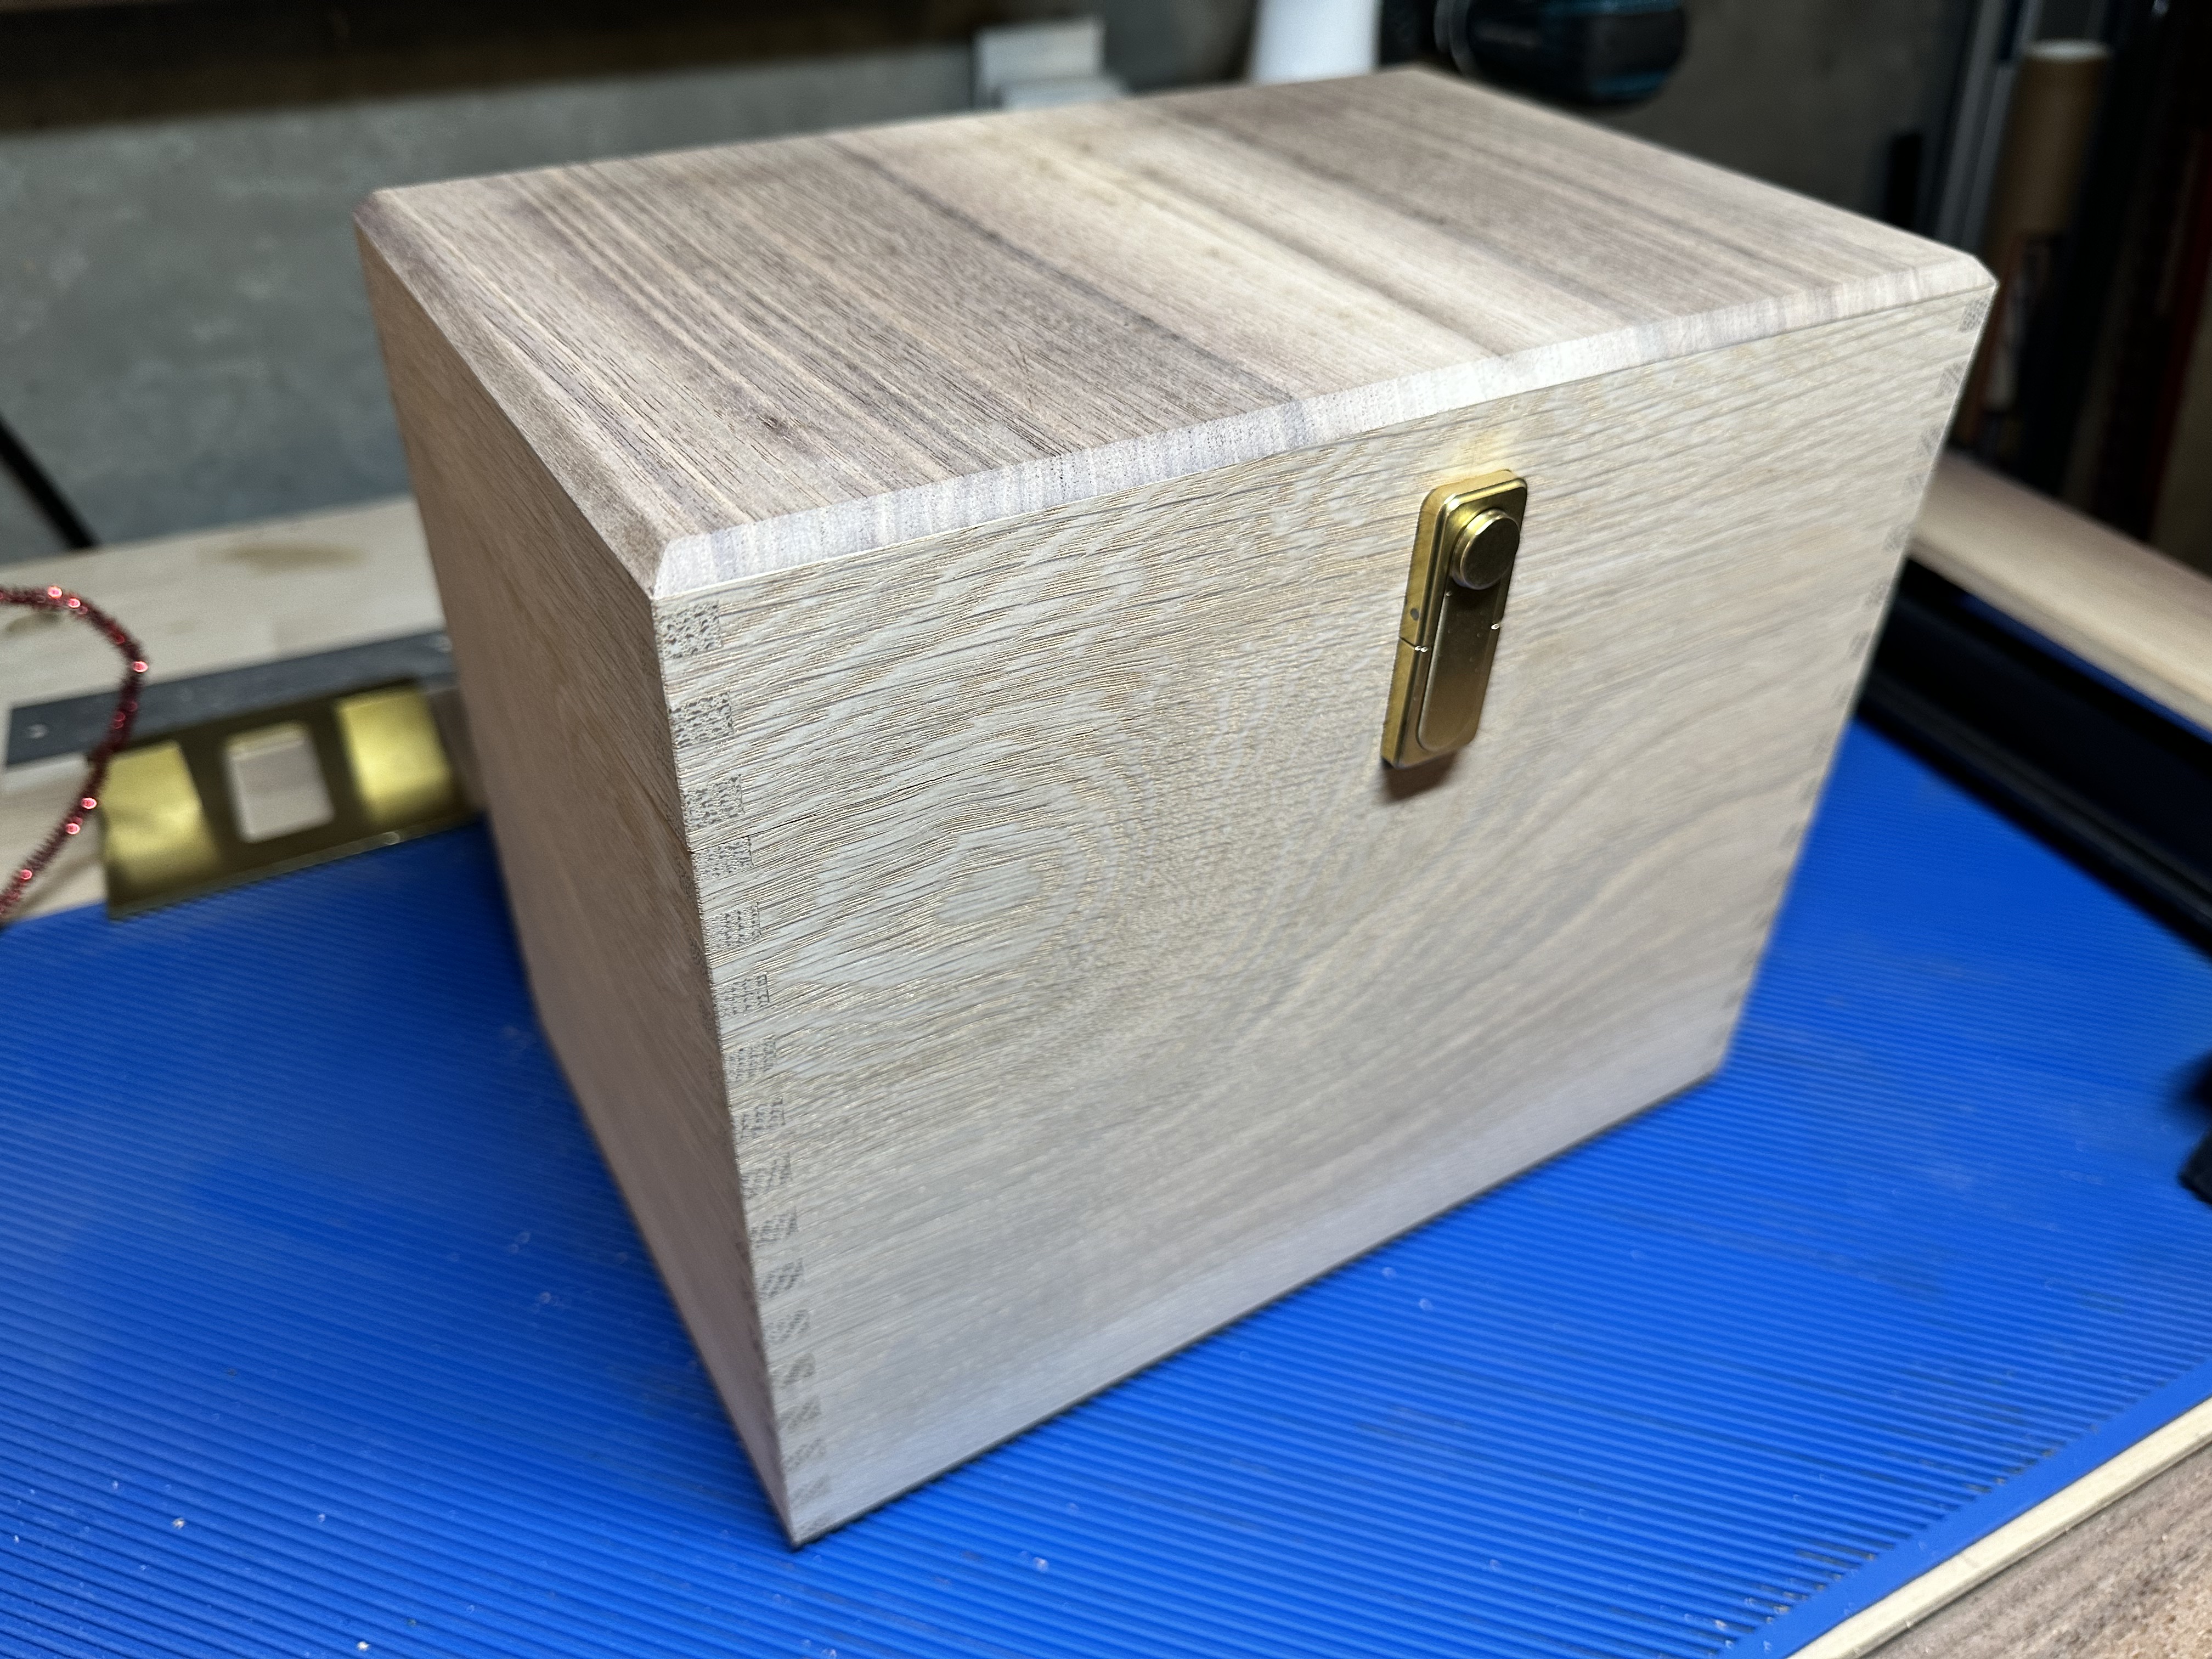
To end another very late night, I fit the hinges.
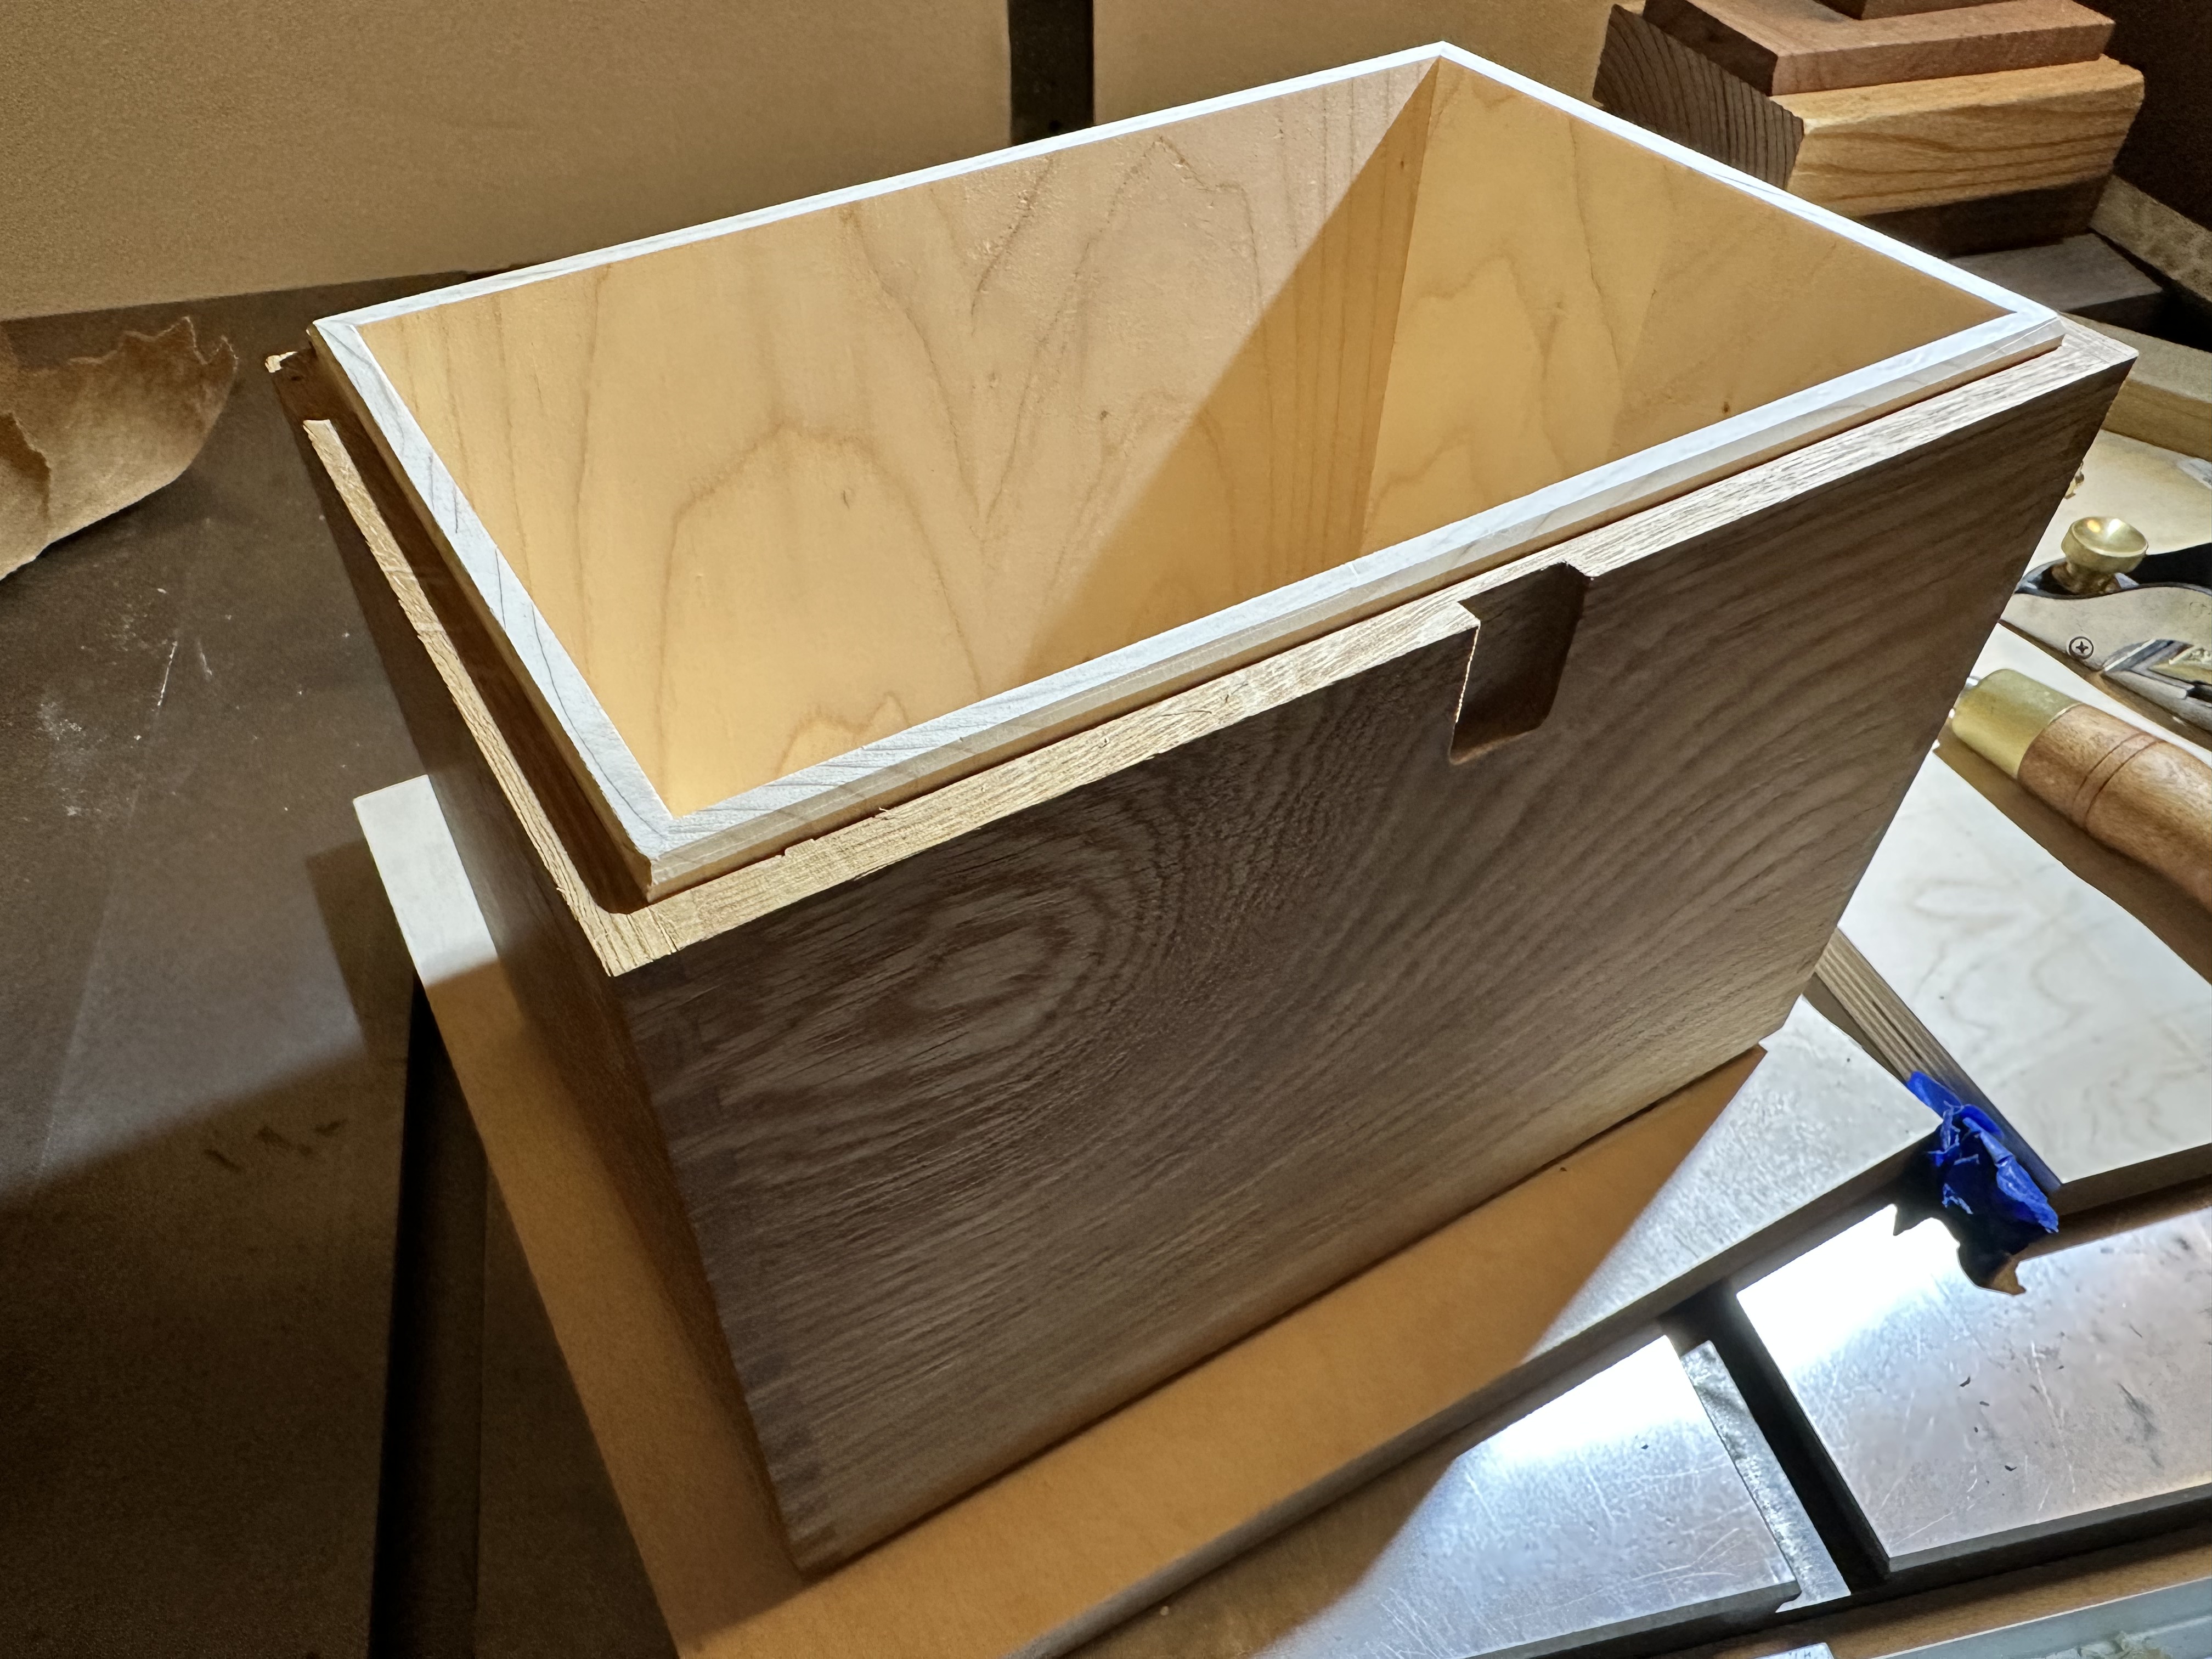
Liners
Cedar is a softwood, which makes it really easy to mill but harder to sand. Good excuse to clean your saw blade and get out the block plane.
Sneaking up on a tight fit:
Shaping the liner so the lid could close easily took some time to get right.
Then the lid:
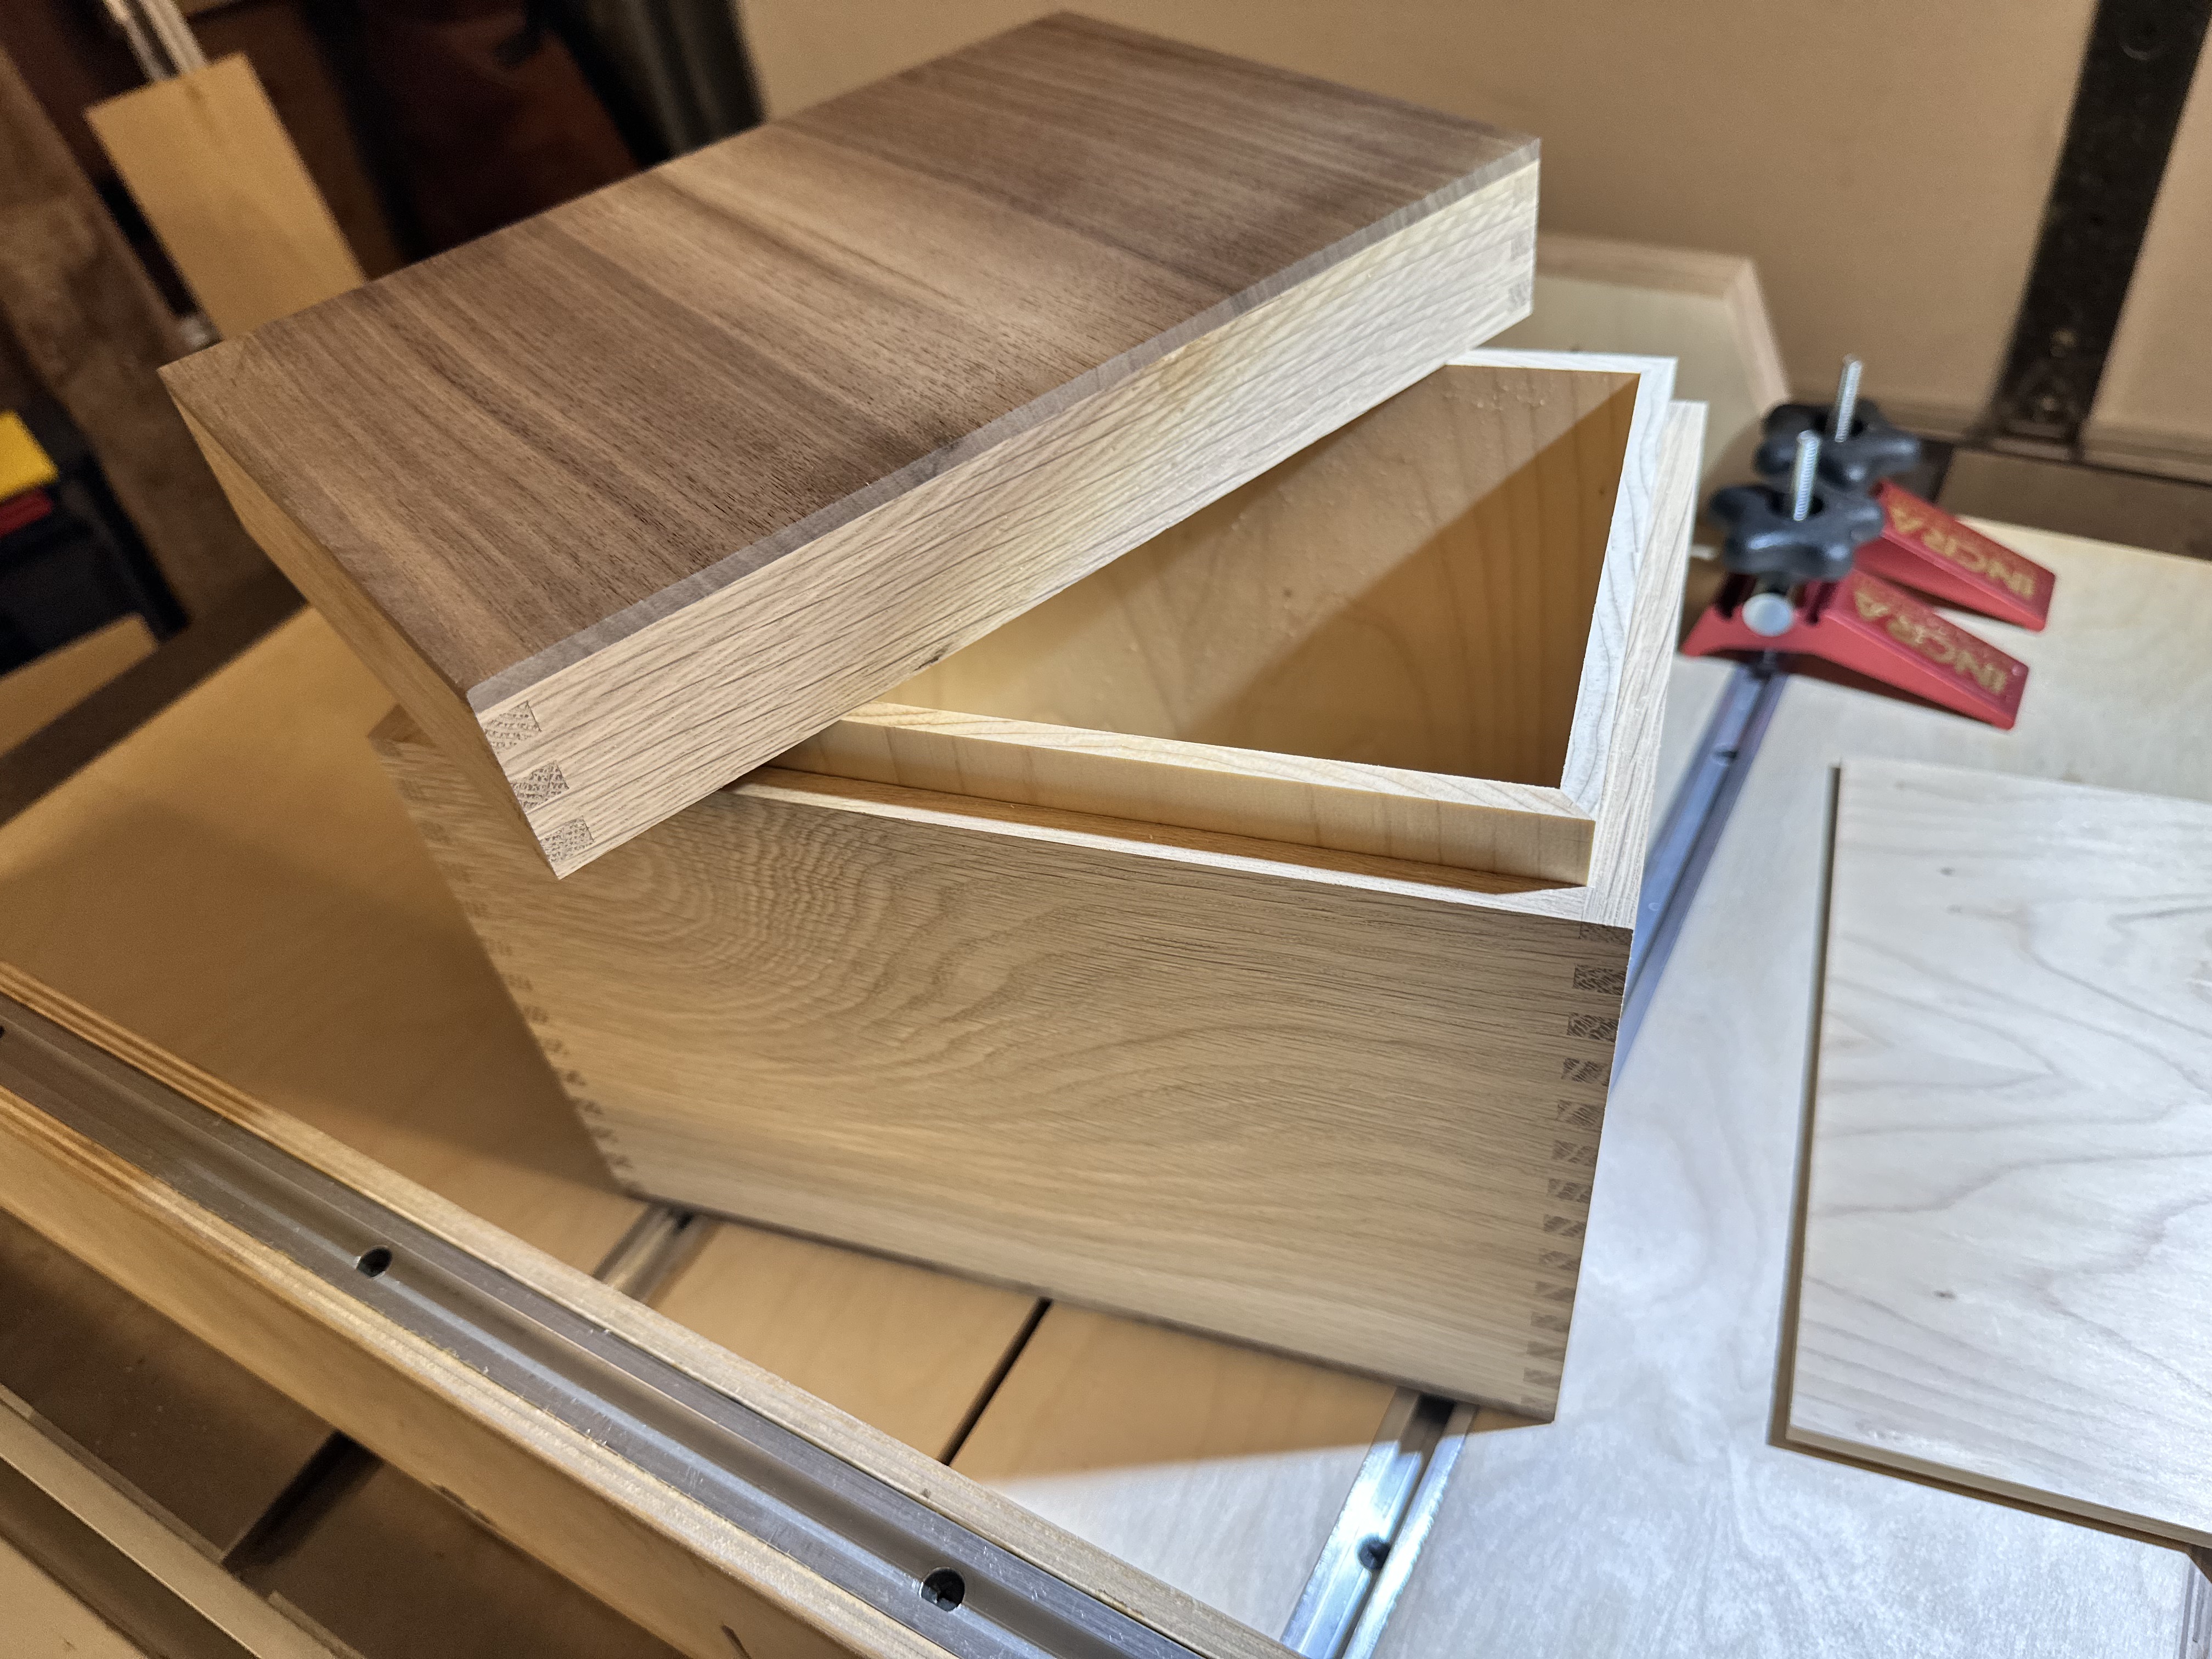
Finishing
I wanted to do multiple coats of finish, but I didn’t have the drying time.
I had one week, which gave me enough time for one coat of Rubio Monocoat. Despite the name, it really does look better with a second coat.
C’est la vie.
By this point I’d been working on the box for weeks. Actually, months. Late nights, chasing flat boards, fixing mistakes, remaking parts.
The whole time I kept thinking about how much my dad would have liked the process of it all — the tinkering, the improvising, the figuring it out as you go. He wasn’t a perfectionist. He just liked making things.
Final Assembly
Putting it all together is another one of those stressful moments in a project. You really don’t know if it’s going to work right until it does.
I got lucky this time.
And I was out of time. The driftwood didn’t make it in. But that’s okay. It felt like enough.